

Welcome! If you’ve been following along on Instagram or checking in here over the last few weeks, you know things have been a bit of a whirlwind, and all I’ve managed have been sporadic check-ins. To say this season of life has been busy would be a massive understatement. Between managing major renovations and the fast-paced timeline of the One Room Challenge, there have been moments when I wasn’t sure this kitchen remodel would make it to the finish line.
But today, we officially crossed it! Okay, that’s a bit of an overstatement…but we are 95% completed. Before we dive into the before-and-afters, I want to say a massive thank you to the One Room Challenge and Apartment Therapy, along with all of the incredible sponsors who made this transformation possible. Having this community (and some accountability) is very motivating when working on a project like this. Let’s take a look at my English Cottage Kitchen Remodel.
What is my definition of an English Cottage Kitchen?
When it came to this kitchen, there was no hiding that it’s a small space. But my philosophy for this renovation was simple: small doesn’t have to feel cramped—small can be incredibly cozy. Instead of trying to make the kitchen look larger, I decided to lean into its size and embrace a warm, authentic English cottage aesthetic.
To me, an English cottage kitchen is defined by history, character, and a lived-in feel that makes you want to pause and linger. To give this small space an English country charm, I focused on three key elements:
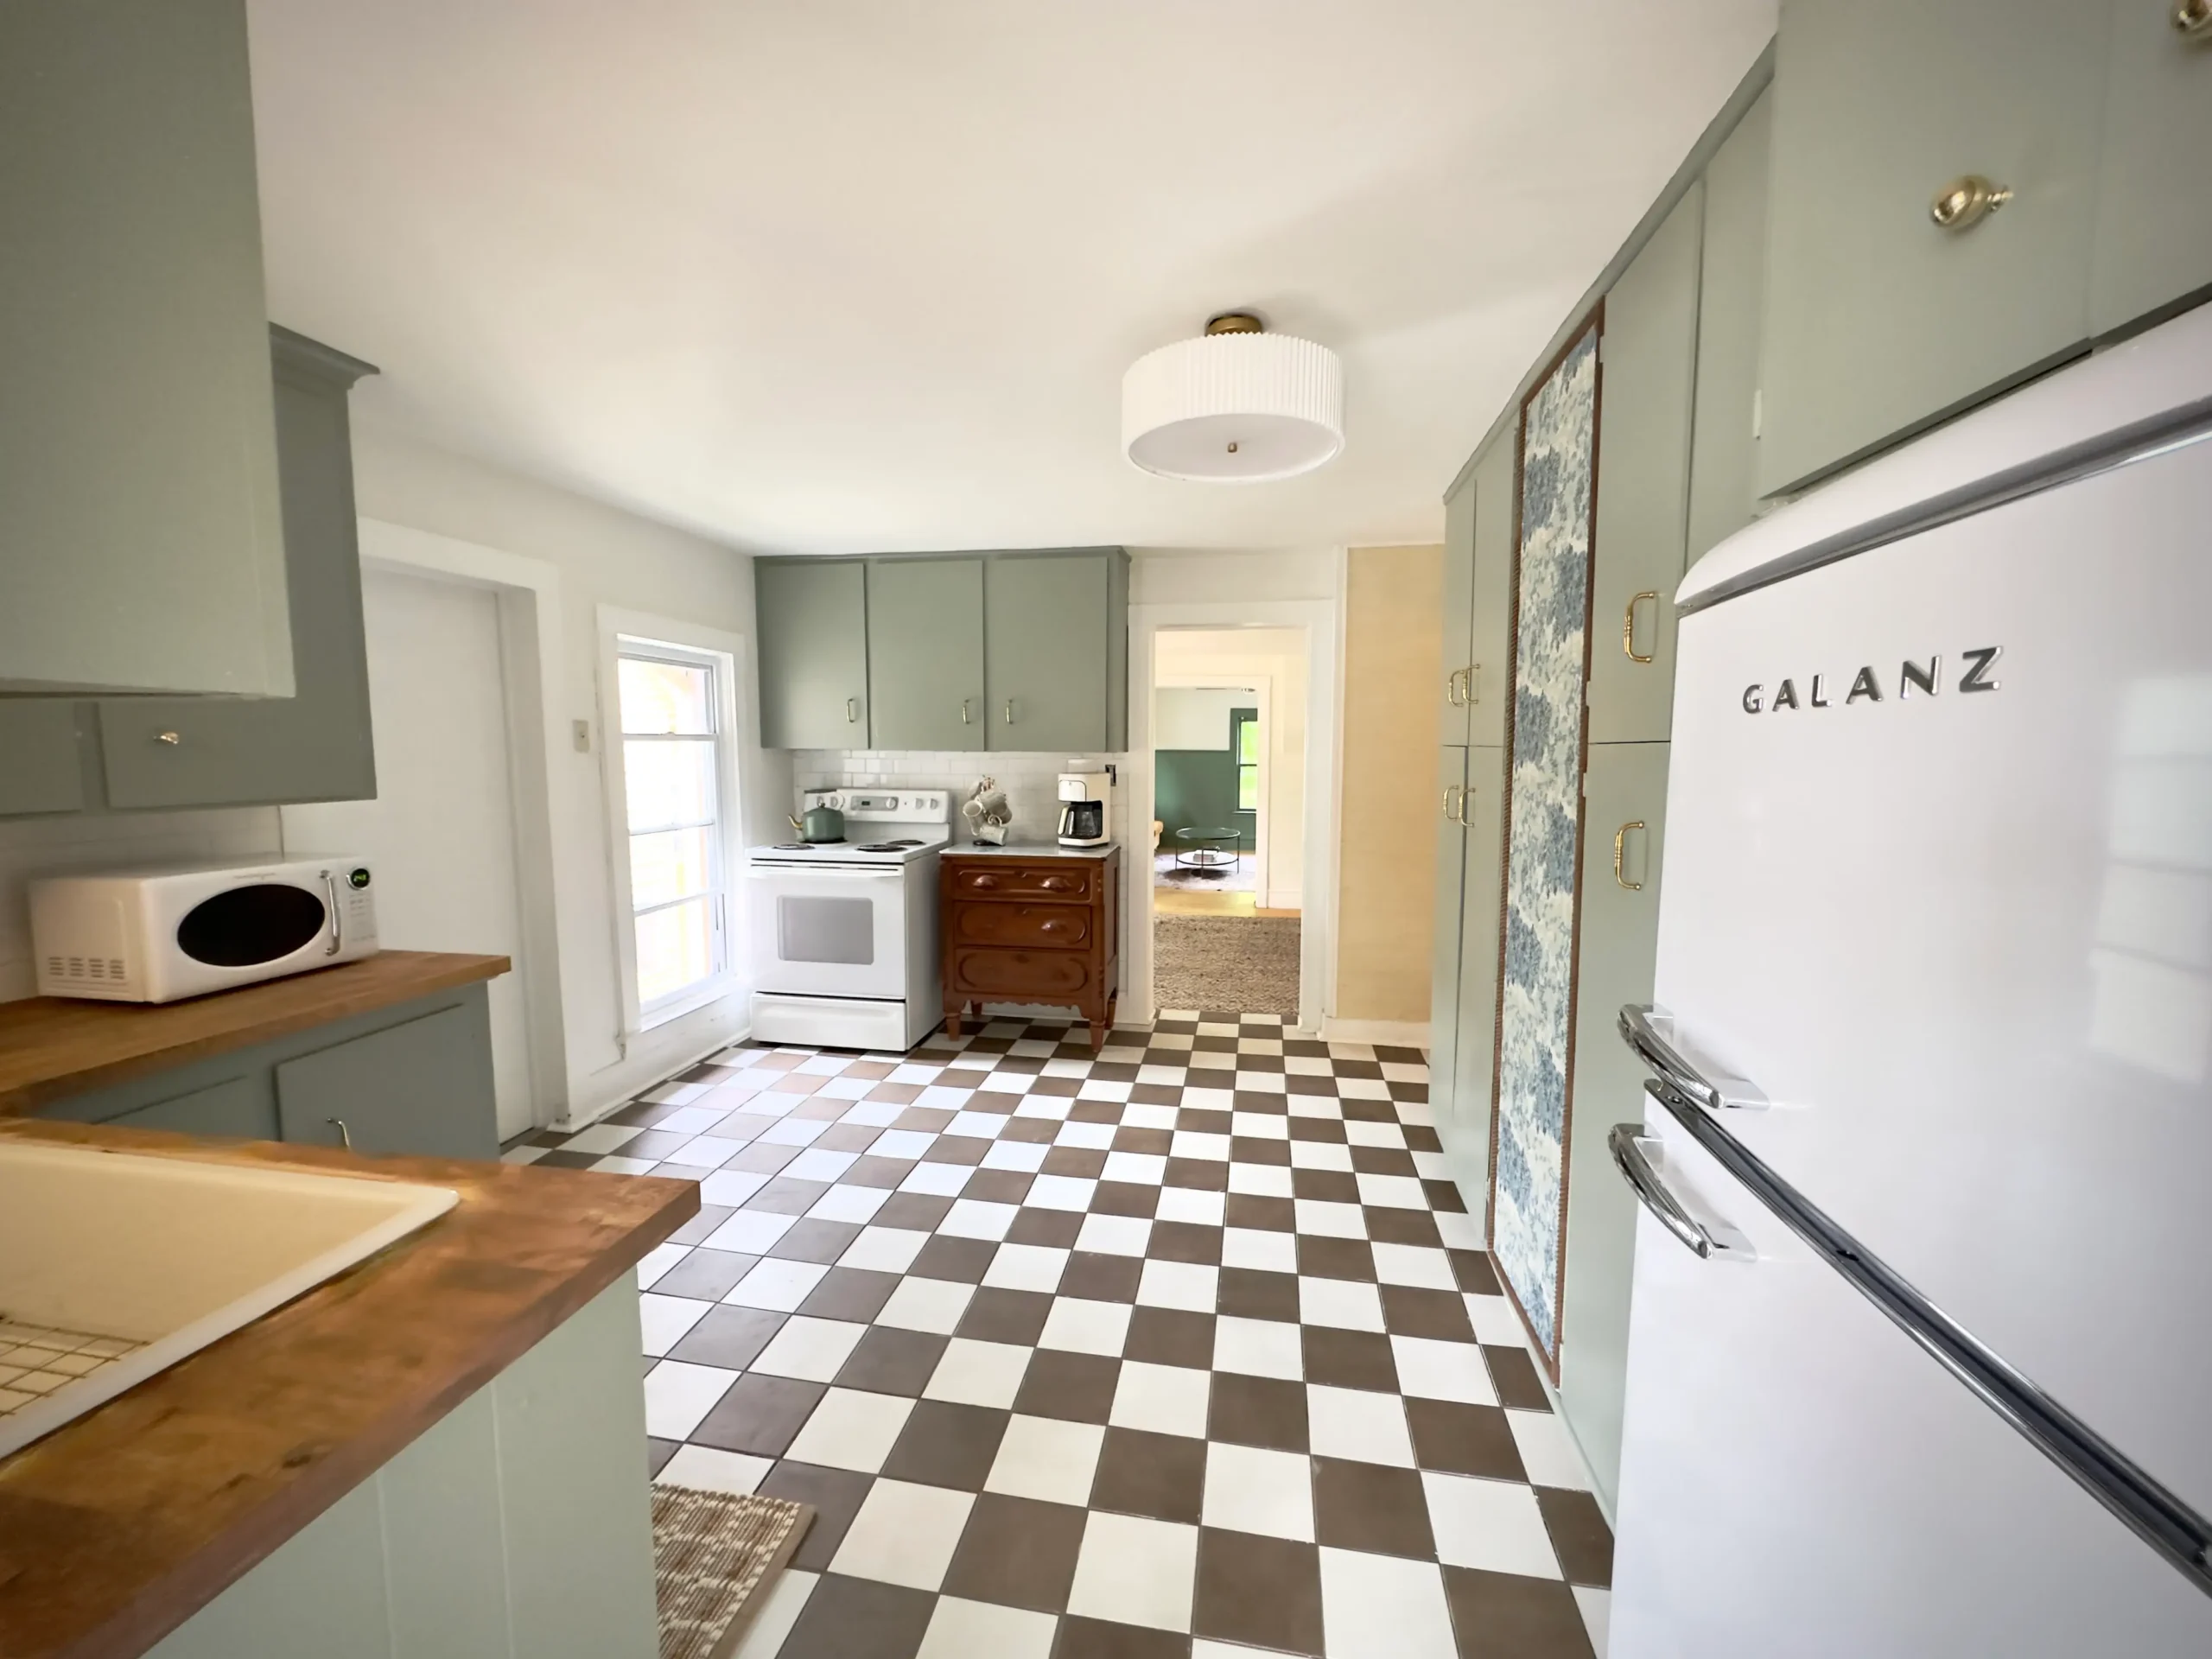
- Earthy Colors & Patterns: We skipped the bright whites and used a cozy palette of rich greens, warm browns, and soft blues. For a nod to classic style, we laid down a timeless checkerboard floor and added a hint of vintage-looking wallpaper.
- The Warmth of Wood: Bringing in natural wood tones was my secret weapon to make sure the small space felt incredibly inviting rather than cold.
- Pretty Details: When you’re working with a smaller footprint, the details matter even more. Getting the little things right—like beautiful lighting, classic plumbing, and hardware—is how you get that charm without breaking the bank.
Let’s take a look at where we started.

The Design Elements:
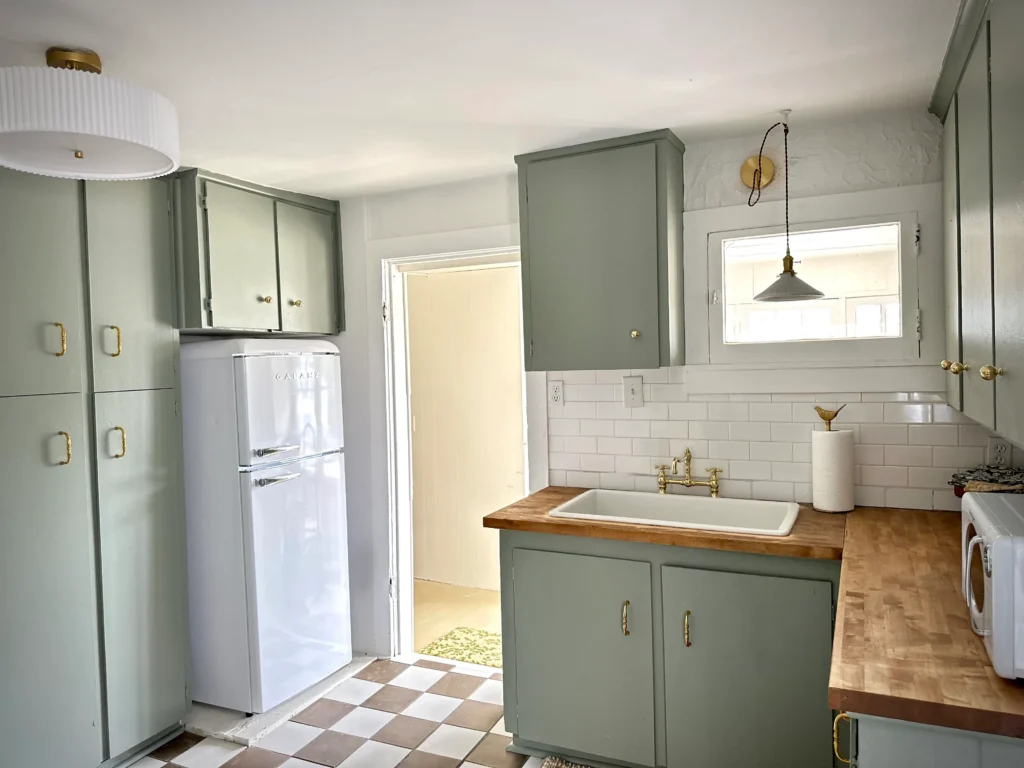
Once the vision was set, it was time to choose the specific elements that would bring this English cottage to life. Because we were working with the original cabinets to keep our budget on track, paint and finishes had to do the heavy lifting. Here is the design recipe that made it happen:
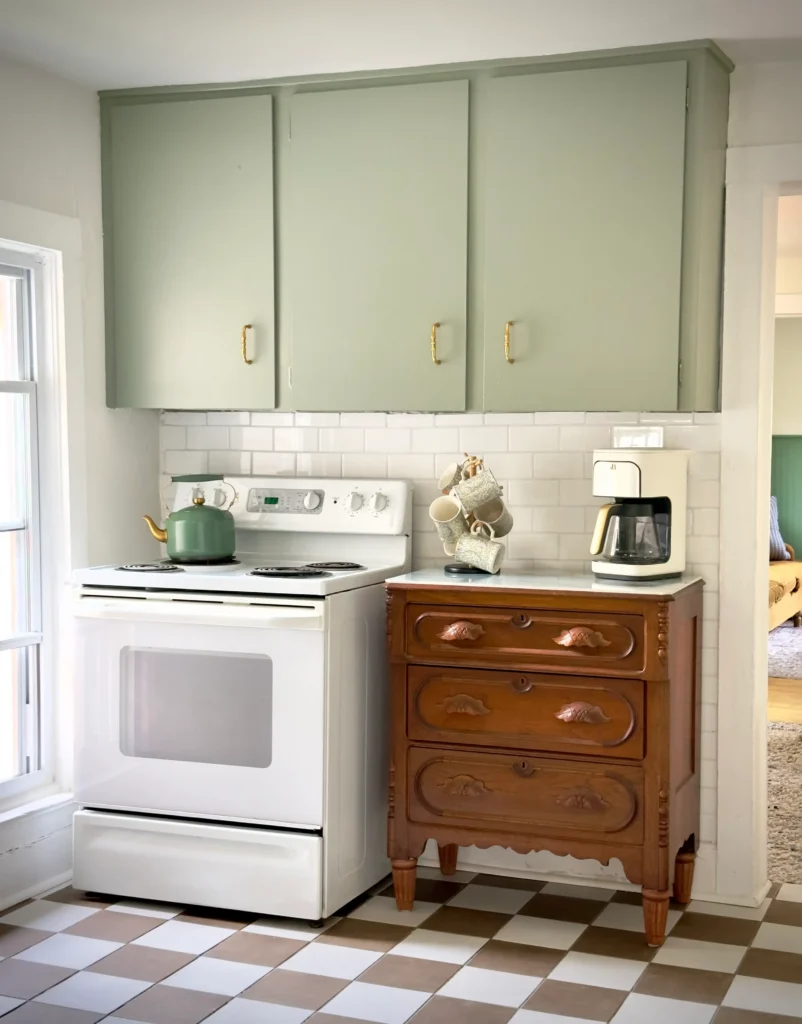
- The Cabinet Color: We painted the original cabinets Sherwin-Williams Acacia Haze. It’s a stunning medium green with slate blue undertones that instantly gave the room a historic, soulful feel.
- The Floors: To ground the green cabinets, we laid a classic checkerboard tile floor—but with a twist! Instead of black and white, we went with a brown and white checkerboard. It adds all that traditional cottage charm but feels softer and more updated.
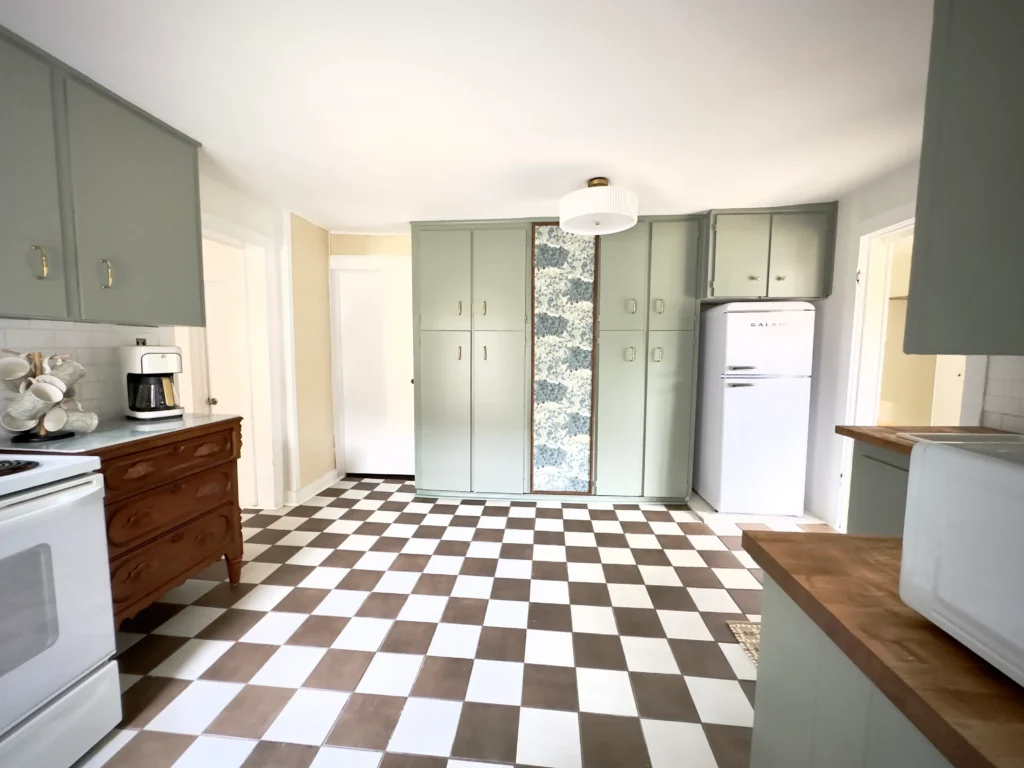
- Warm Textures: For that essential layer of warmth, we installed butcher block countertops. They contrast beautifully with the cool tones of the cabinets.
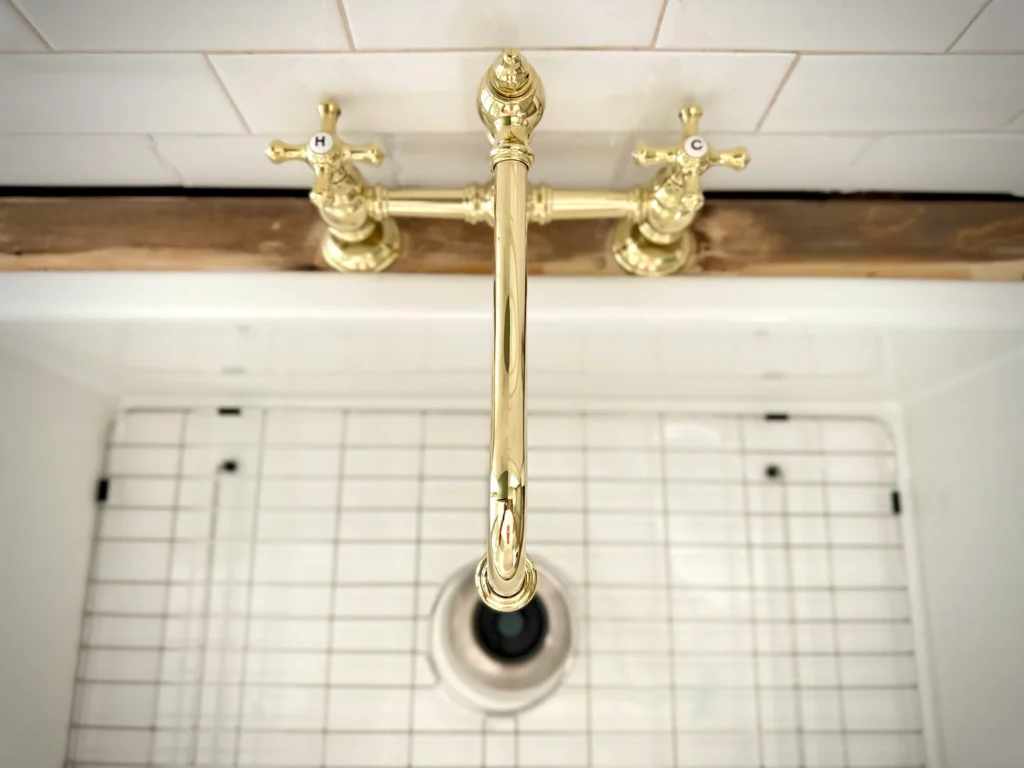
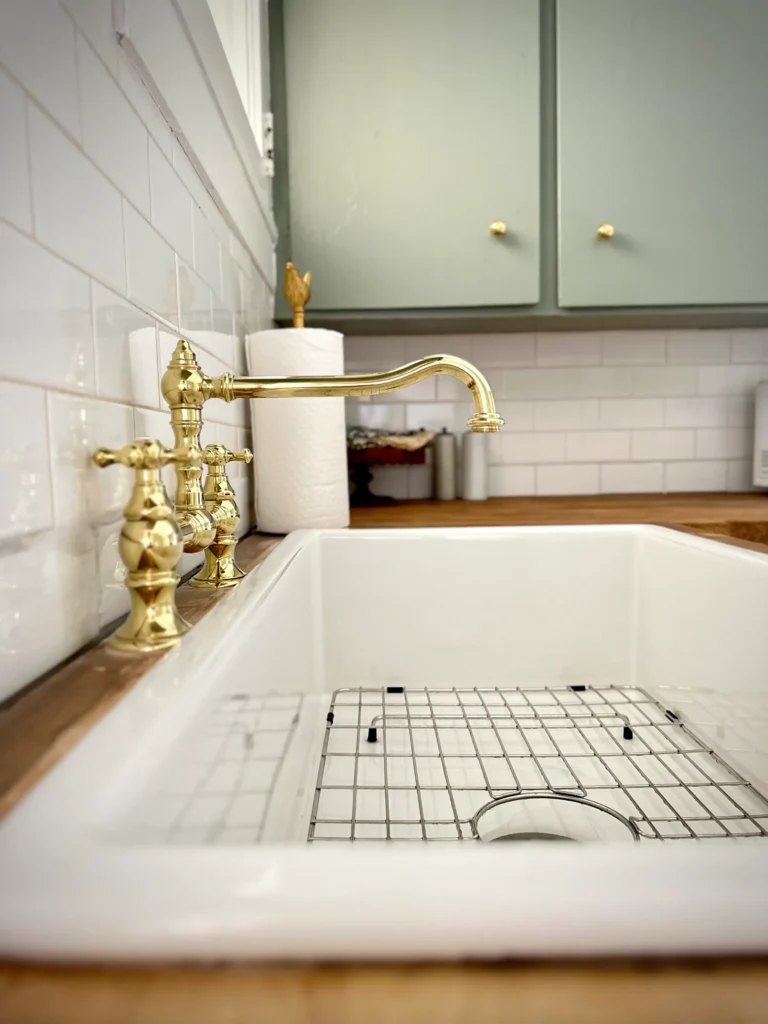
- The Statement Sink & Plumbing: We paired a classic white porcelain sink with a show-stopping brass faucet from Speakman. It absolutely oozes cottage charm and acts like jewelry for the kitchen.
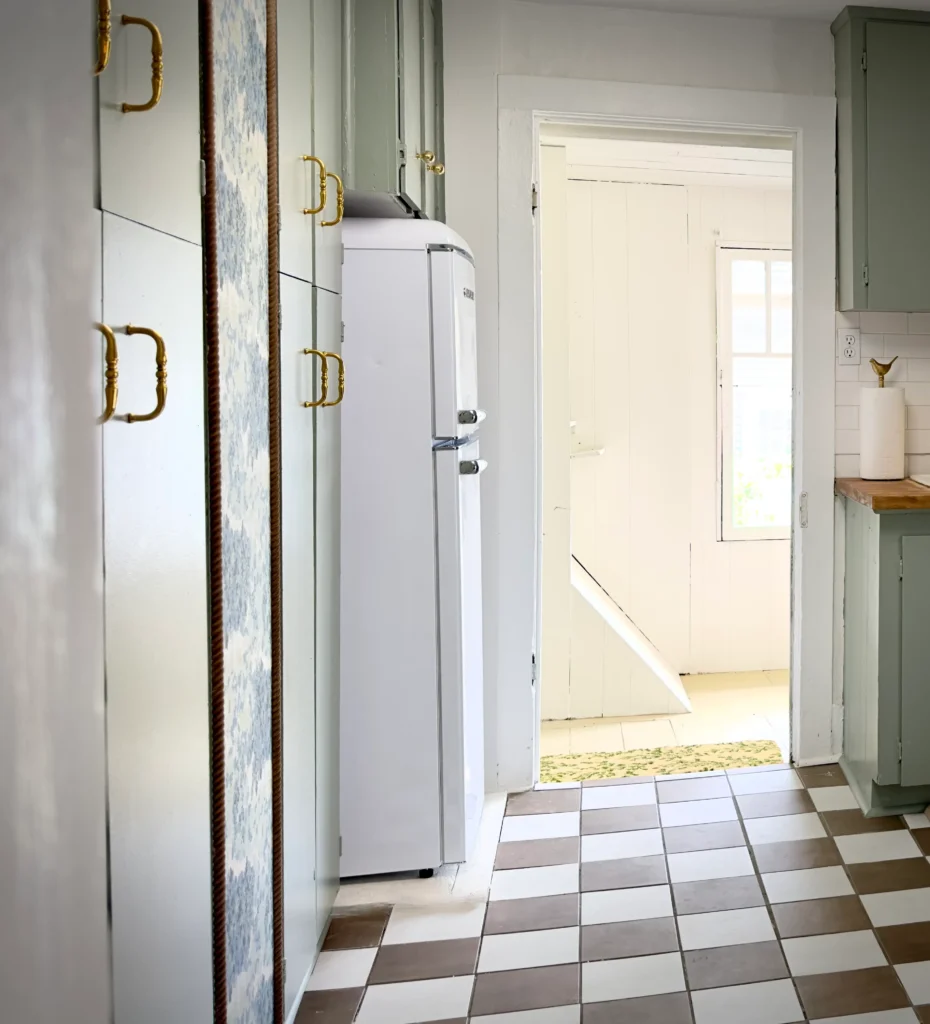
- The Hardware: We carried that warm metal finish throughout the space with gorgeous, timeless brass hardware from Baldwin.
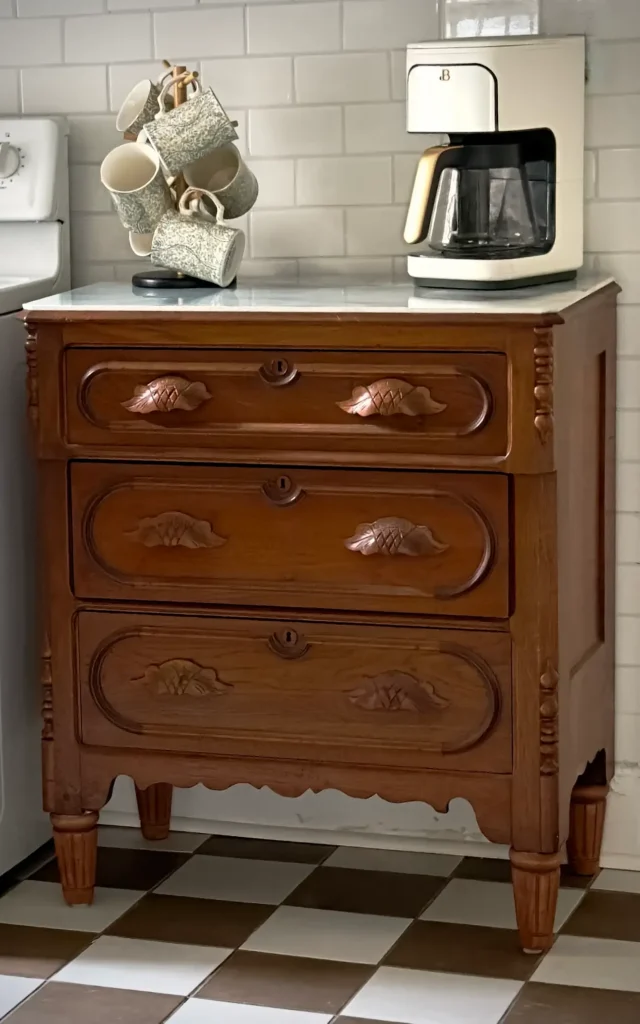
- Art & Vintage Soul: I truly believe every space needs some vintage love! We brought in a unique vintage piece of furniture to use as a cabinet. We framed a random panel of lovely vintage-inspired wallpaper to look like custom art.
- Lighting & Appliances: We updated the space with cleaner, new lighting fixtures and added an adorable retro-style fridge that fits the aesthetic perfectly.
Implementing the Plan
Having a vision is one thing, but bringing it to life on a tight One Room Challenge timeline is a whole different story. Because we wanted to keep costs down and get the details exactly right, we rolled up our sleeves and tackled the vast majority of the labor ourselves. Let me tell you, it was grueling work for this pair of 60-year-olds!
We jumped right into the thick of it by painting the original cabinets, laying down that brown-and-white checkerboard floor, and tiling the backsplash ourselves. By the time we finished the tiling, we decided it was best to leave the heavy porcelain sink installation to a professional plumber.
But as soon as the plumbing was secure, we were right back at it! We teamed up to install the butcher block countertops and spent hours modifying our vintage furniture piece to make sure it functioned perfectly as a kitchen cabinet.
To cross the finish line, we divided and conquered: Dave took on the electrical and installed all of our new, clean lighting fixtures, while I took on the wallpaper panels.
Whew! Looking back at that list, no wonder we are so tired! 😉 It was a marathon of sweat equity, but doing the work ourselves made the final result sweeter.
The Reveal
After all the dust, the late nights, and the endless DIY hours, the moment is finally here. I couldn’t be prouder of how this little kitchen turned out. It is proof that you don’t need a massive footprint or an unlimited budget to create a space that feels high-end, intentional, and incredibly special.
Without further ado, here is our new English Cottage Kitchen!
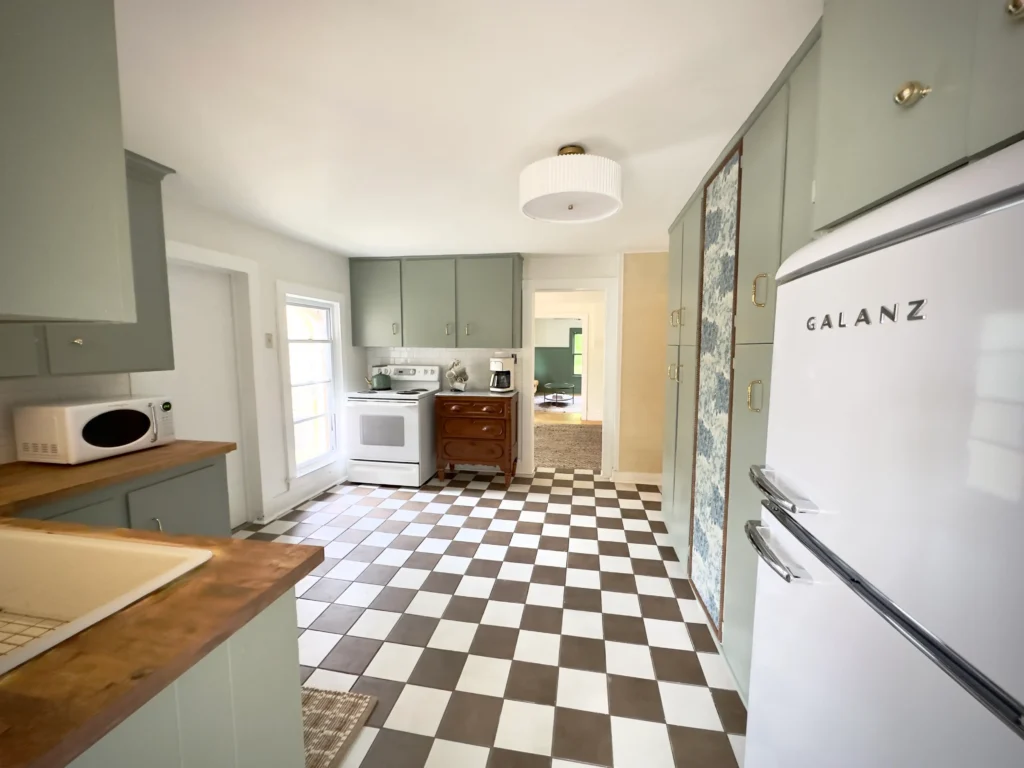
Seeing the Sherwin-Williams Acacia Haze on the cabinets paired with that rich brown-and-white checkerboard floor makes my heart skip a beat. The colors ground the entire room and make it feel like it has been here for decades, completely honoring the 125-year-old bones of the house.
The warmth of the butcher block countertops completely transformed the vibe, making it feel so welcoming. And that Speakman brass faucet? It is the absolute jewel of the room against the crisp white porcelain sink.
I am so glad we took the time to modify our vintage cabinet. It gives the kitchen that “collected over time” soul that is the signature of true English country style. I am actually going to write a separate blog post on this piece because the modification process deserves its own spotlight!
And I can’t forget the beautiful wallpaper panel framed in picture molding. It acts like a piece of art and ties all our greens, browns, and blues together so beautifully. Every single pretty detail we sweated over was worth it.
Sherwin-Williams Acacia Haze cabinets
A little behind-the-scenes secret: What you don’t see in the photos is the 18-inch dishwasher we finally tracked down! It’s being installed next week, proving you don’t have to sacrifice modern convenience for historic style.
What we still have to do: The Plumber installed the sink and sanded the stain on the butcher block along the sink edges. That will need to be restained. We also need to rehang the back door and add some art to the grasscloth wallpapered wall. Also need to think about a window covering.
5. A Big Thank Thank You to ORC and Sponsors
An undertaking like this truly takes a village, and this kitchen wouldn’t have been possible without the incredible support we received along the way.

A massive thank you to the One Room Challenge and their media partners for creating this amazing event. The community, inspiration, and accountability of the ORC are what keep us moving forward when the DIY hours get long and exhausting!
I also want to extend my deepest gratitude to our wonderful sponsors who stepped up to help us bring this English cottage vision to life. Their beautiful, high-quality products allowed us to achieve that high-end, high-charm look while staying entirely on budget:
- Speakman: For the absolutely stunning brass faucet that serves as the centerpiece of our sink area.
- Baldwin: For the gorgeous, timeless brass hardware that completely elevated our painted cabinets.
Thank you for believing in this project and helping us turn this small space into something so incredibly special.
Don’t forget to head over and take a peek at some of the other rooms! They are so good.
You May also enjoy: