
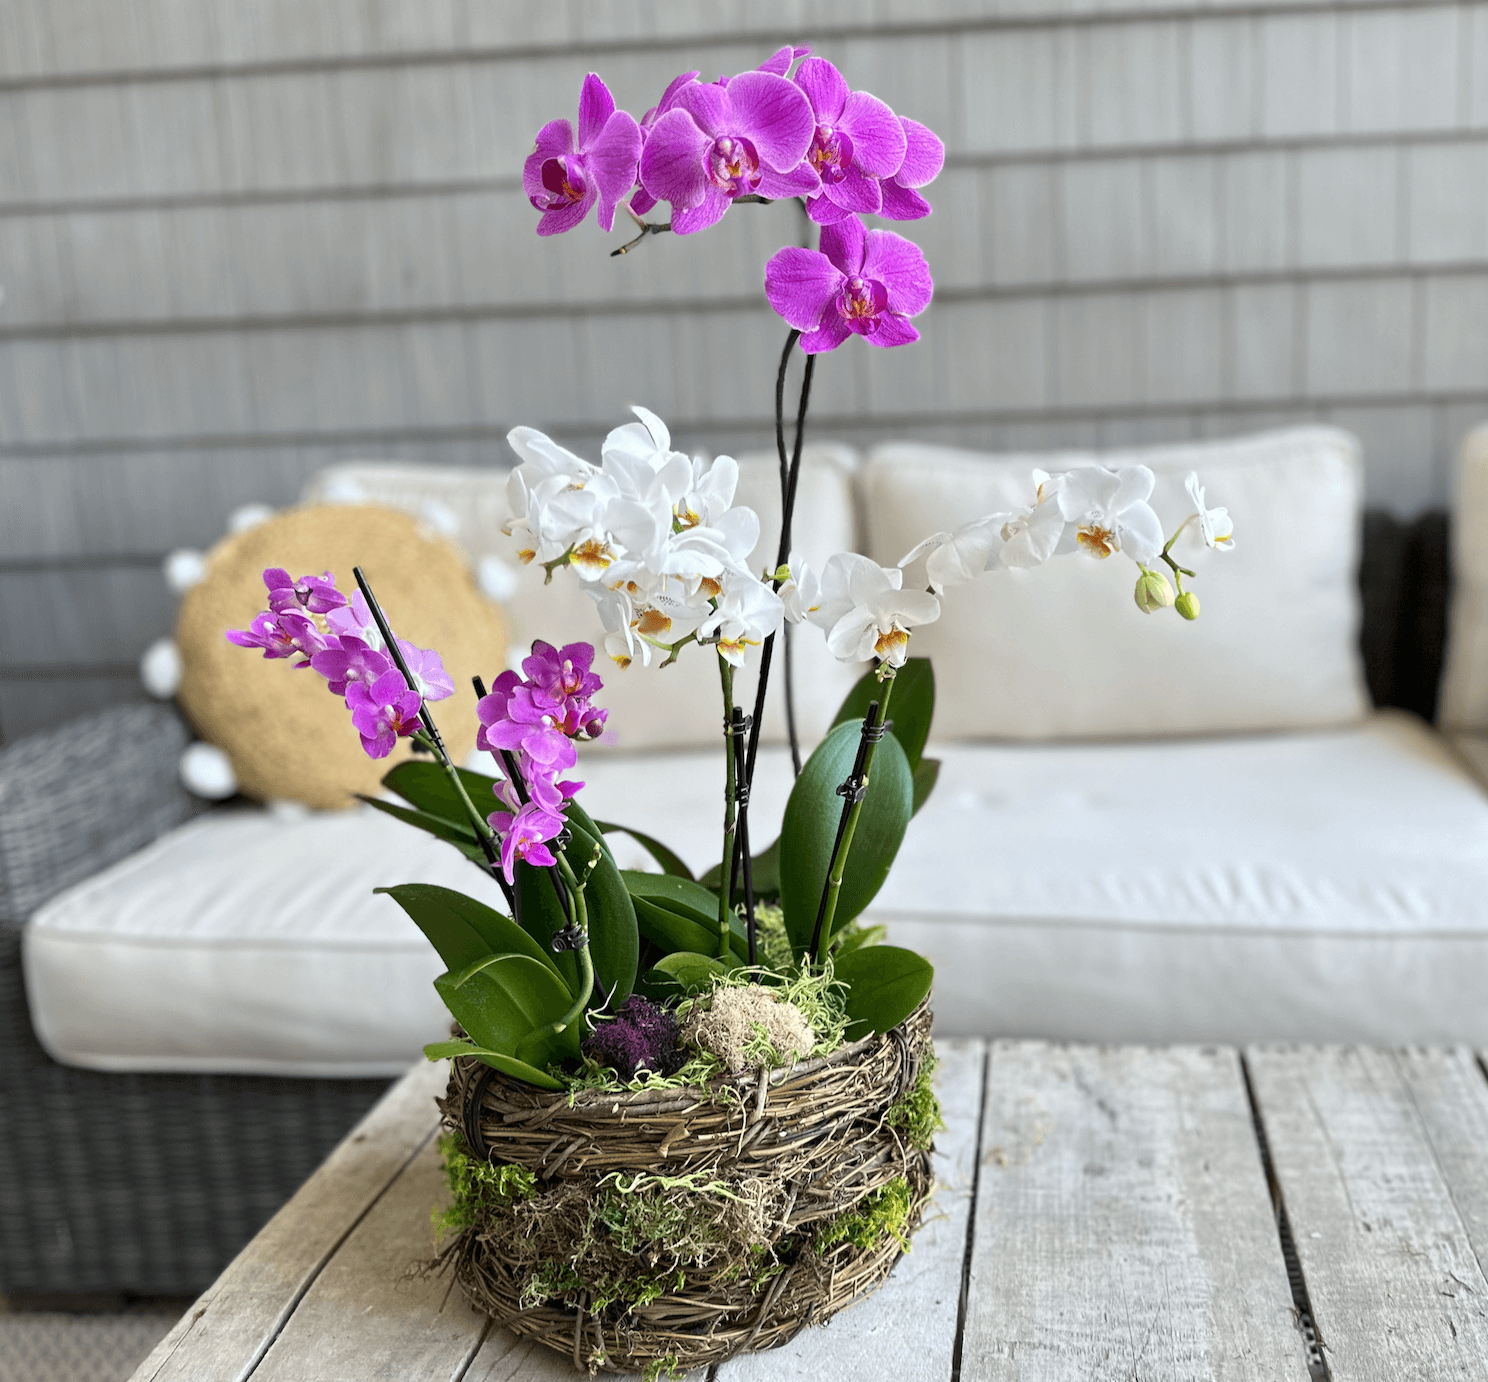
You know how it goes—you see a gorgeous potted orchid, and suddenly, you’re holding an armful and looking for a cart! That’s exactly what happened to me at Trader Joe’s this weekend when I found potted orchids at such great prices. I couldn’t resist grabbing a couple of each color and size. They’re stunning as they are, but I thought, “Why not elevate them just a bit?” Join me as I use some leftover craft supplies to DIY an Orchid and Moss Basket Arrangement!

*This post contains affiliate links
Supplies You’ll Need for Your DIY Orchid Basket
Before we dive into the fun part, let’s make sure you have everything ready. Most of these items can be found at your local craft store/ Amazon, or, if you are anything like me, in your “leftover project closet.”
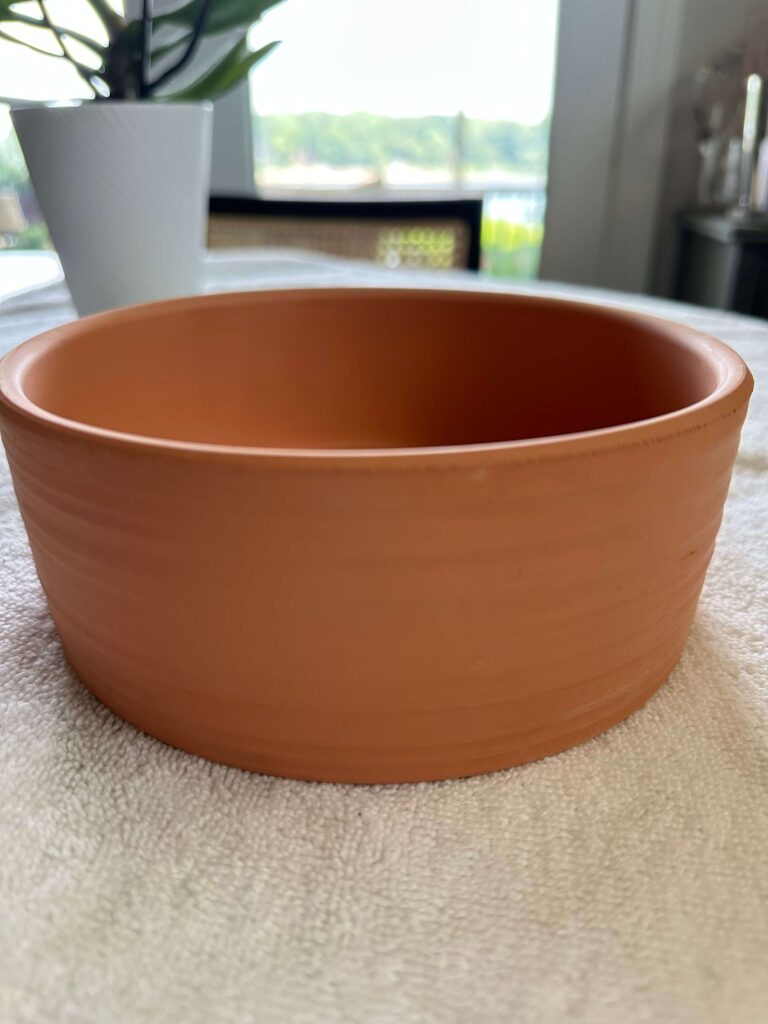
- A Clay Tray—a plastic liner — would also work; just be careful with the glue gun.
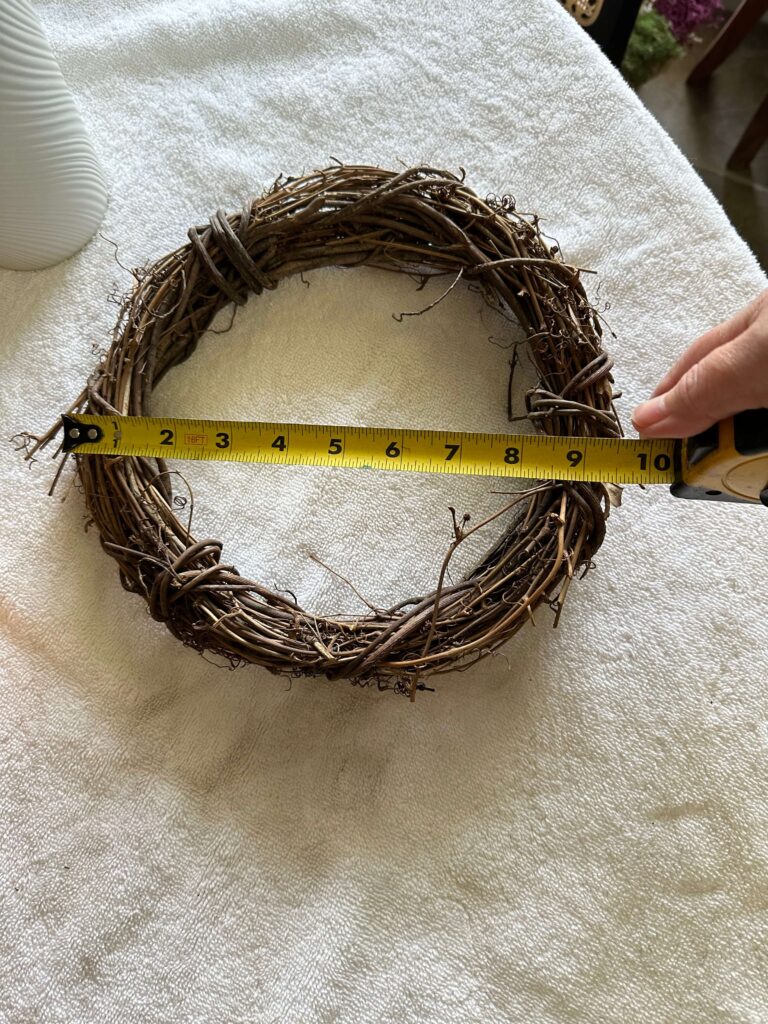
- Grapevine Wreaths (I am using 3-10-inch wreaths)
- Floral Wire
- Scissors
- Moss (choose your favorite)
- Glue Gun
- Glue Sticks
- Orchids (as many as you’d like, depending on the size of the wreaths you are using)
Assembling the Basket:
Okay, this is an embarrassingly simple way to DIY a basket. But it turns out so pretty!
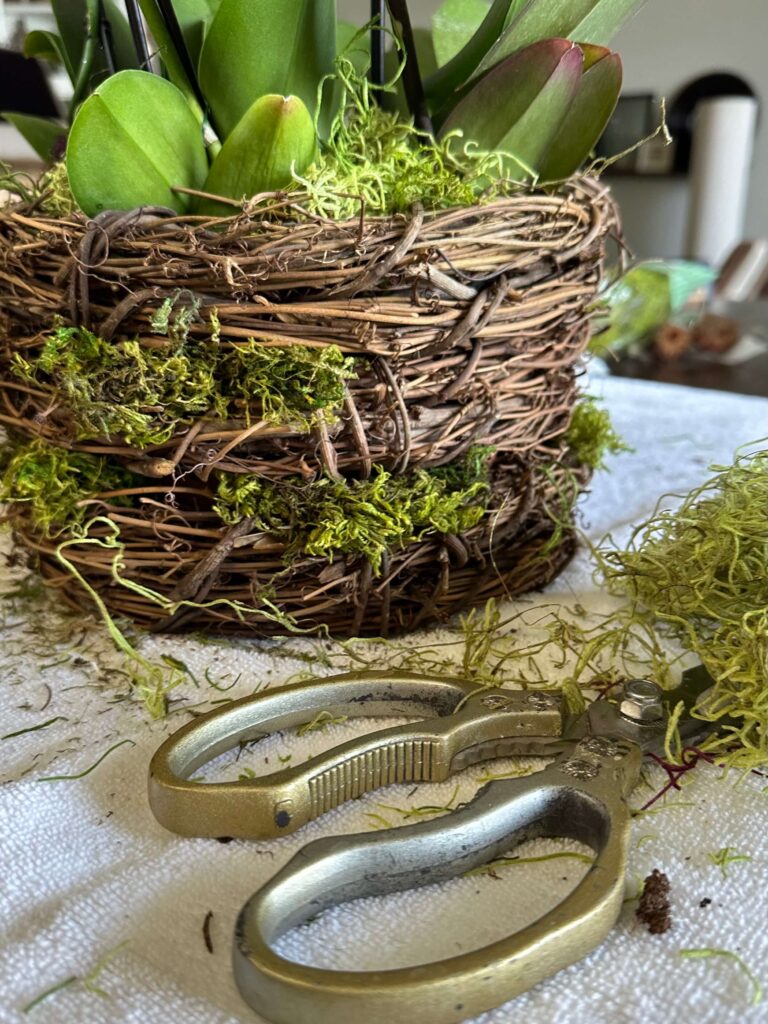
1. Place your first grapevine wreath over your clay tray (or plastic). Glue the wreath to the sides of the tray. Next, continue stacking the wreaths on top of each other, moving them around so they leave the fewest possible gaps.

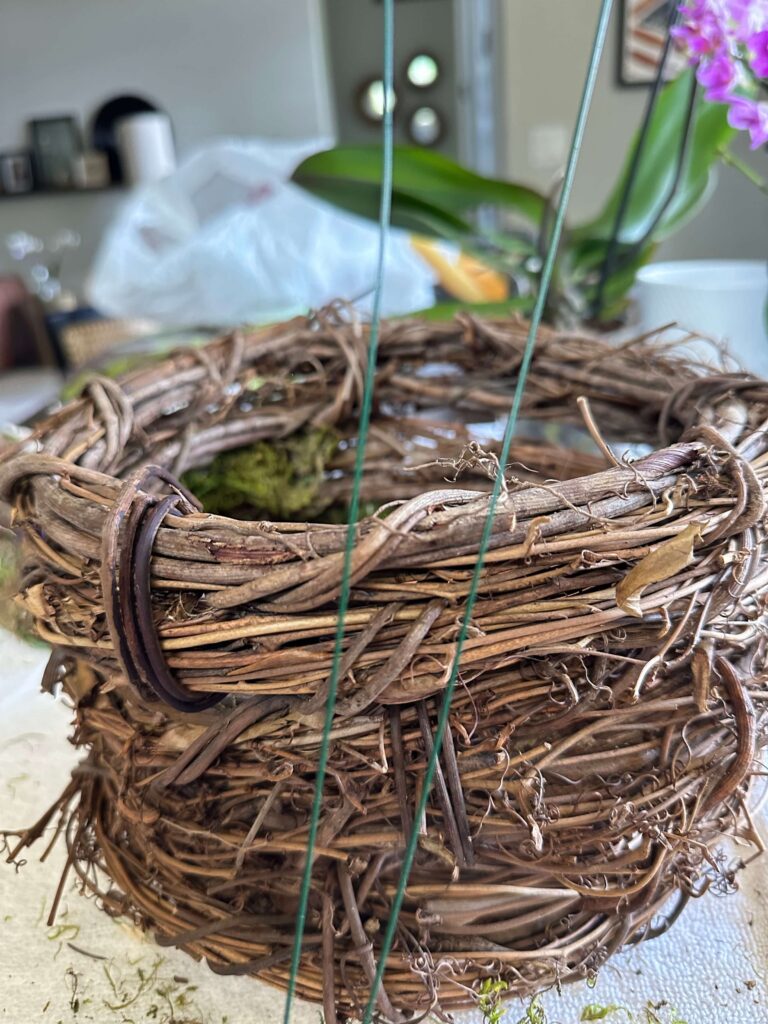
2. Use your floral wire to secure the wreaths together. Twisting tightly and cutting off the excess wire. For extra hold, I also glued the grapevine wreaths together at a couple of spots.
Now is the fun part! Moss. I love a good moss project. Here is one of my all-time favorites!
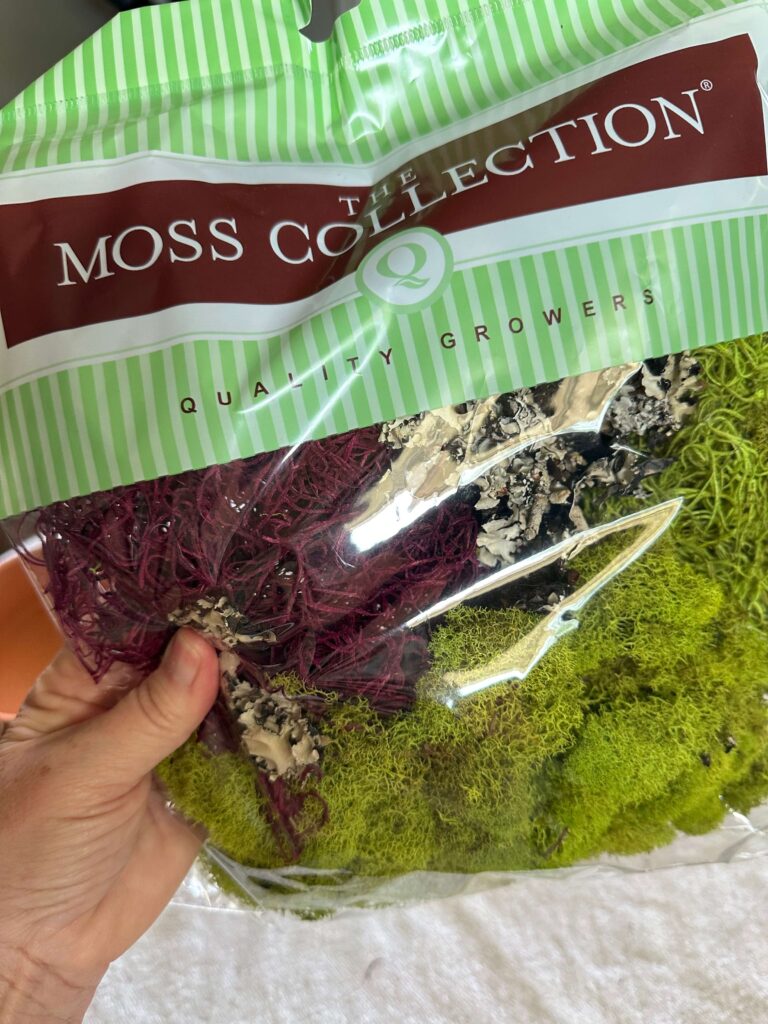
3. In the gaps between the wreaths, start adding your moss and gluing it in place. Keep turning the basket as you go to fill in all the gaps.
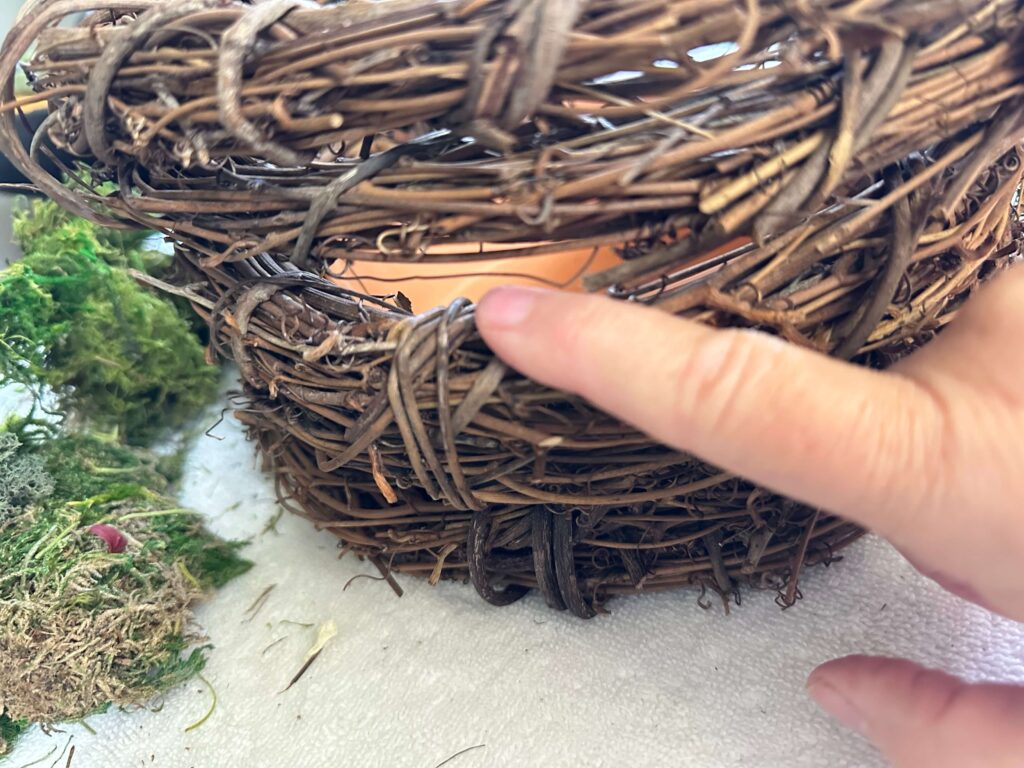
Check for stability as you go. You will want it to feel stable when you pick it up. If needed, add more wire and/or glue for support. I also glued the wreaths to the clay spot in a couple of places.
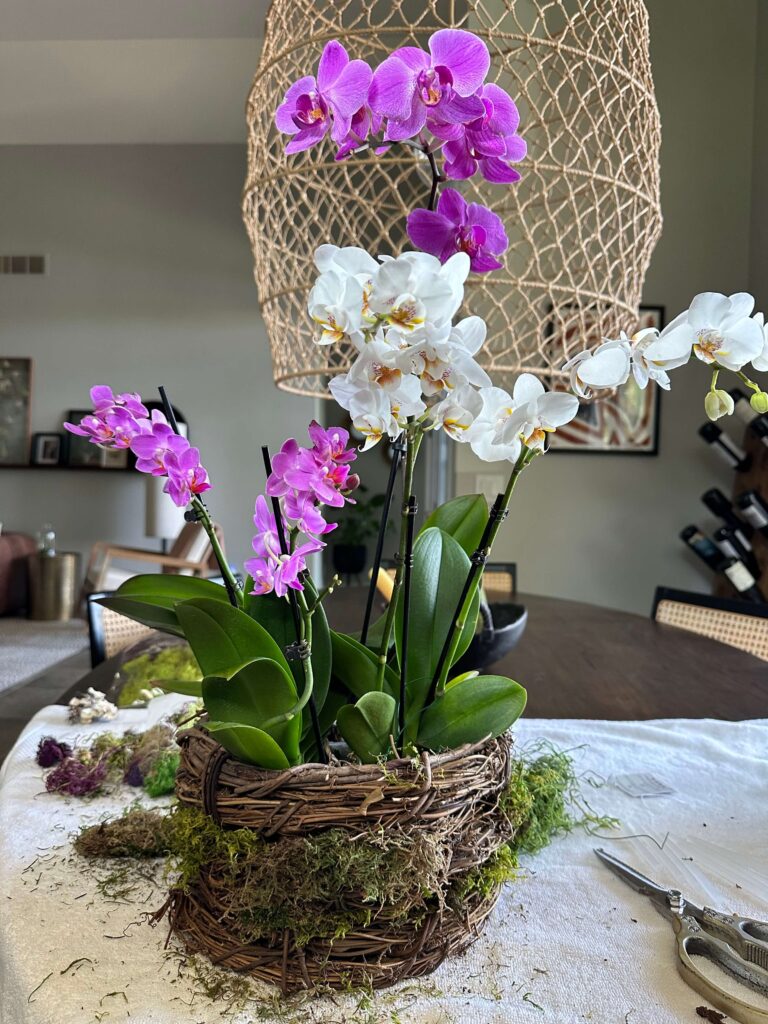
4. Once the basket looks full, it’s time to place your orchids. I removed mine from their ceramic pots and just kept them in the plastic inserts—this allowed me to move the orchids around a bit more freely.

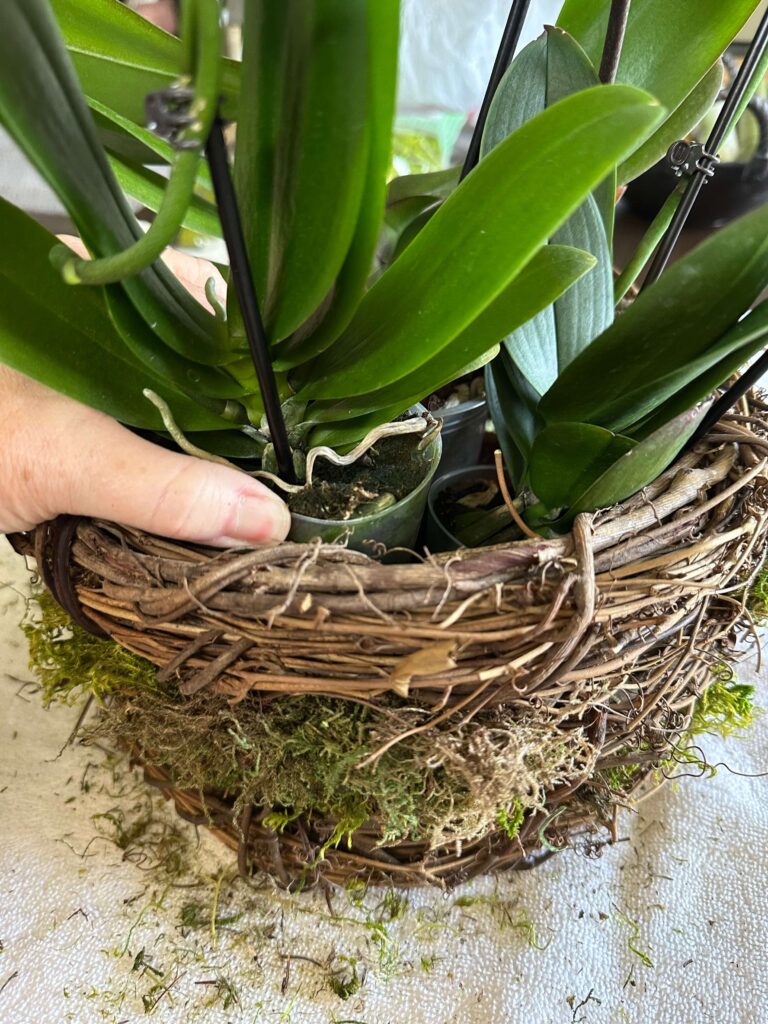
5. You’ve likely heard florists and designers talk about the “Rule of Three” or using odd numbers in arrangements, and there’s a reason why! Groupings of 3, 5, or even seven elements are naturally more appealing to our eyes, creating visual movement and a clear focal point. You can see an example of another basket using this rule here. For this basket, using one larger orchid and two smaller ones achieves this idea, giving a balanced feel.
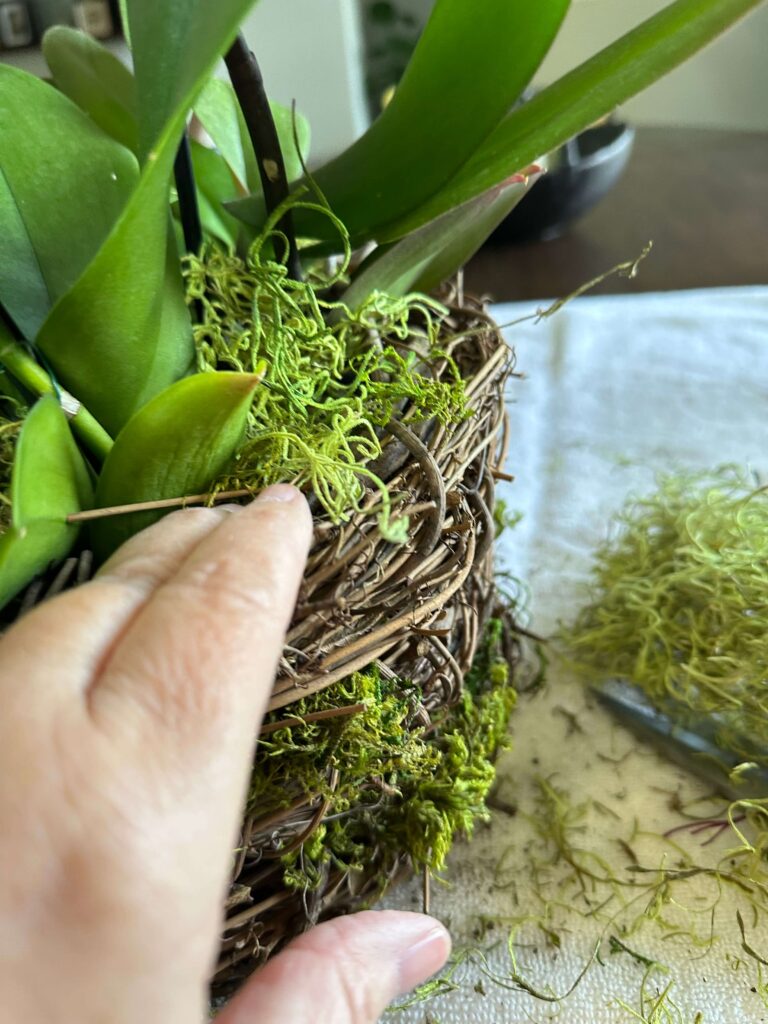
6. When you’re happy with your orchid placement, use more moss to cover the plant bases. I even added some touches of purple moss to tie in with the purple orchids.
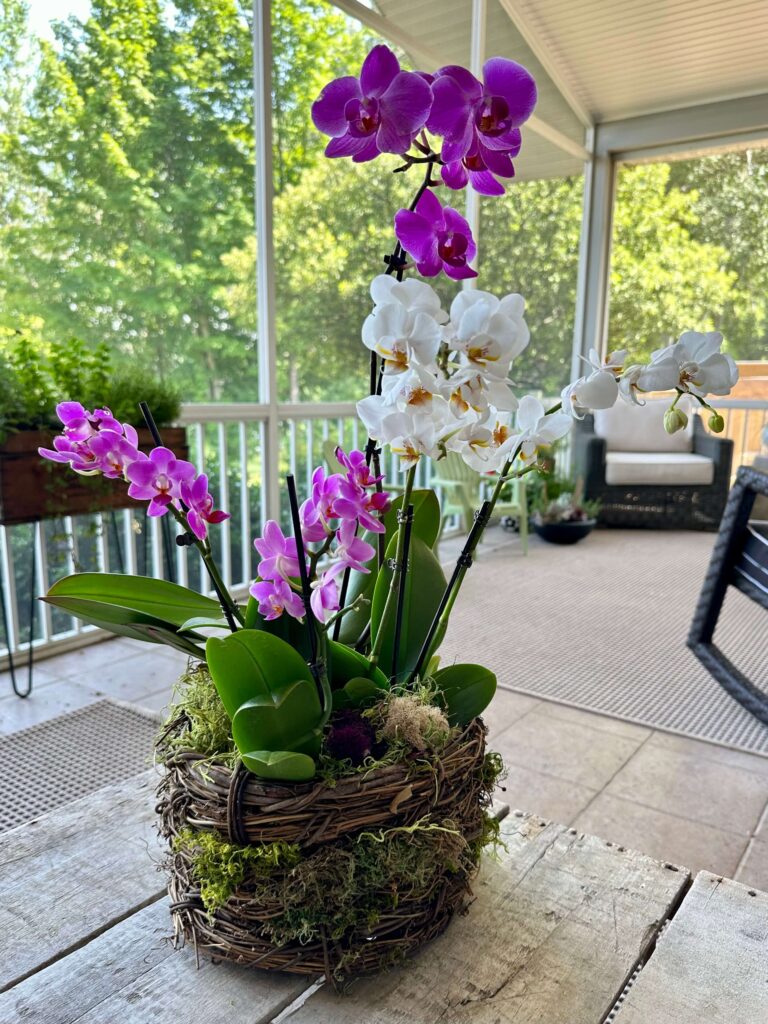
7. Now, stand back and admire your beautiful creation!
Shop my Amazon Storefront for some of my favorite craft supplies.
Caring for Your Orchid & Moss Basket
With just a little love, your Orchid and Moss Basket Arrangement can last for weeks, if not months! The key is proper watering and light.
Watering: Since the orchids are still in their plastic inserts, gently remove them from the moss. Water them as you normally would (usually by soaking or running water through until it drains), then let them drain completely before placing them back into the basket. The moss itself can be lightly misted if it starts to feel dry, but avoid over-saturating the entire arrangement.
Light: Orchids do best in bright, indirect light. Avoid direct sunlight. Properly cared for, your Orchid and Moss Basket Arrangement will last for a few weeks.

There you have it—your very own Orchid and Moss Basket Arrangement! This versatile basket isn’t just for orchids; you could also use it as a planter for your favorite plant, or even tuck a vase inside for a stunning display of fresh-cut flowers.
So what do you think? Will you give it a try? If you do, I’d love to see how you style yours!
Until next time,
-Libbie
You may also enjoy the following:
DIY a Holiday Centerpiece in 15 minutes with Mini Topiary Trees

Thanks for sharing with us, I’m featuring you this week when the next To Grandma’s house we go link party starts!
I cannot get over how beautiful this entire arrangement is! And the base/container is stunning. I’ve never seen one prettier! Featuring this on Farmhouse Friday this week. Thanks so much for sharing your talents with us. pinned