
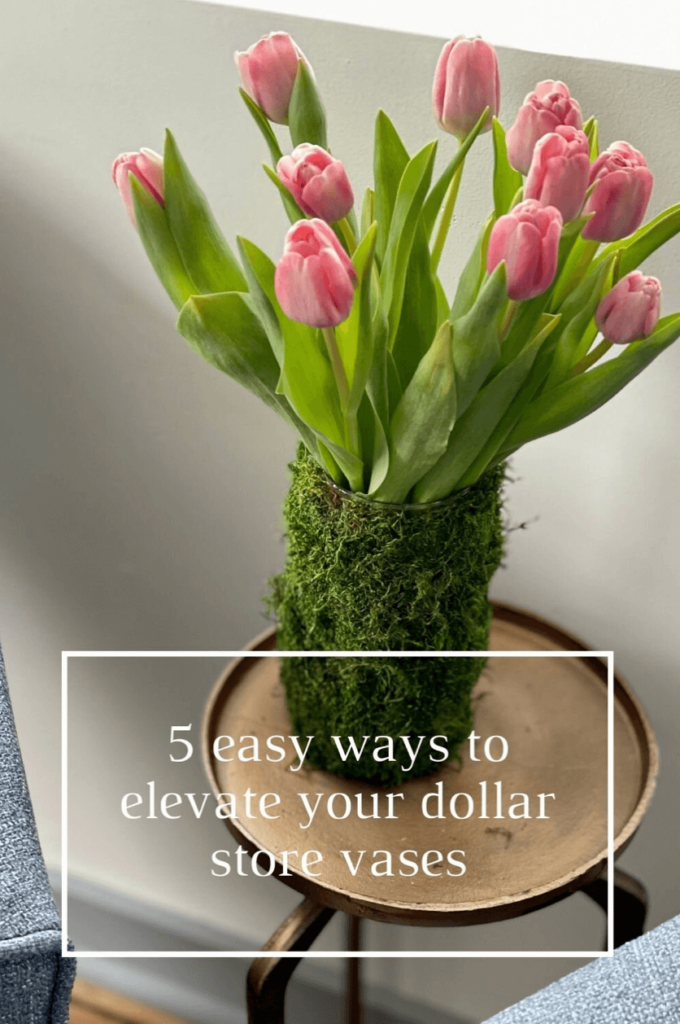
Hello and welcome! Today I am showing you five easy DIYs that will elevate the simple cylinder-shaped dollar store vases that seem to multiply in the cabinet. I’ve taken five vases and created five different looks that are incredibly easy to DIY.
Let’s get started!

Please note…some of the links below are affiliate links, and I may earn a small commission at no additional cost to you.
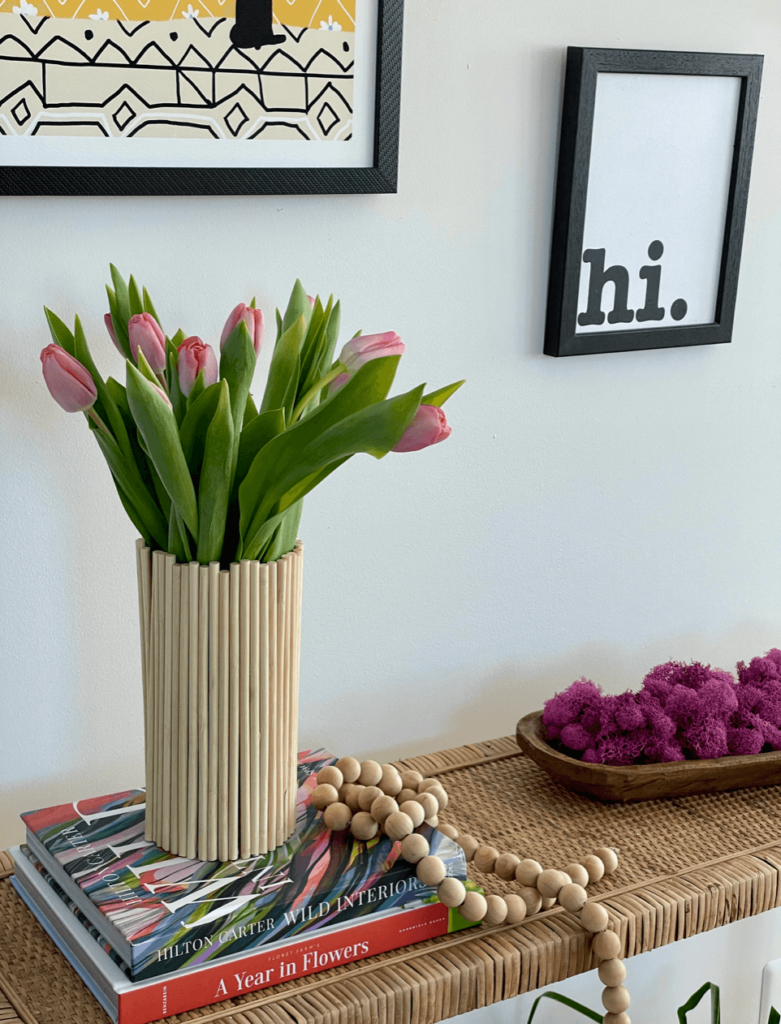
Scandinavian Style Vase
You will need:
Directions:
- Step 1- Cut your dowels to the length of your vase.
- Step 2- Glue dowels around the vase. This is why I like a dual-control hot glue gun. I use the lower temp to prevent burning my fingerprints off.
- Step 3- Remove any Hot Glue strings that may be hanging.
- Step 4- Add flowers, and enjoy.
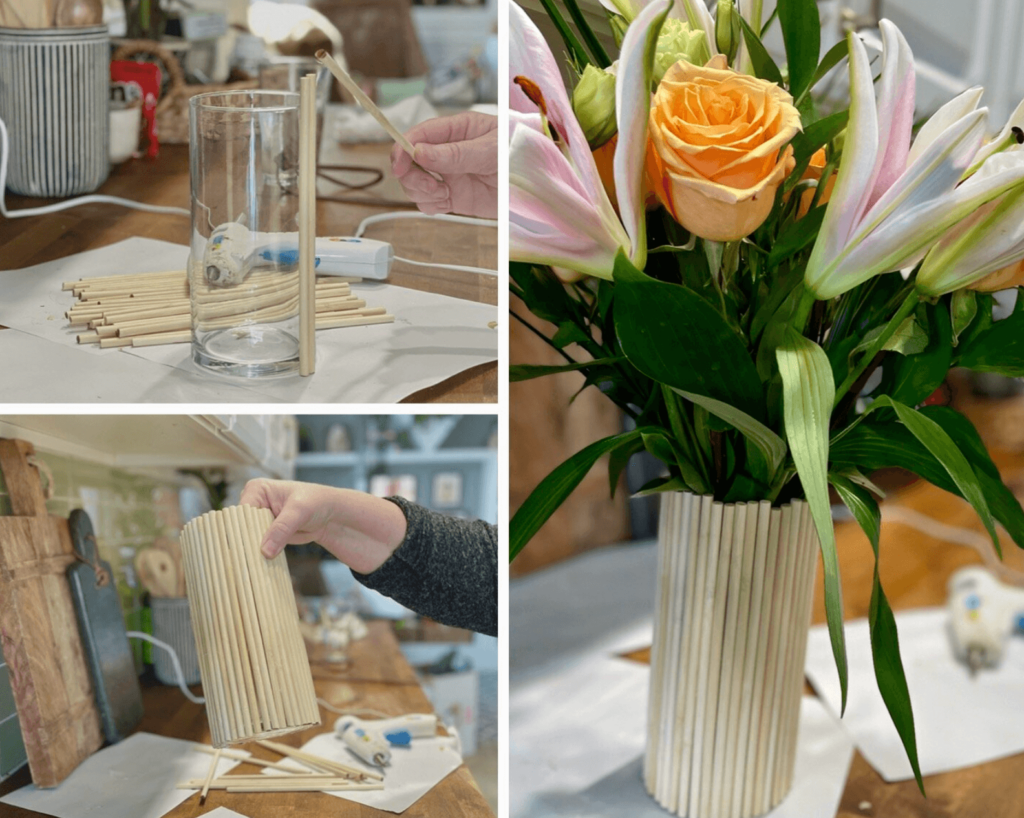
Tip- keep your dowels as straight as possible, or they will slant, and the last piece won’t fit. Each of the DIY vases I am sharing today will need to be hand-washed; not a big deal for me; just letting you know.
Next Up:
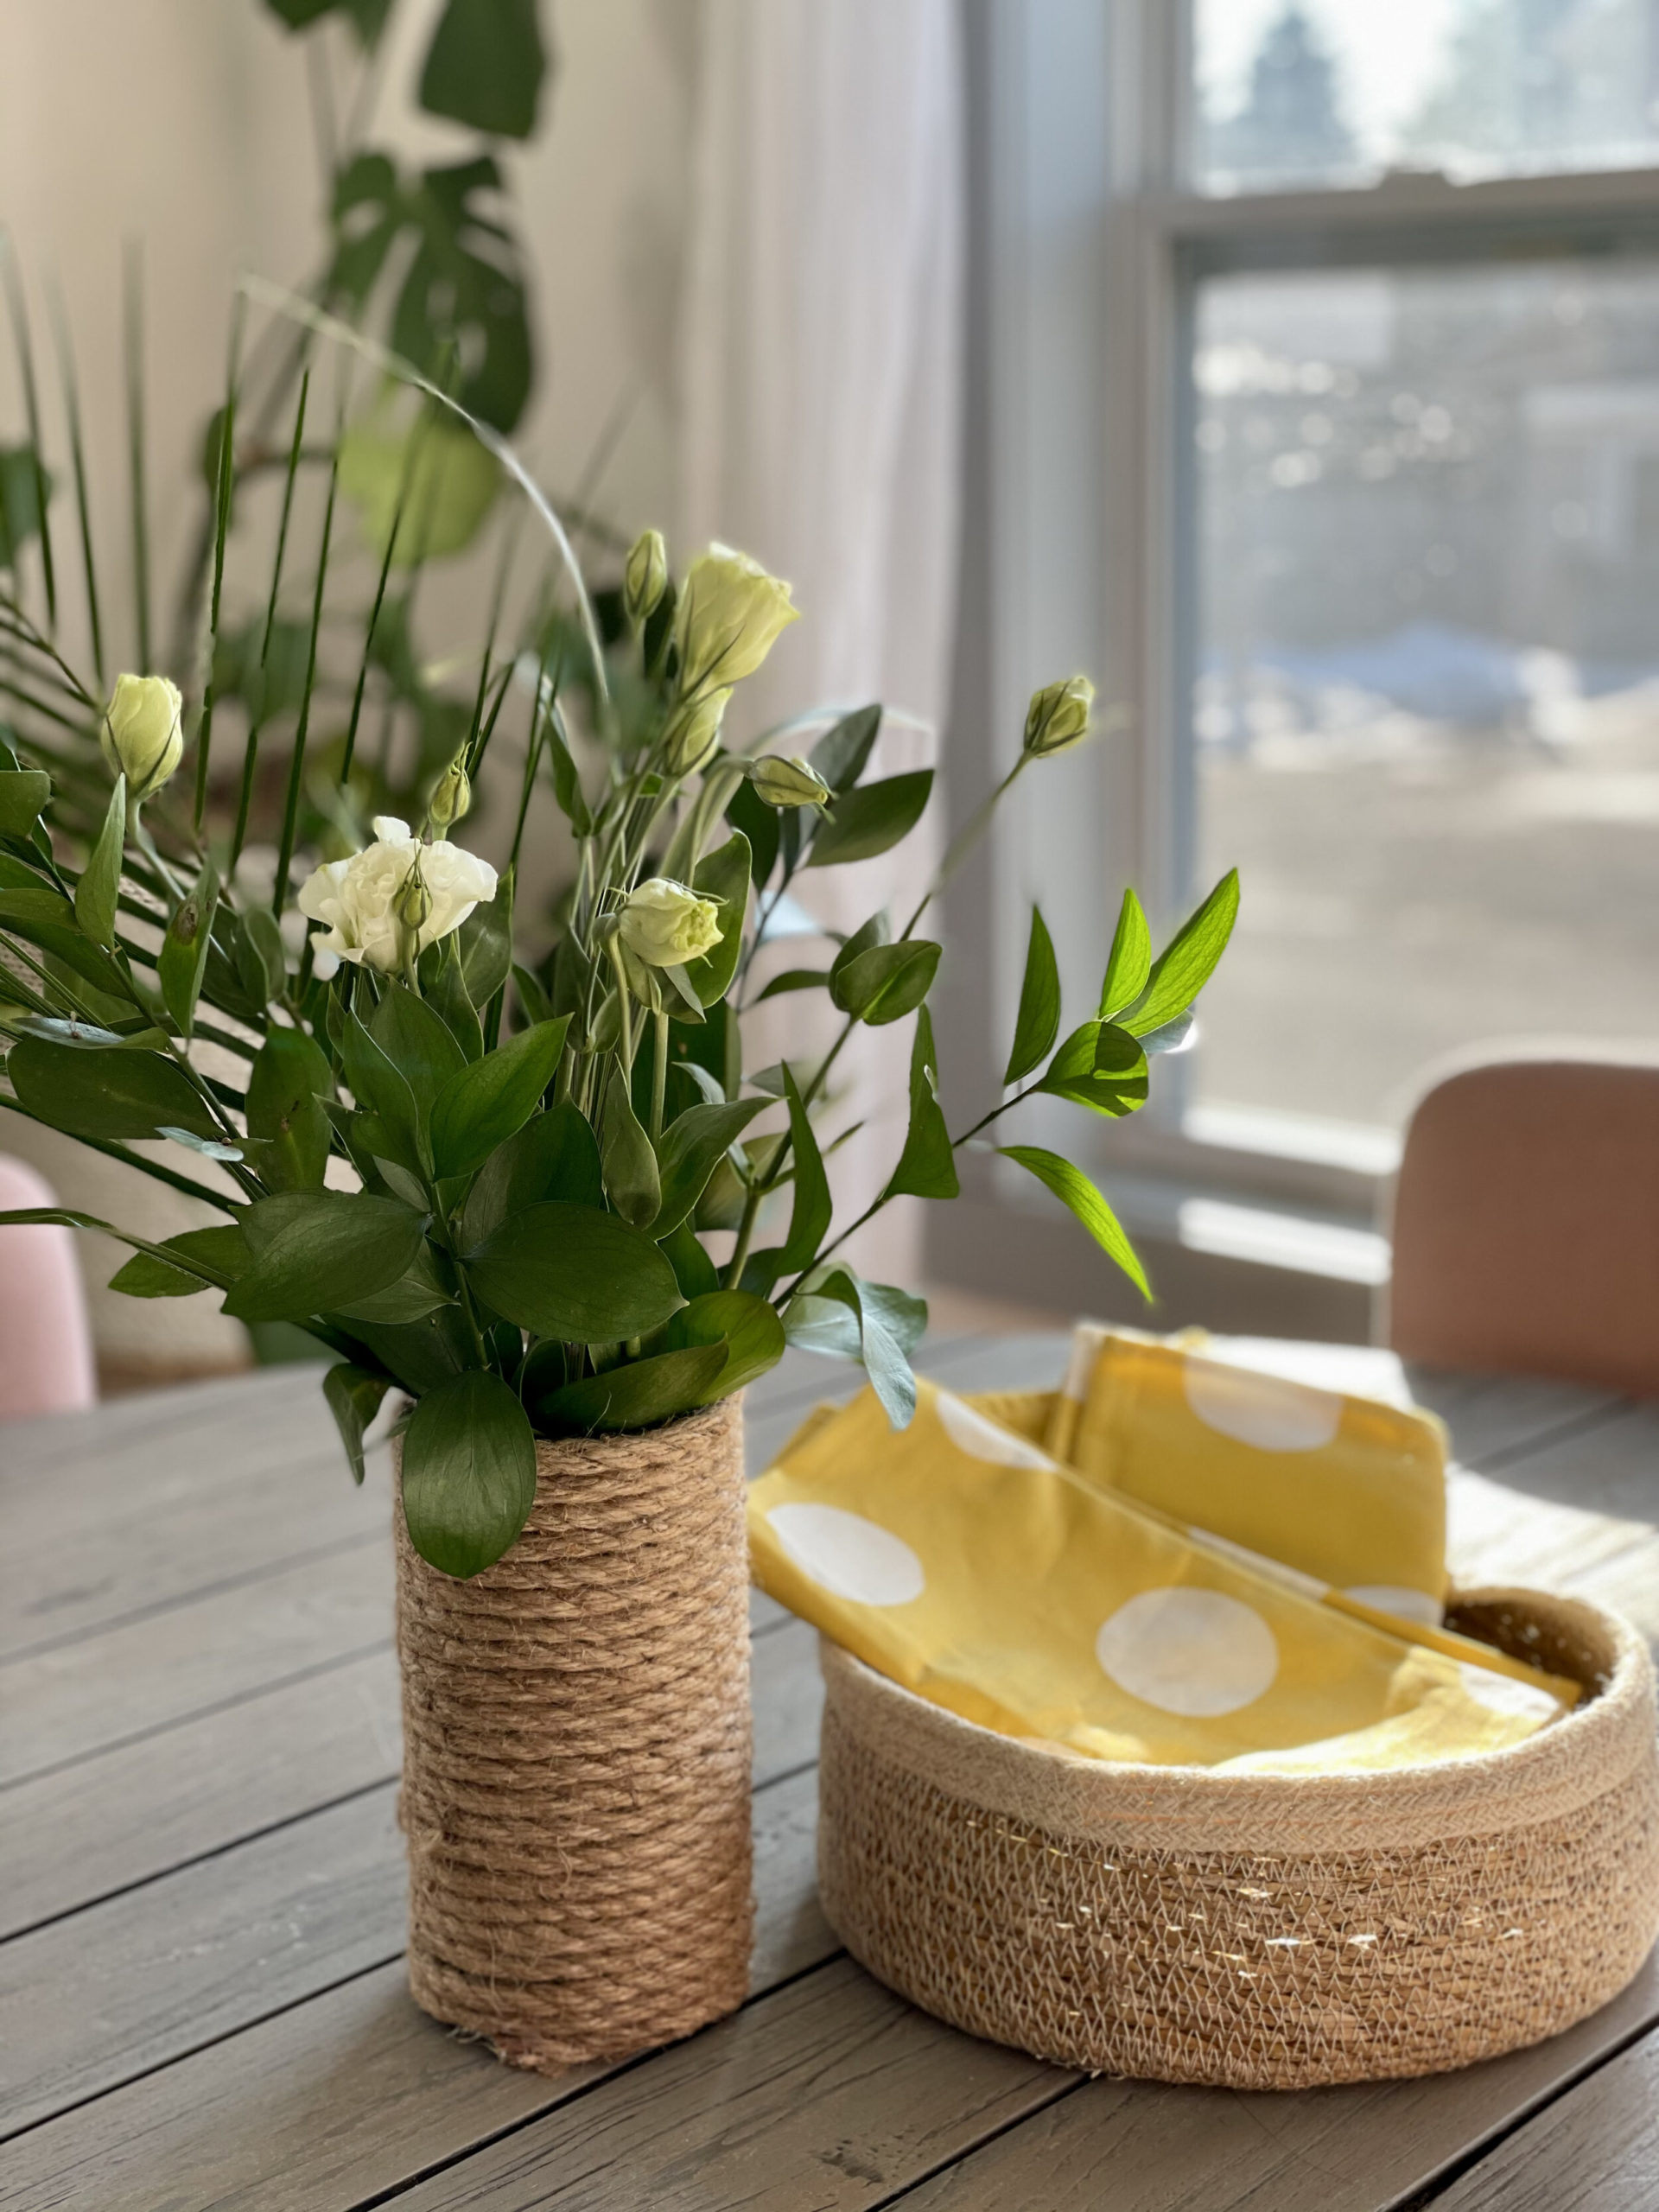
Coastal/Nautical Vase:
You will need:
Directions:
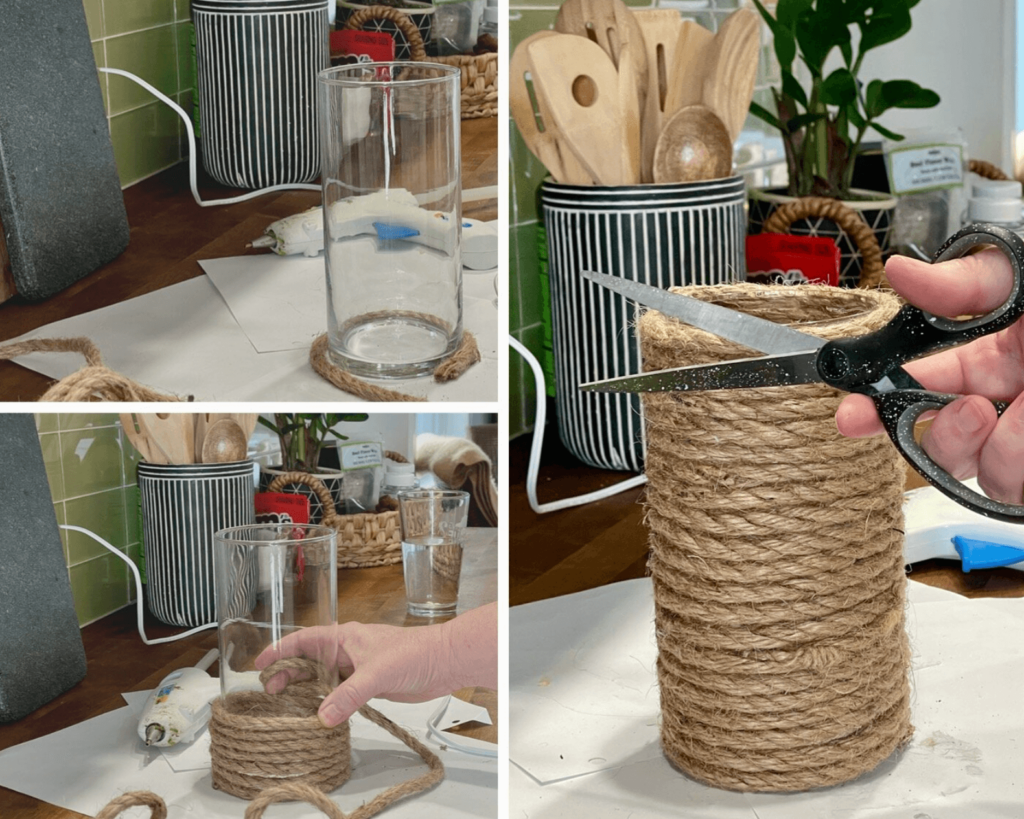
- Step 1- Wrap the Vase with rope to determine how much you will need to cover the whole vase. Cut.
- Step 2- Begin at the bottom of the vase, gluing your way around and up. As you go along, make sure the rope is snug without being tight. This will prevent the glass from showing through.
- Step 3- Cover both ends of the rope with hot glue so they do not unravel. Just a tiny dot will do.
- Step 4- Use scissors to trim off and tidy up any excess rope.
- Step 5- Add flowers and stand back and enjoy!
Tip: The vases I am using are from the Dollar Store and cost $1.25 each. Dollar Tree also has cylindrical vases so you can check both places for the best price. The vases I am using are left over from my oldest daughter’s wedding that we hosted in our backyard. If you’d like, you can see that here.
On to vase number three.
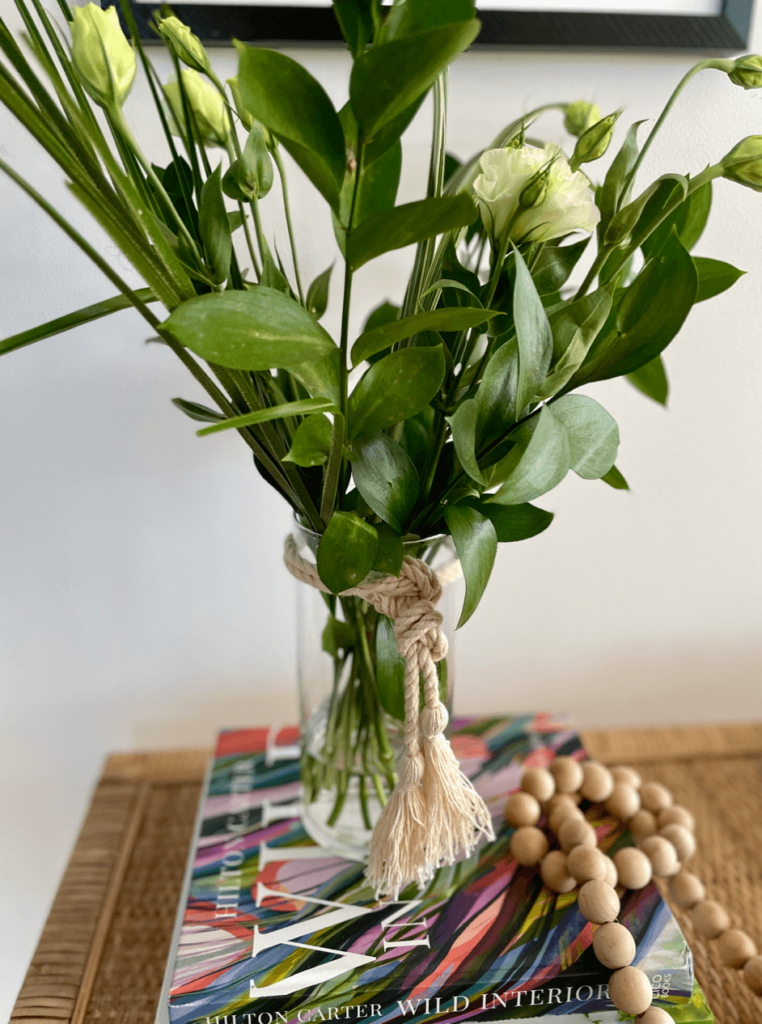
Boho Style Vase
What you will need:
- Tassel Cord
- Glue Gun-dual Temp
- Scissors
Directions:
- Step I- Wrap the cording around the vase. Center the ribbon where you want it.
- Step 2- Tie two knots in the cording
- Step 3- Glue in place!
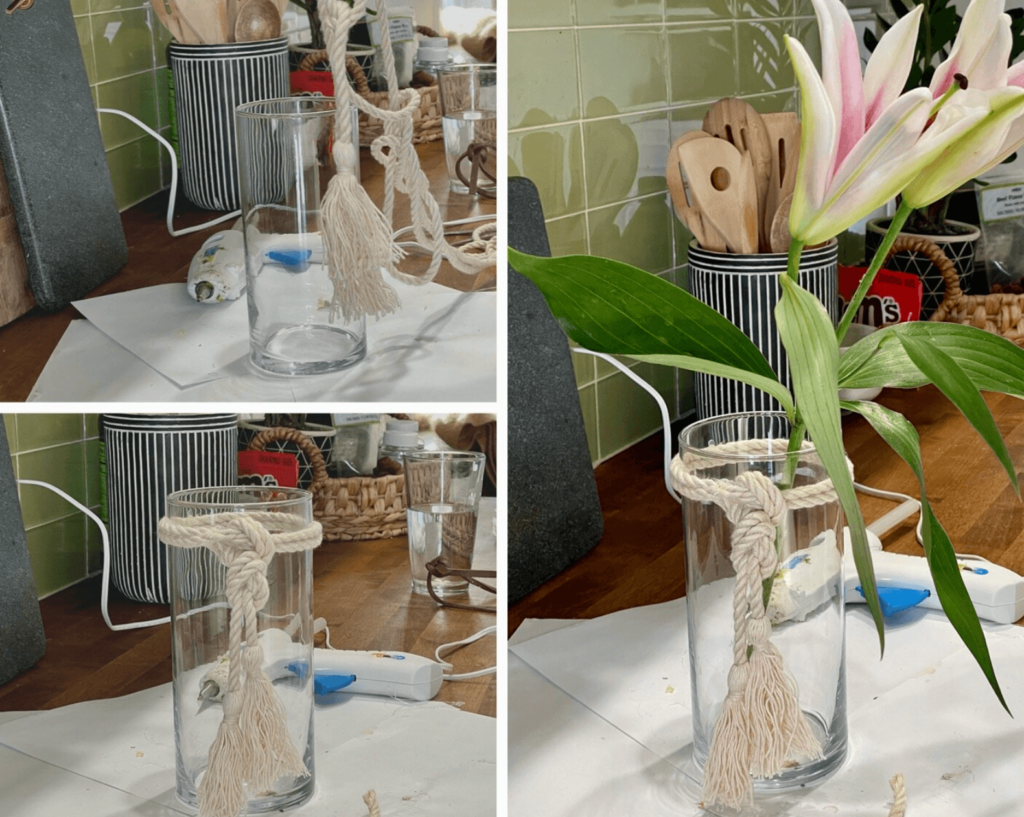
Easy right?!? I love the rustic charm.
Tip: I played with the cording to get it right where I wanted it, and I glued the knots so they won’t come undone.
I told you these were easy! But even more importantly, they look high-end.
Now on to the easiest dollar store vase hack yet. I once did this for bridal shower centerpieces and then gave them as thank-you gifts for the guests, and they were a huge hit; plus, it was so simple!
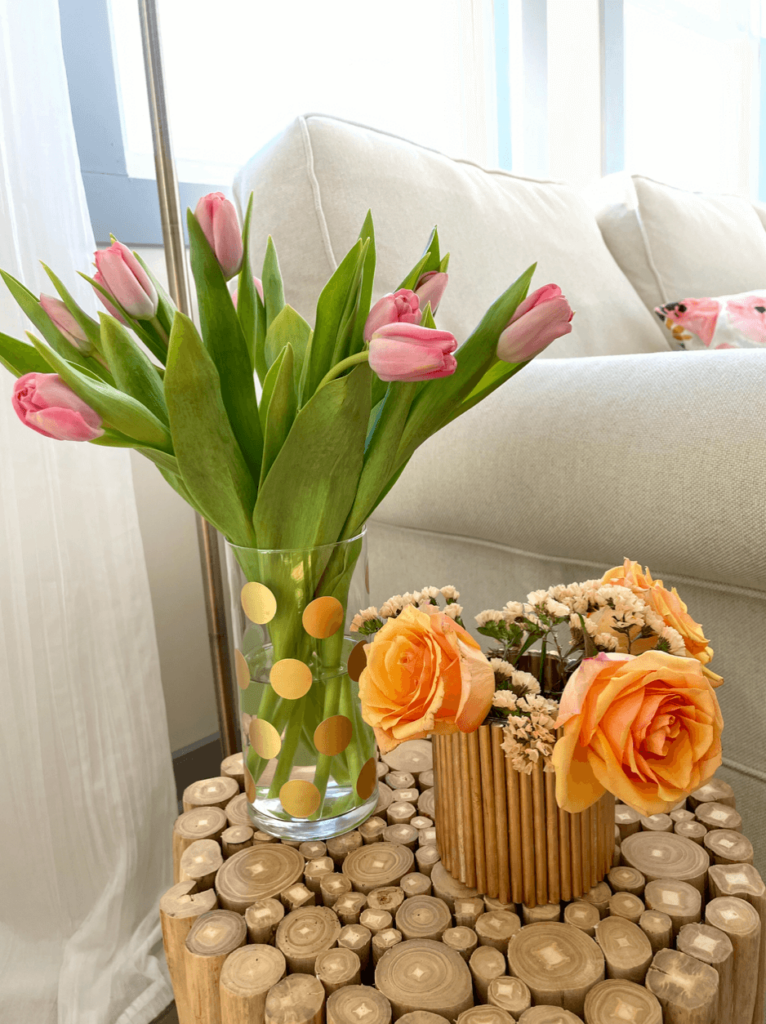
Glam Chic Style Vase
What you’ll need:
- Gold Polka Dot Stickers
- Glass Vase
Directions:
- Step 1- I just put the stickers on in a pattern. I was not careful to make the perfect. Talk about a glow-up for your dollar store vases, right?!
- Step 2- Insert flowers, and admire!
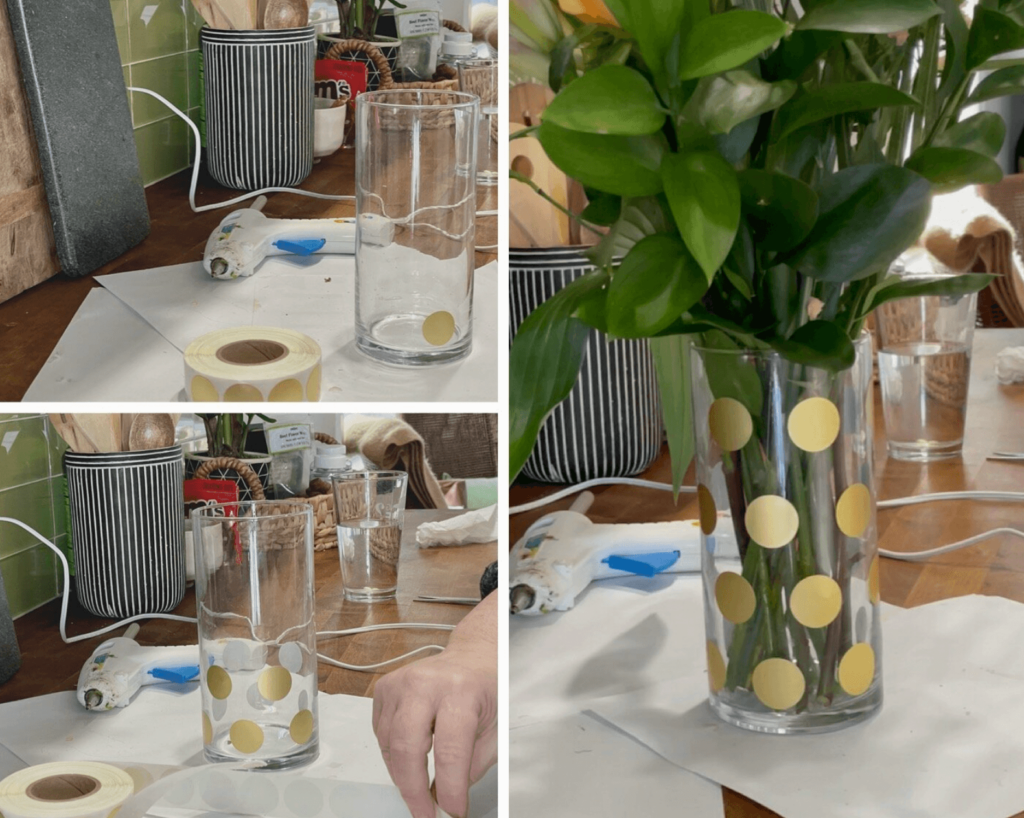
You could also spray paint the vases before adding your stickers.
Tip: The stickers I used are very sticky, so if you put one where you don’t want it, you may have to use glue gone to remove it.
And now for my personal favorite:
Nature Inspired Moss Vase
What you Need:
- Bag of Moss
- Glue gun
- Dollar store Vase
- Scissors
Directions:
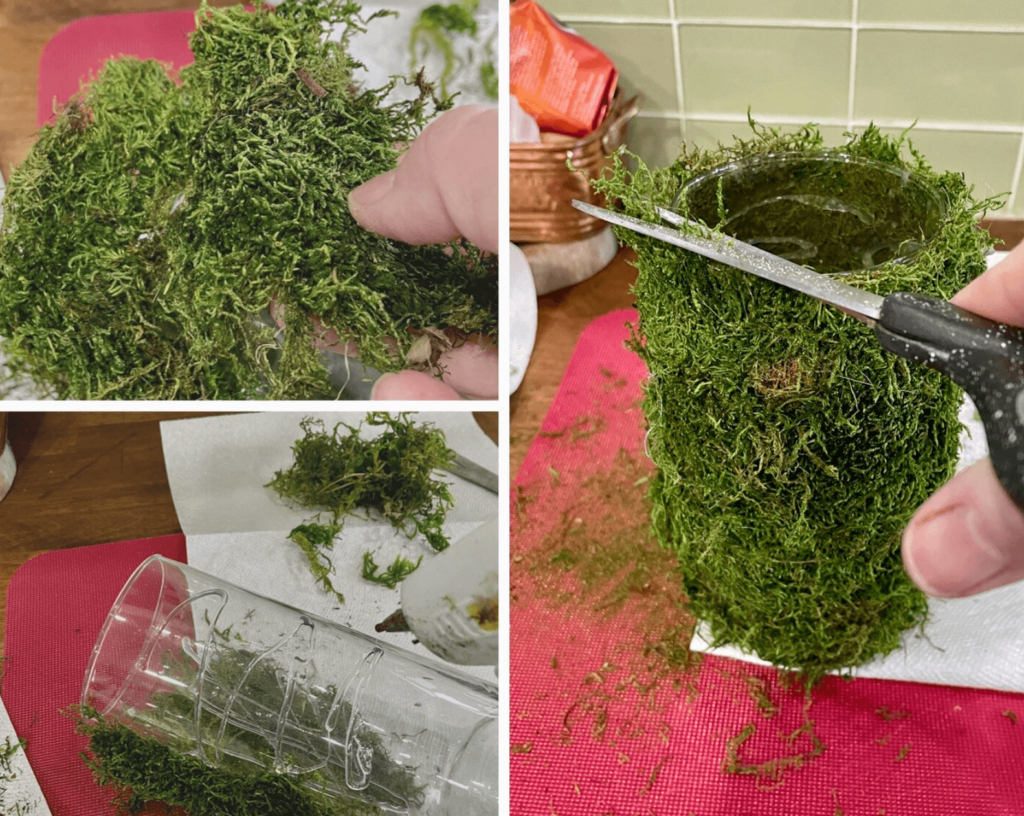
- Step 1- Pull your moss out and separate it into thin strips. You will want the moss to be uniform in size.
- Step 2- Start gluing the moss onto the vase. Be careful not to burn your fingers!
- Step 3- Fill in any holes or spaces.
- Step 4- To tidy up your vase, trim the moss.
Add your favorite fresh-cut flowers!
Tip: I rolled the vase to flatten it a bit when the glue was dry to flatten it out a bit.
I hope I’ve inspired you to do something with all those glass vases you have collected!
Until next time,
-Libbie
You may also like:

They are all gorgeous the dowel and the moss are my favourite.
I do love a good moss project! 🙂
Super cute! I didn’t even think of using stickers … what a great idea! I’ll have to try some of these!
Meriah,
I can’t believe how well it’s held up. I find myself grabbing for it often!
These are all such creative ideas! I am definitely going to try a few of them. The moss especially…my word, who would have thought? Obviously you and not me! Ha ha!
Marieza,
How sweet of you! xx
Oh my goodness these are such great ideas. I have a number of glass vases from Yankee candles that I repurpose to hold items. These ideas are perfect for me to do with them! Thank you!
This may very well be one of my most favorite posts ever! I love dollar store crafts, and I have a thing for re-doing these glass vases!!! You gave me so many new ideas! These all look so good!!!
These are really useful ideas. Thanks so much for sharing your great instructions and ideas.
I love these ideas; so simple, yet it really elevates these plain ‘ol vases!
These are all so beautiful that it is hard to choose a favorite! Thank you for the inspiration. 🙂
Oh wow!! They all look so fantastic, thanks so much for sharing!
LOL, I had a quiet chuckle to myself, Libbie. As you were sharing each makeover I kept on thinking "Well it can’t get better than this" and then it did. Absolutely love the moss one. So beautiful
Michelle, what a sweet comment! Thank you.
This is so cute, love the ideas specially the green one..
Moss for the win!
These are all so pretty! I think the Glam chic style is my favorite.
It’s the power of the polka dot! 🙂
These turned out beautiful. I just happen to have a few vases I can try this on. I never seem to be able to throw them away.
I feel you! I had soooo many!!
Love this! The polka dots are so fun. And the moss is perfect for spring!
I believe gold polka dots make everything better!
Love them! Great ideas!!!
Thank you, Melissa!
My goodness, I love this post! I’ve thought of one of these creative ideas and that’s it! Thanks for posting and linking up at the Farmhouse Friday Link Party. We are featuring it on Friday and have pinned it. Hope you join us again.
Sorry! This is Cindy@CountyRoad407 🙂
I love all of these ideas and I couldn’t help but notice all the sweet side tables you have to display your vases. Thanks for linking up to Creatively Crafty #ccbg 🙂
I love linking to your party! Such beautiful inspiration each week.
Such good ideas, and so doable! I love this post!
Thanks so much for joining the Grace at Home party at Imparting Grace. I’m featuring you this week!
Thank you, Richella!
All great ideas Libbie! Love them.
Thank you for sharing these easy projects at Create, Bake, Grow & Gather this week. I’m delighted to be featuring them at tonight’s party and pinning too.
Hugs,
Kerryanne
Thank you my friend!
Libbie,
I love these ideas. I’d like to share on my Sunday, Dirt Road Adventures with a link back to your blog of course.
Thanks so much.
Rachel,
I would be honored! Thank you!!!
Great ideas and easy to do! Thank you.