
Hello!
Today I am sharing a quick and easy DIY we did in the Airbnb. I recently added some warmth to our TV niche with a wood shim accent wall!

DIY Wood Shim Accent Wall
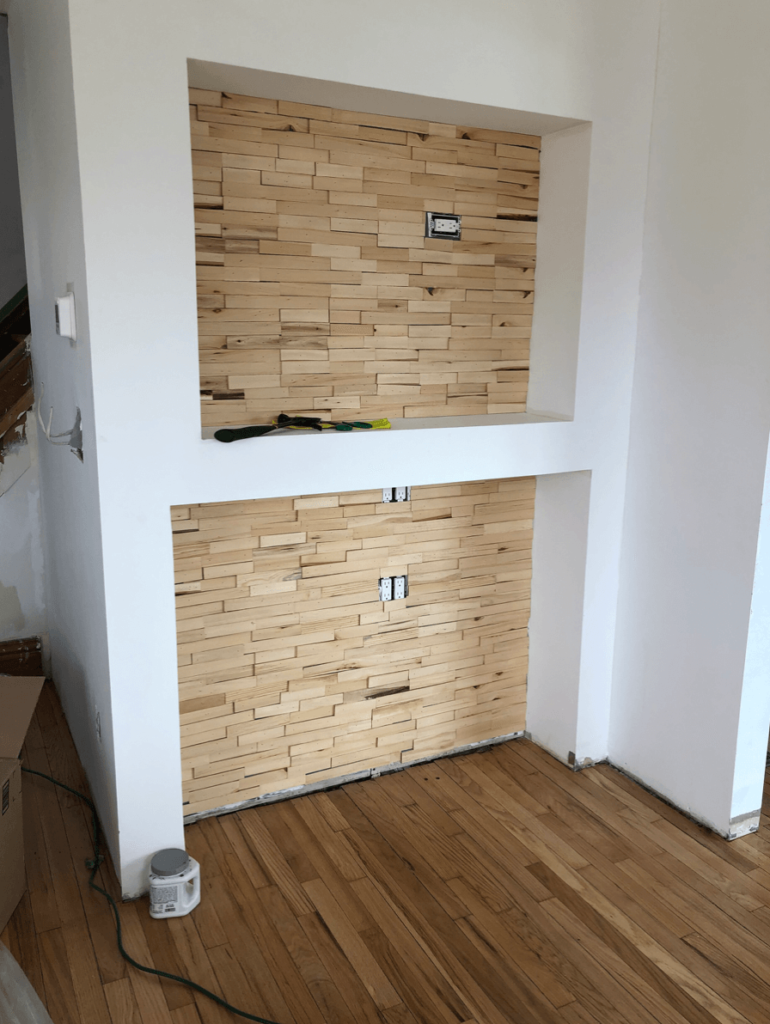
We inherited a rather empty and cold TV niche in the Airbnb (not complaining as I looked at it as a blank slate).
A quick reminder this was a distressed property that we bought on Auction.com and was filthy when we got it.
You can see the entire Reno here.
If you are a regular here (and I hope you are), you know, I love a good DIY accent wall!
You can see another of my favorite accent walls here
Prepping the wall
Before I decided on an accent wall, the plan was going to paint the inside walls with SW Naval as the downstairs of the space was going to be filled with blues and greens.
That idea went by the wayside when I ended up painting the bar area located to the right instead.
I thought a wood element would warm the room up nicely, then I remembered that I had ordered waaaaay too many shims from Home Depot (we are taking advantage of curbside service during the pandemic), and I had ordered 10 packages of extra-long shims instead of one.
BINGO!
So instead of returning the extra shims, I thought I would use them up.
We began with cutting five packages in half to give us a variety of lengths.
I then painted the back of the niche so that if any areas showed through the shims, it would not be white.
I used the SW Naval paint I had on hand.
We then capped off some of the random holes left for cords.
Next, I dragged out our trusty Pneumatic nailer and some wood glue.
Adding the shims
I began nailing from the top (knowing the TV would cover any mistakes) and worked my way down.
Overlapping the shims as I went.
I also choose any pieces that had knots or irregular grain so that they were in places that would show.
I liked the character and warmth the wood shims add.
Because my sizing was off, each row needed one shorter piece that I cut to size at the end.
A few pieces around the outlets needed a touch of glue because they stuck out a bit.
You can see below some of the blue peeking through in the picture below.
Ta Da!
Finished shim wall.
I ended up capping off the outlets in the bottom half and shimmed over them.
We don’t need them at the Airbnb, and they can be removed if the next owner of the home wishes.
Staining the Shim Accent Wall
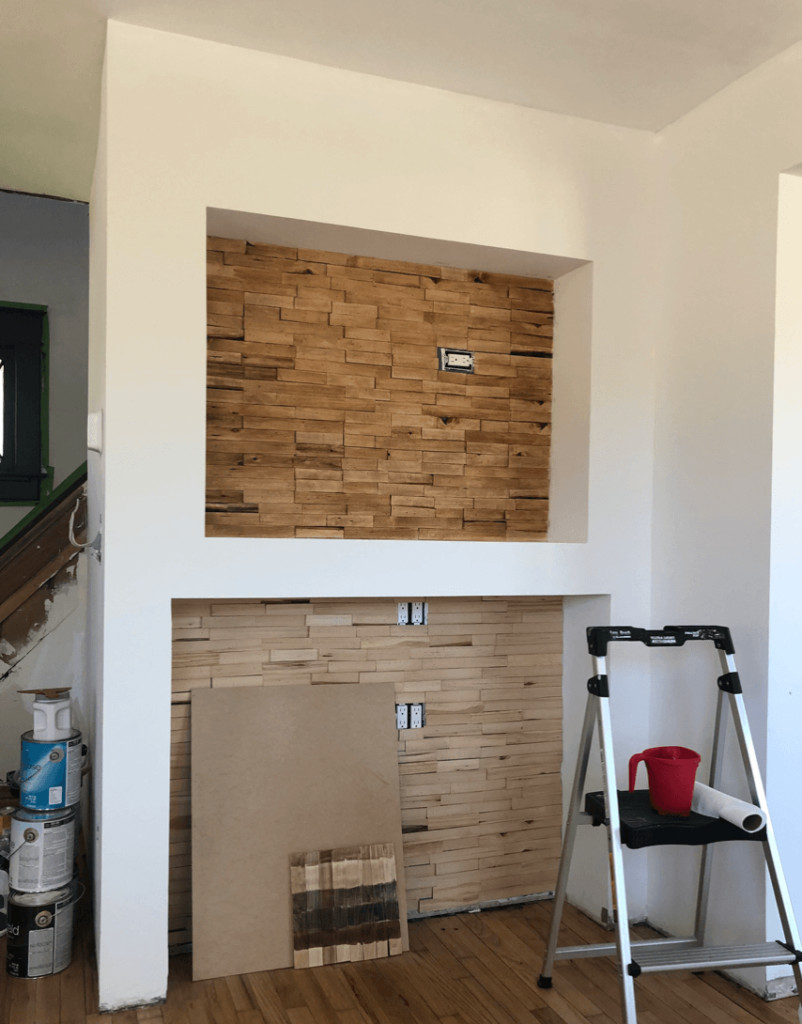
In the end, I decided on staining the shims.
I had leaned toward painting or whitewashing them when I started.
But I do love the warmth of wood.
So I stained them with Minwax stain weathered oak.
Here are a few words of advice- basically, what I would do differently 🙂 in case you are thinking of making your own shim project.
First, I would have stained the shims before attaching them to the wall.
Staining after is so much more time-consuming!
I would also paint the wall behind to match whatever color the shims will be- maybe a light brown instead of the blue.
But, since I wasn’t sure what I wanted the final project to look like I lived with it for a bit before I figured out what I wanted.
Finished Wall
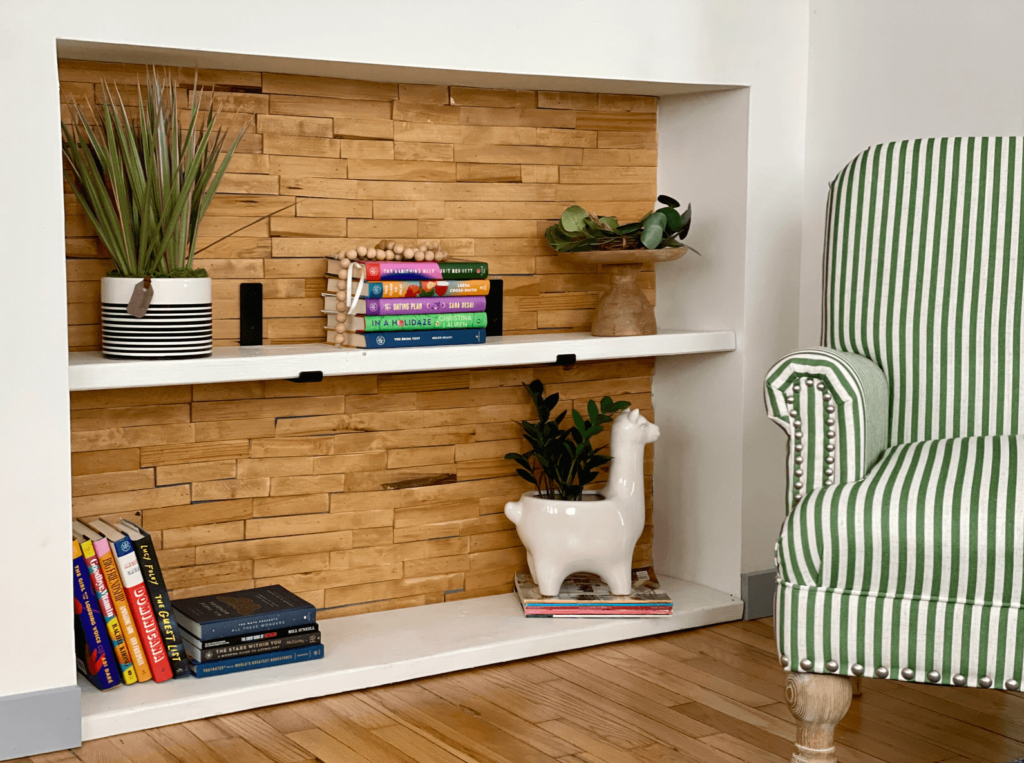
I LOVE the added warmth this DIY Wood Shim Accent wall added.
I love how the shims added so much warmth!
We finished the bottom (on the floor) with a painted board cut to size and then added another board so we could have a bookshelf for books and games.
Adding Shelves
I lived with it for awhile and decided to add a shelf.
The black 10 inch shelf brackets I ordered from Amazon and attached with wall anchors.
Quick, easy, and inexpensive DIY’s are my favorites!

Until next time,
-Libbie
RELATED POSTS YOU MAY ENJOY:

Oh, this is really lovely. The texture it adds is wonderful.
Texture is my love language! 🙂
What a difference in that space! Warms it up and very welcoming.
Thank you, Linda!
Quick, easy, inexpensive and sooooooooo gorgeous 😀 What a brilliant idea.
Michelle.
You’ve made my day!!! 🙂
I love a beautiful accent wall. This one is beautiful and useful.
🙂 Thank you Deana!!
This is gorgeous!!! Such a great idea.
Thank you, Amy!
This is absolutely gorgeous. I love the look and it goes great in your home. This project is just up my street. I will be having a go at this.
Thanks Anita! It’s always the small projects that make me the happiest!
Fabulous look!
Thanks!
That looks so great! Visiting you from the hearth and soul link up. laurensparks.net
Thanks Lauren, love Hearth and Soul! xx
Such a fun and creative DIY project, Libby. I just love the texture and detail. Thanks for all the inspiraation.
Thank you, Meegan!
Wow, this wall is gorgeous! I love that it matches the floor. So cool! Pinned
Thank you, Kim! xx
How lovely this is. The accent wall is a wonderful addition. I am happy to feature your wood skim accent wall at Love Your Creativity on Sunday. Happy Valentines.
Thank you, Linda! I’ll be sure to stop by. 🙂
I’ll be featuring you! Thanks for sharing with us at the To Grandma’s house we go link party!
This is awesome!! Beautiful!!
Thank you, Julie!
Simply AMAZING! You’d never know that wall was covered in shims! I’d love for you to join us over at the Creative Crafts Linky Party every Wednesday through Sunday
https://creativelybeth.com/creative-crafts-linky-party-29/
Followed and Pinned! 🙂
Creatively, Beth
This is absolutely AMAZING. I love a wood accent wall, but to create one with shims? A great WOW factor while being easy on the budget!
Thanks so much for joining the Grace at Home party at Imparting Grace. I’m featuring you this week!
This project is amazing!!! I am thinking of walls in my home that would be perfect for a shim wall! Thanks for sharing! BTW, I found this post as a feature in the Charming Homes and Gardens link party!
Wow, this is gorgeous! What a great idea for an accent wall and especially one with a television. Thank you for sharing it with us at the Snickerdoodle Party. I will be featuring you this weekend!
What a wonderful idea! I love it! It turned out so great!
So pretty! Great diy!
It definitely adds warmth! What a clever idea.
Oh I love this! What a smart idea to use shims, and so budget friendly!!! What would you estimate the cost of this project to be (if you had to buy the shims?)
This looks so great! I also LOVE that chair!
This is beautiful! I’m in love! Thanks for sharing on Traffic Jam Weekend with Life as a LEO Wife! Like I said on your cedar wall post, you have to share this with our DIYers on Happiness is Homemade at https://LifeasaLEOWife.com! This turned out so great!
Thank you so much!