
Hello everyone! So, I wanted to share what we’ve been working on lately – specifically, choosing porcelain tile for the back entryway and mudroom! When we first bought the St Joseph house, that old indoor/outdoor carpet by the back door definitely had a certain… smell… you know, a lovely lingering mildew smell? Yeah, I was not a fan. So, a tile project became the obvious answer, and I’m excited to tell you all why we landed on porcelain tile for this space and how much I’m loving the finished look

Choosing the right material for a high-traffic area, like our back entryway and mudroom, was crucial. We were pretty sure we wanted tile. But also considered LVP options. Once we pulled up the carpet (and oh my gosh… it was DEFINITELY the source of the smell), we found relatively flat concrete underneath, which was the best case scenario as it made us confident we could DIY the tile ourselves.
We ultimately landed on porcelain tile for the project, and here’s why, along with a few things to consider when choosing tile for a high-traffic space like our back entryway mudroom space.
1. Why We Chose Porcelain Tile:
Pros of Porcelain Tile:
- Durability: Porcelain is incredibly dense and hard-wearing. It can withstand heavy foot traffic, dropped items, and even the occasional muddy boots without chipping or scratching easily.
- Water Resistance: This was a major factor for us, given the mildew smell we encountered with the old carpet. The house is also located in a beach community, so wet flip-flops in the summer and muddy boots in the winter will be a regular occurrence.
- Stain Resistance: The non-porous nature of porcelain also makes it highly resistant to stains from dirt, mud, spills, and other common entryway mishaps. Cleanup is usually as simple as wiping with a damp cloth.
- Longevity: Properly installed and maintained porcelain tile can last for decades, making it a cost-effective flooring solution in the long run.
Cons of Porcelain Tile:
- Coldness: Like other hard surfaces, porcelain tile can feel cold underfoot, especially in colder climates. Not really a problem for us in this small area.
- Hardness: While its hardness contributes to its durability, it also means that dropped items are likelier to break on a porcelain tile floor.
- Pricey: We found our tile at Wayfair, and it was quite affordable!
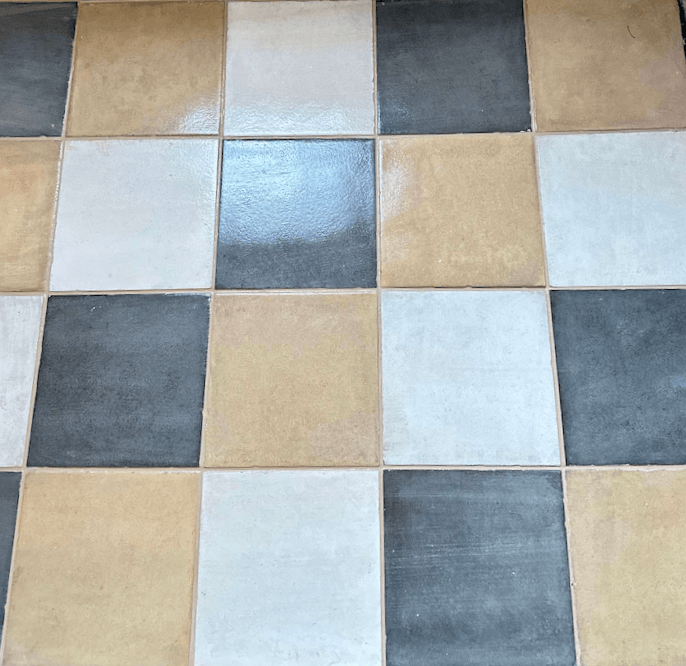
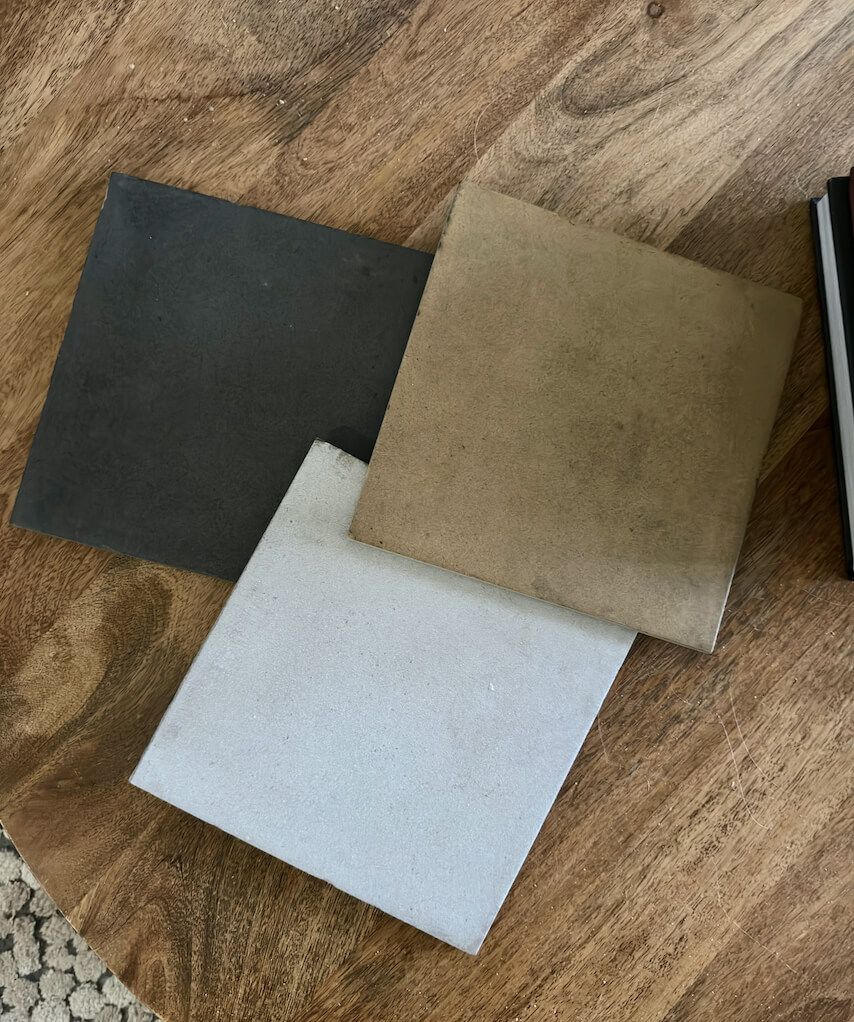
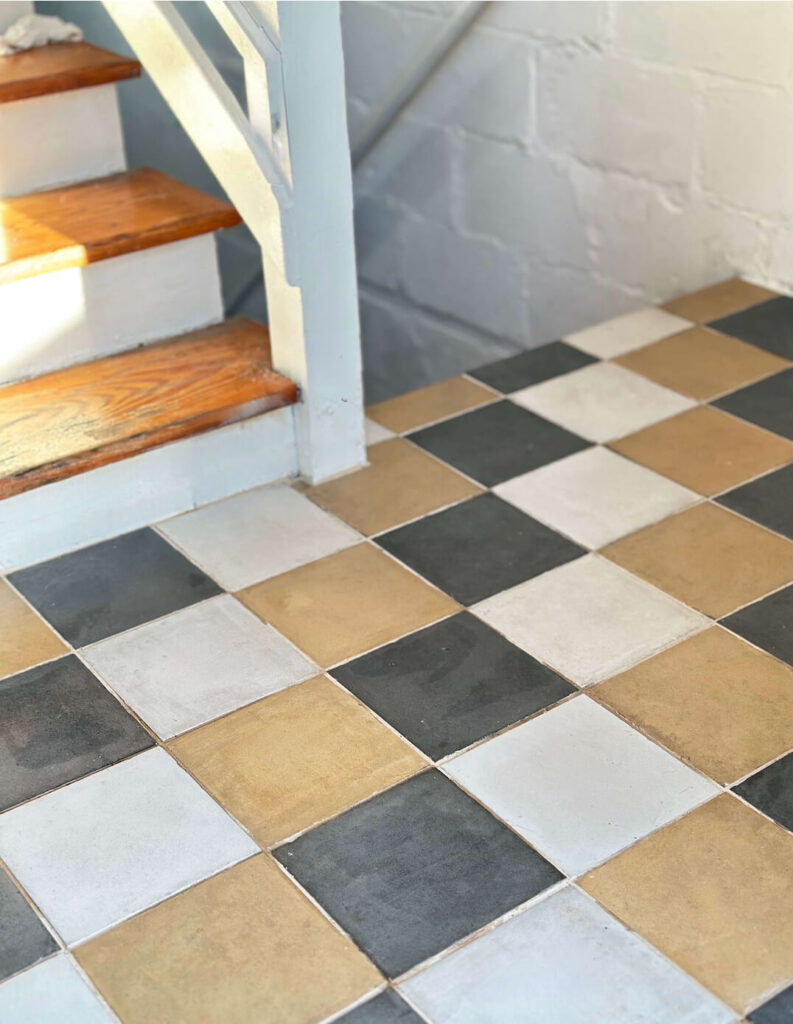
We really wanted to save costs on this project, so our number one priority was to find a flooring option that we could install ourselves. I love a checkerboard pattern, and it felt appropriate for the home’s age, so I started looking at that. Then, I found the three-color 8 x 8 Porcelain combo above, on Wayfair, which is called Talco, orca, and basalto, and I fell in love.
2. Porcelain Tile is Easy to DIY Install:
Prep Work:
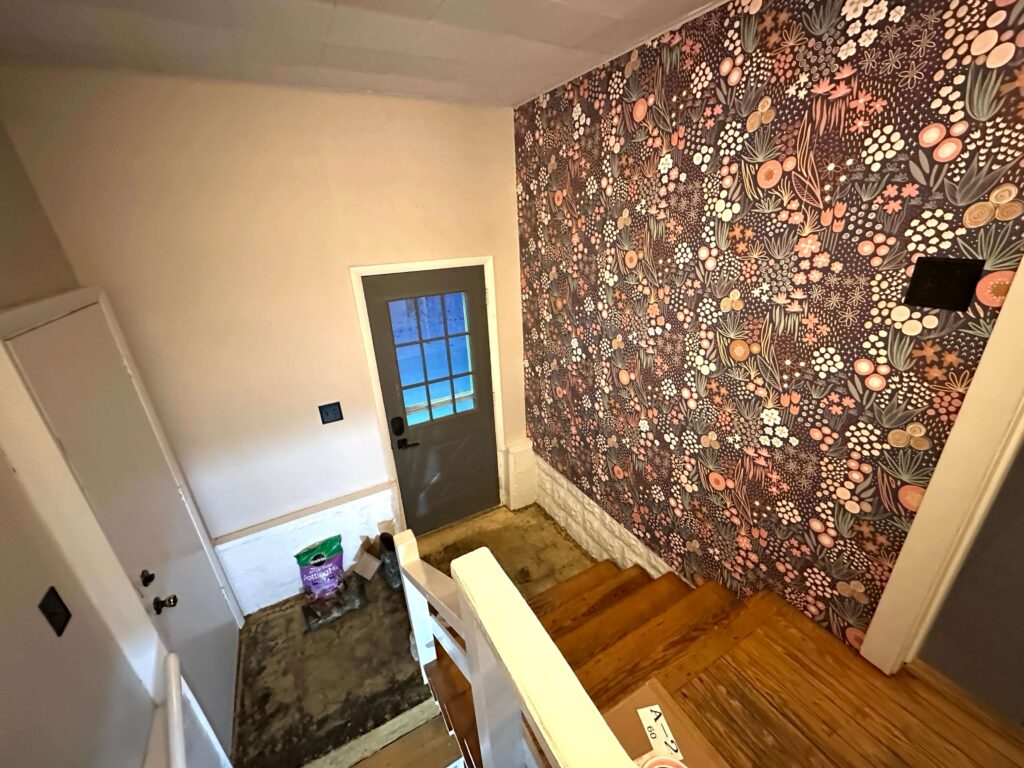
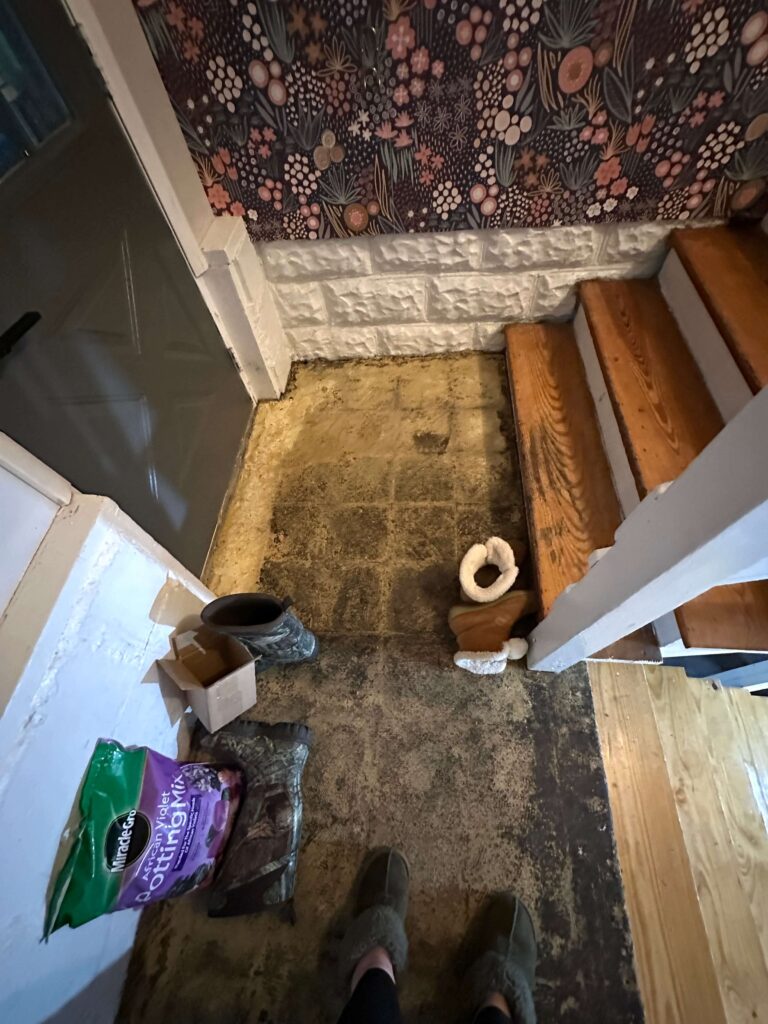
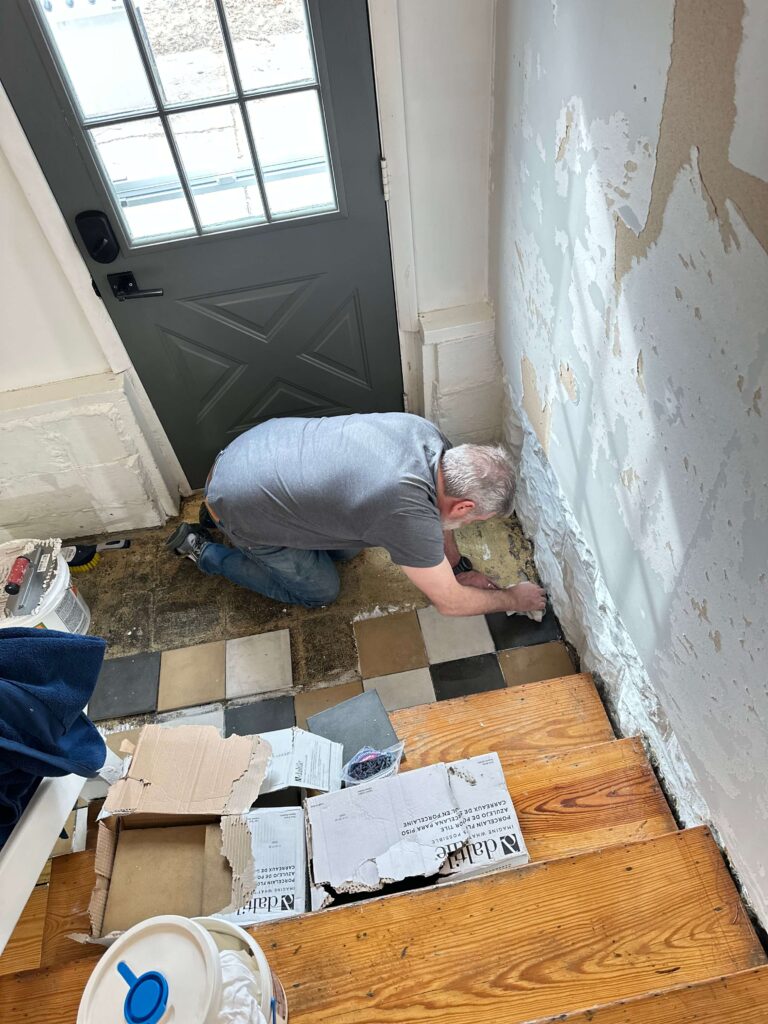
- Removed carpet and cleaned the concrete. Happy to find the concrete was in decent shape and did not need leveling. You can see the back entryway was an add-on to the house at one time. As that stone is an exterior wall.

- Planned the tile layout so we knew where the cuts would be.
- Gathered our tools.
Tools Needed:
- Thin-set/Mortar
- Trowel
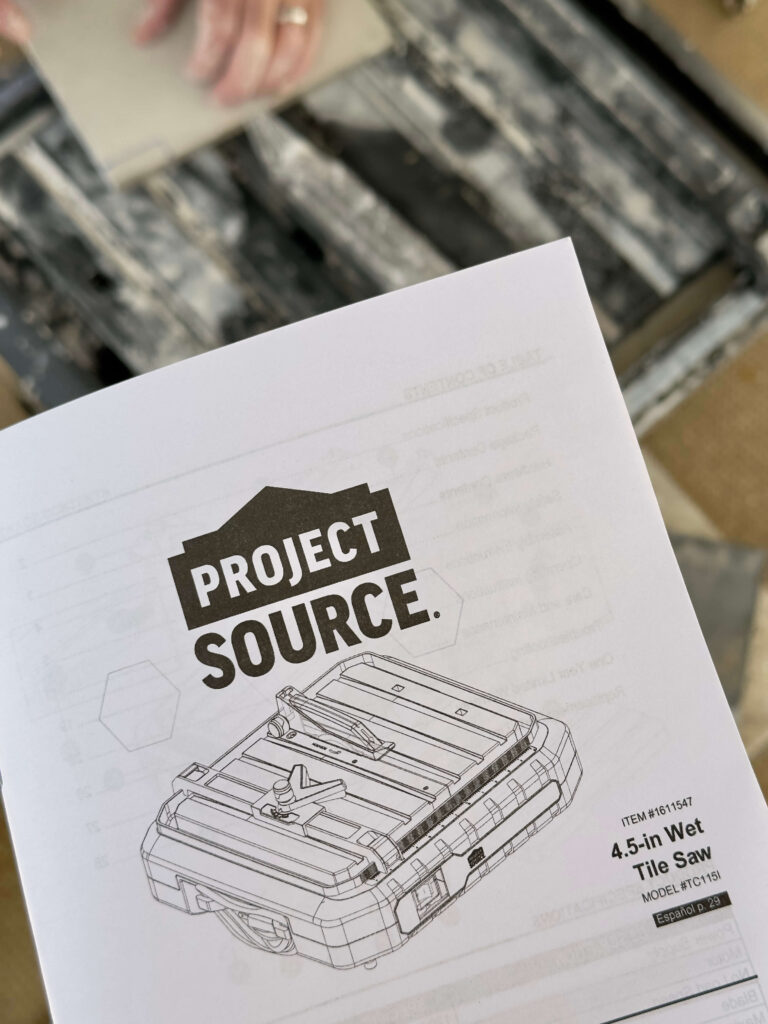
- Wet Saw– Inexpensive and did the trick!
- Tile Spacers
- Bucket
- Sponge
- Grout
- Grout Sealer
- Float
Laying the Tile:
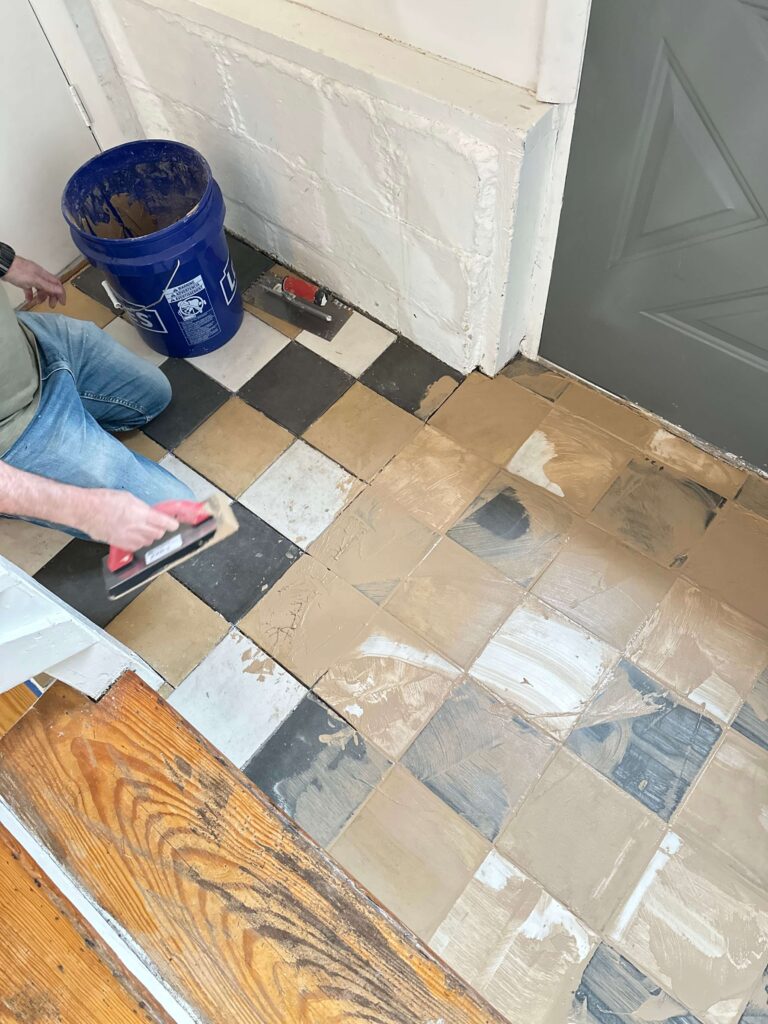
Mix your Mortar and when the consistency is soft and creamy, you are ready to spread with the trowel.
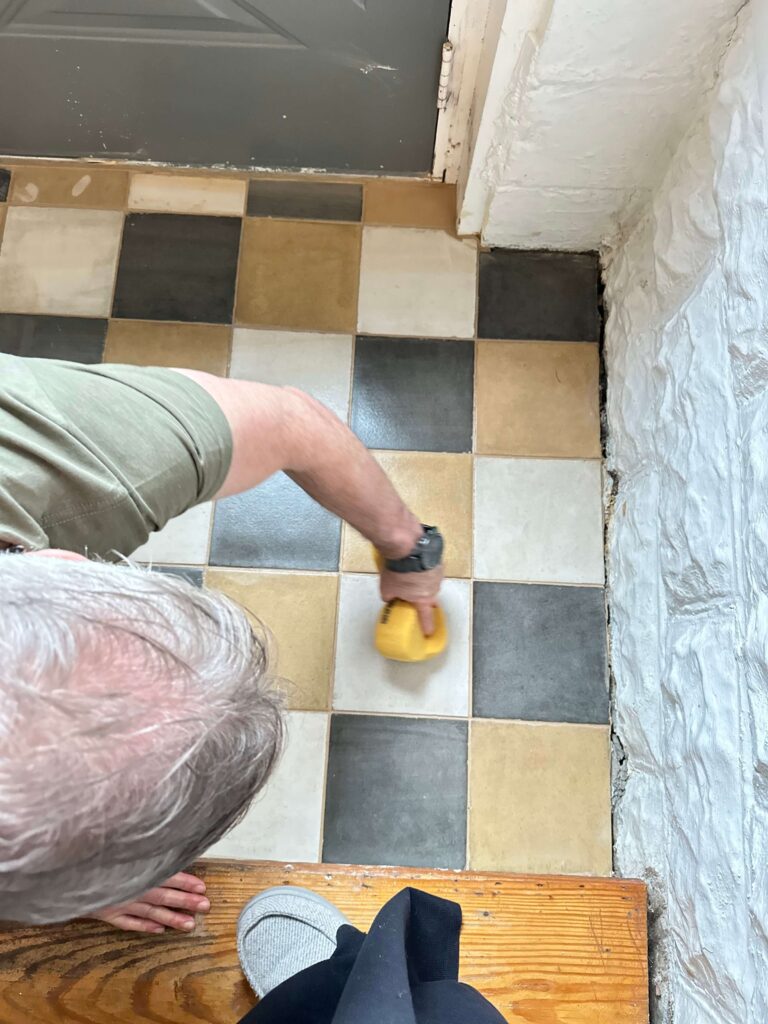
Spread the mortar with your trowel onto the concrete. Place your first tiles into place, and using spacers, continue your pattern in a row, making sure your tiles are level as you go. My husband and I worked together to make quick work on the project. Dave, on the wet saw, I measured the cuts and laid most of the tiles.
Once we worked our way through, we had gaps around the door frames and walls (that comes from having a 125 + home), and we are planning on caulk to fill the gaps.
After the tile was completed, we went over it several times with a damp sponge to remove the haze. Then, let the mortar dry for 48 hours.
While waiting for the mortar to dry, we searched for grout. Luckily, our neighborhood, Lowe’s, had a nice selection. I was looking for something mid-range in color so that it would hide dirt but not be too dark.
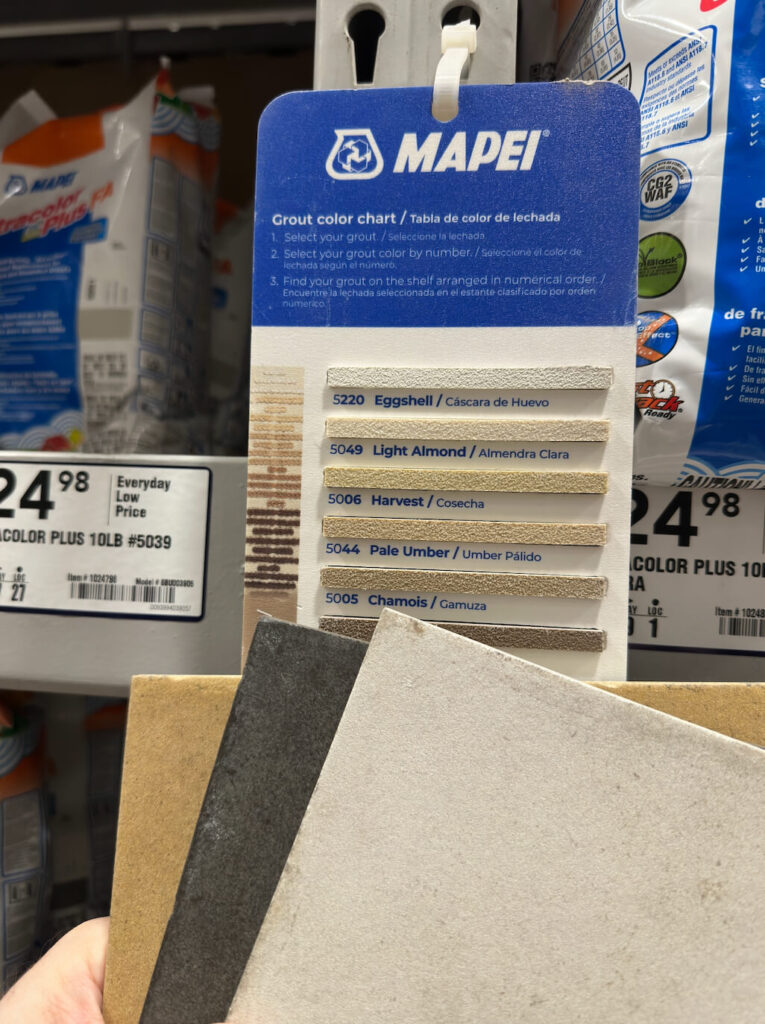
I went with the Pale Umber.
Once the tile was grouted, we sealed it (the house will be rented for part of the year), and I really recommend sealing the grout to help maintain it.
3. Care and Upkeep of Porcelain Tile:
One of the great things about porcelain tile is its relatively low maintenance (and why we chose it). Here are a few tips to keep your newly tiled entryway and mudroom looking its best:
- Regular Sweeping or Vacuuming: Regularly remove loose dirt and debris to prevent scratching the surface.
- Damp Mopping: For general cleaning, a damp mop with warm water and a mild cleaner is usually sufficient. Avoid using harsh chemicals or abrasive cleaners that could potentially damage the grout.
- Spot Cleaning: Wipe up spills immediately to prevent staining.
- Grout Maintenance: Periodically inspect your grout lines. If you notice any discoloration or mildew growth, you can clean them with a grout brush and a specialized grout cleaner. Sealing your grout can also help prevent staining and make it easier to clean.
We are absolutely thrilled with how our porcelain tile project transformed our back entryway and mudroom! Not only has it eliminated that lingering mildew smell, but it’s also created a durable, easy-to-clean space that can handle whatever we track in. If you’re considering a flooring upgrade in a high-traffic, moisture-prone area, I highly recommend choosing porcelain tile and giving DIY installation a try.
I am excited to be able to do this project along with this Spring’s One Room Challenge I love watching what everyone is doing with their spaces and how they are coming along!
Until next time,
-Libbie
You may also enjoy:
Cottage Kitchen Glow-up made easy: DIY a Glass Tile Backsplash.
