
Hey friends!
Do you remember when I wrote about the Kitchen backsplash DIY project I tackled at The Little Green Cottage a few years ago? At the time, I was actually working on two backsplashes. Well, I’m back with an update! On Both! This post is a review of the product Mussel Bound tile adhesive mat two years later. I’m thrilled to report that both backsplashes are still looking fantastic! Let’s dive into my thoughts with this innovative product and see how it held up in two different settings.

Pros of Using Musselbound Tile Mat Adhesive.
One of the biggest pros of using Musselbound adhesive tile mats is the ease of use. Even for a first-timer tackling DIY projects, this is a game-changer! Forget the bucket of mud and the messy thin-set adhesive.
Musselbound can be found at Lowes.
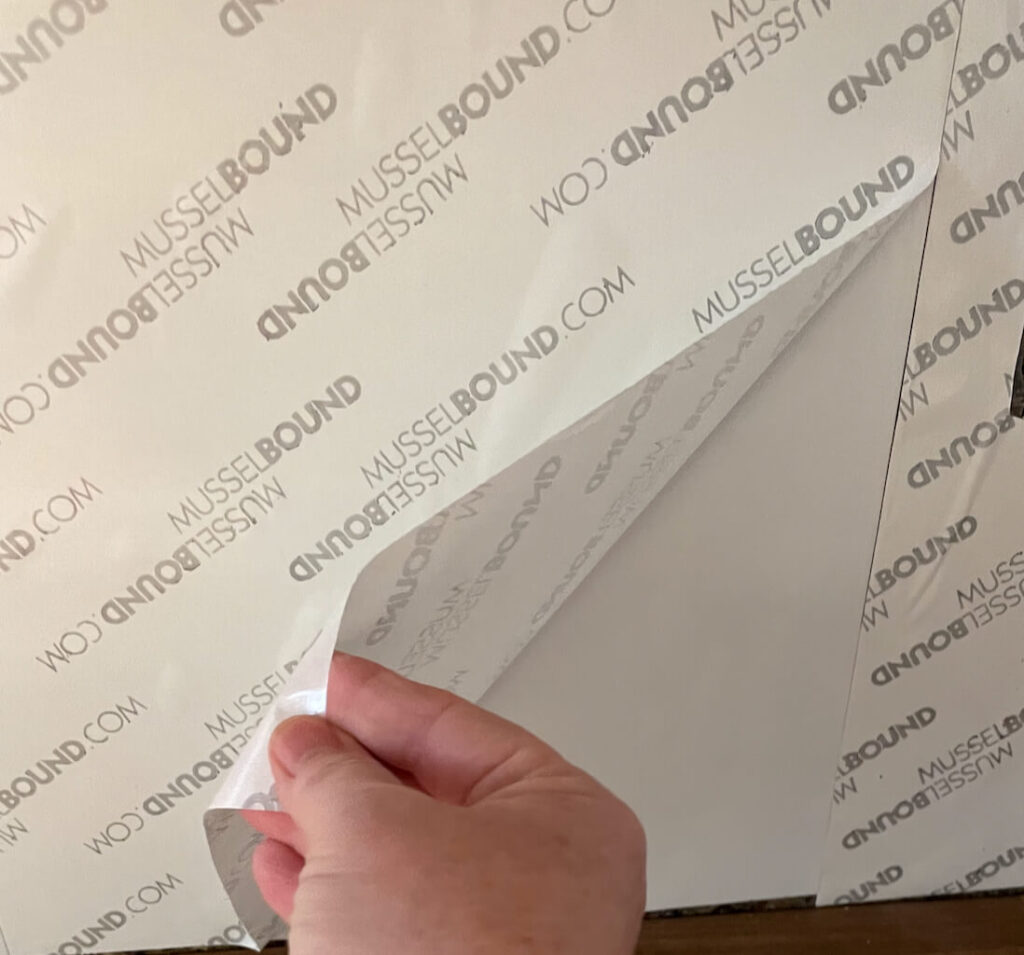
With Musselbound, you simply peel off the release liner and stick your wall tile to the adhesive sheets. It’s that easy! This makes tile layout a breeze and eliminates the messiness of traditional applying thinset mortar (and the drying time). It’s a really great product, especially for small projects. Plus, cleanup is a dream – no messy thinset to deal with! Not having a mess to clean up after a tile project is a very big plus. :-
Cons of Using Musselbound.
Honestly, the only con I can think of is the cost. Musselbound adhesive tile mat is a bit pricier than traditional thinset mortar. However, for me, the convenience and time savings, especially on smaller DIY projects, more than make up for the extra cost. If you are looking for a quick and easy way to add the beauty of new tile to your home decor, this is a great product.
Tips for Installing a Backsplash with Musselbound.
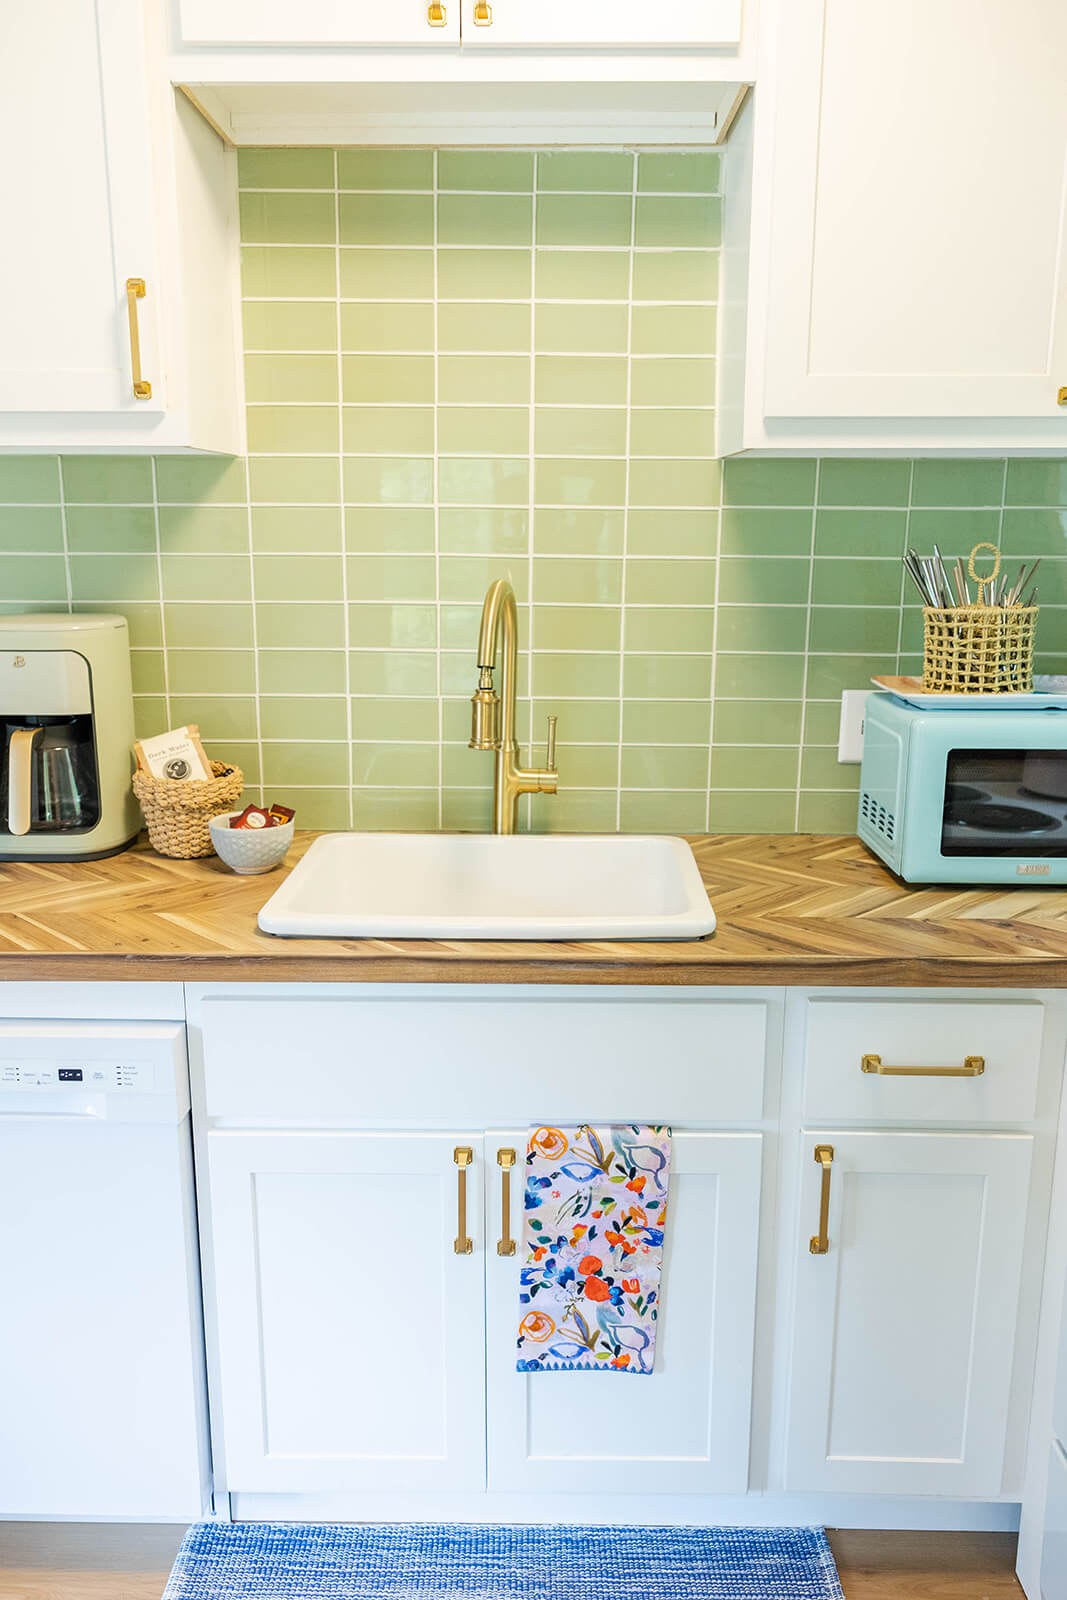
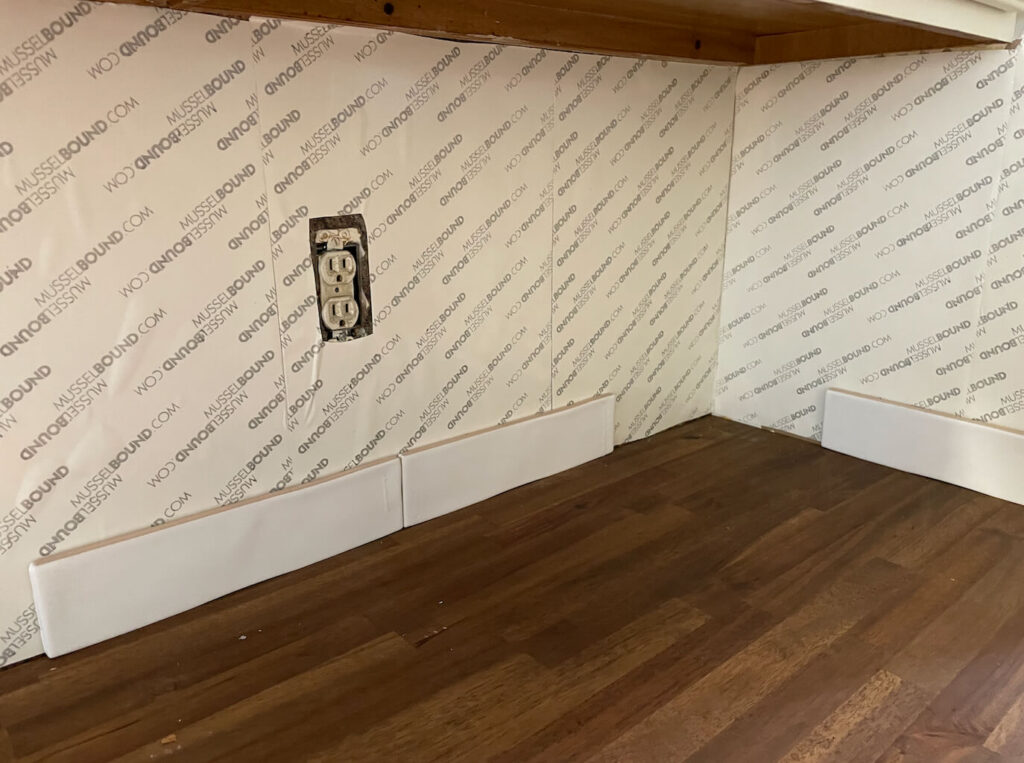
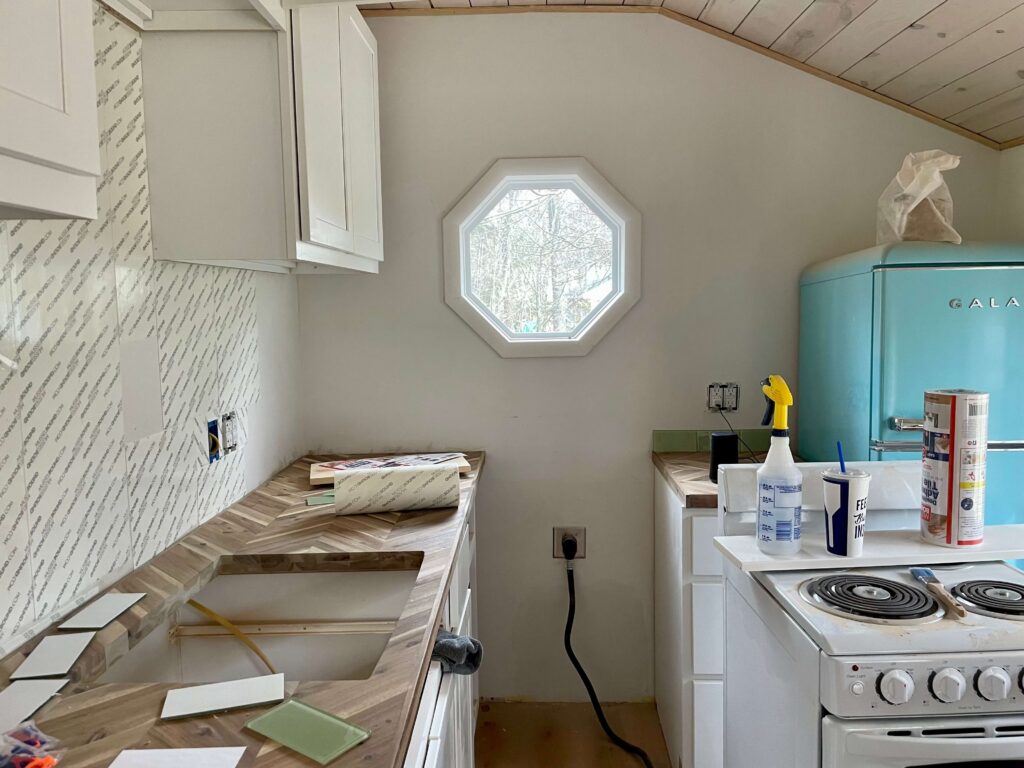
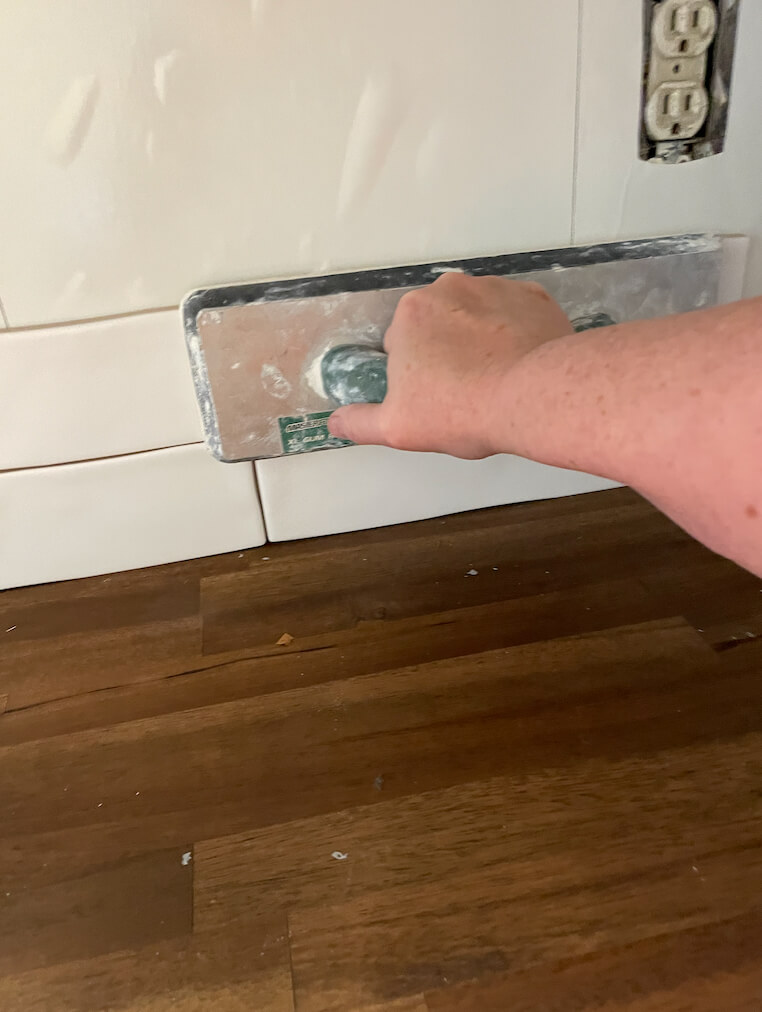
Before you start, make sure your well-bonded surfaces are clean and smooth. I used pretty green glass tile in a tiny 100-year-old cottage for my first backsplash. It was so easy to work with the mussel bound mat! I used a ceramic tile in another older home for my second project. I was concerned about the ceramic tile as it was a bit heavier than the glass tiles I had used at the cottage.
The Musselbound mat handled the weight of the 2.5×12 ceramic tiles like a champ! A utility knife is your best friend for cutting the mats and fitting them around outlets. Remember to plan your tile layout before you peel off the protective film. I used a float to press the tile onto the mat itself.
Long-Term Durability and Performance.
This is the key, right? How does Musselbound hold up over time? In both my kitchen backsplash projects, I’m happy to say, incredibly well! The cottage backsplash, which is in a heavily used short-term rental, still looks as good as the day I installed it. The ceramic tile backsplash in the other old house is also holding strong. No loose tiles, no issues whatsoever. The musselbound mat creates a strong bond and the tile has stayed put. As I mentioned, I was a bit worried about the weight of the ceramic tile, so I made sure to press the tile to the mat with a float. It has been rock solid. I’m so impressed with the long-term performance of this product.
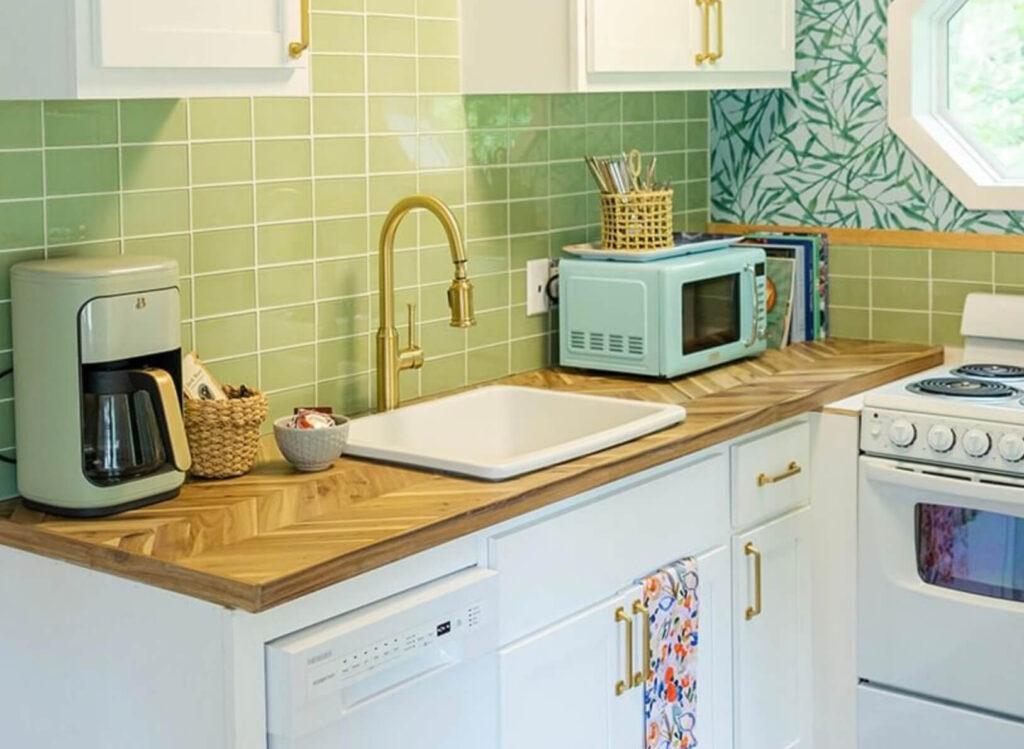
Here is how the backsplash looks in the cottage project today.
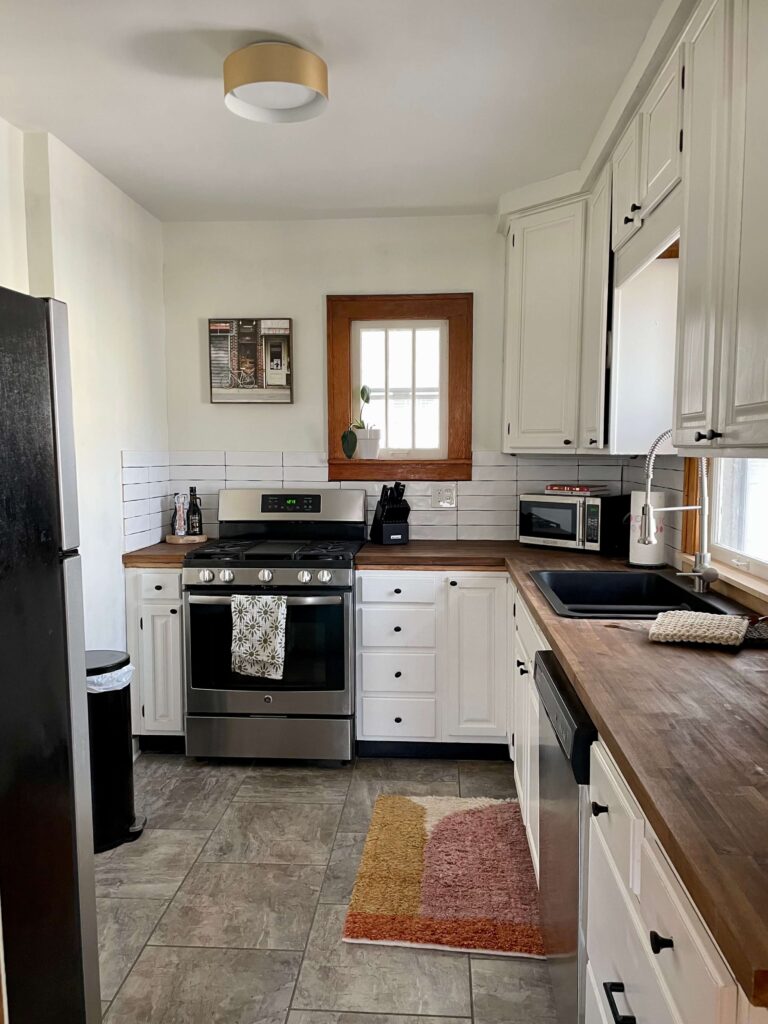
And at the ceramic tile at our long-term rental property.
So, there you have it – my two-year update on Musselbound. If I haven’t made it clear, I’m a huge fan! It made my DIY backsplash projects so much easier, and the results have been fantastic. If you’re looking for a less messy and time-consuming alternative to thin-set adhesive for your wall tile projects, especially in an old house, I highly recommend giving Musselbound a try. I’m already planning a couple of projects using mussel bound mat- one a small decor DIY and the other one is a bathroom refresh!

Until next time,
-Libbie
You may also enjoy:
