
Looking for a quick and easy way to add a mid century modern accent wall to your home? This simple DIY wood accent wall tutorial will walk you through exactly how to do it in a weekend.
DIY Mid-Century Modern Accent Wall
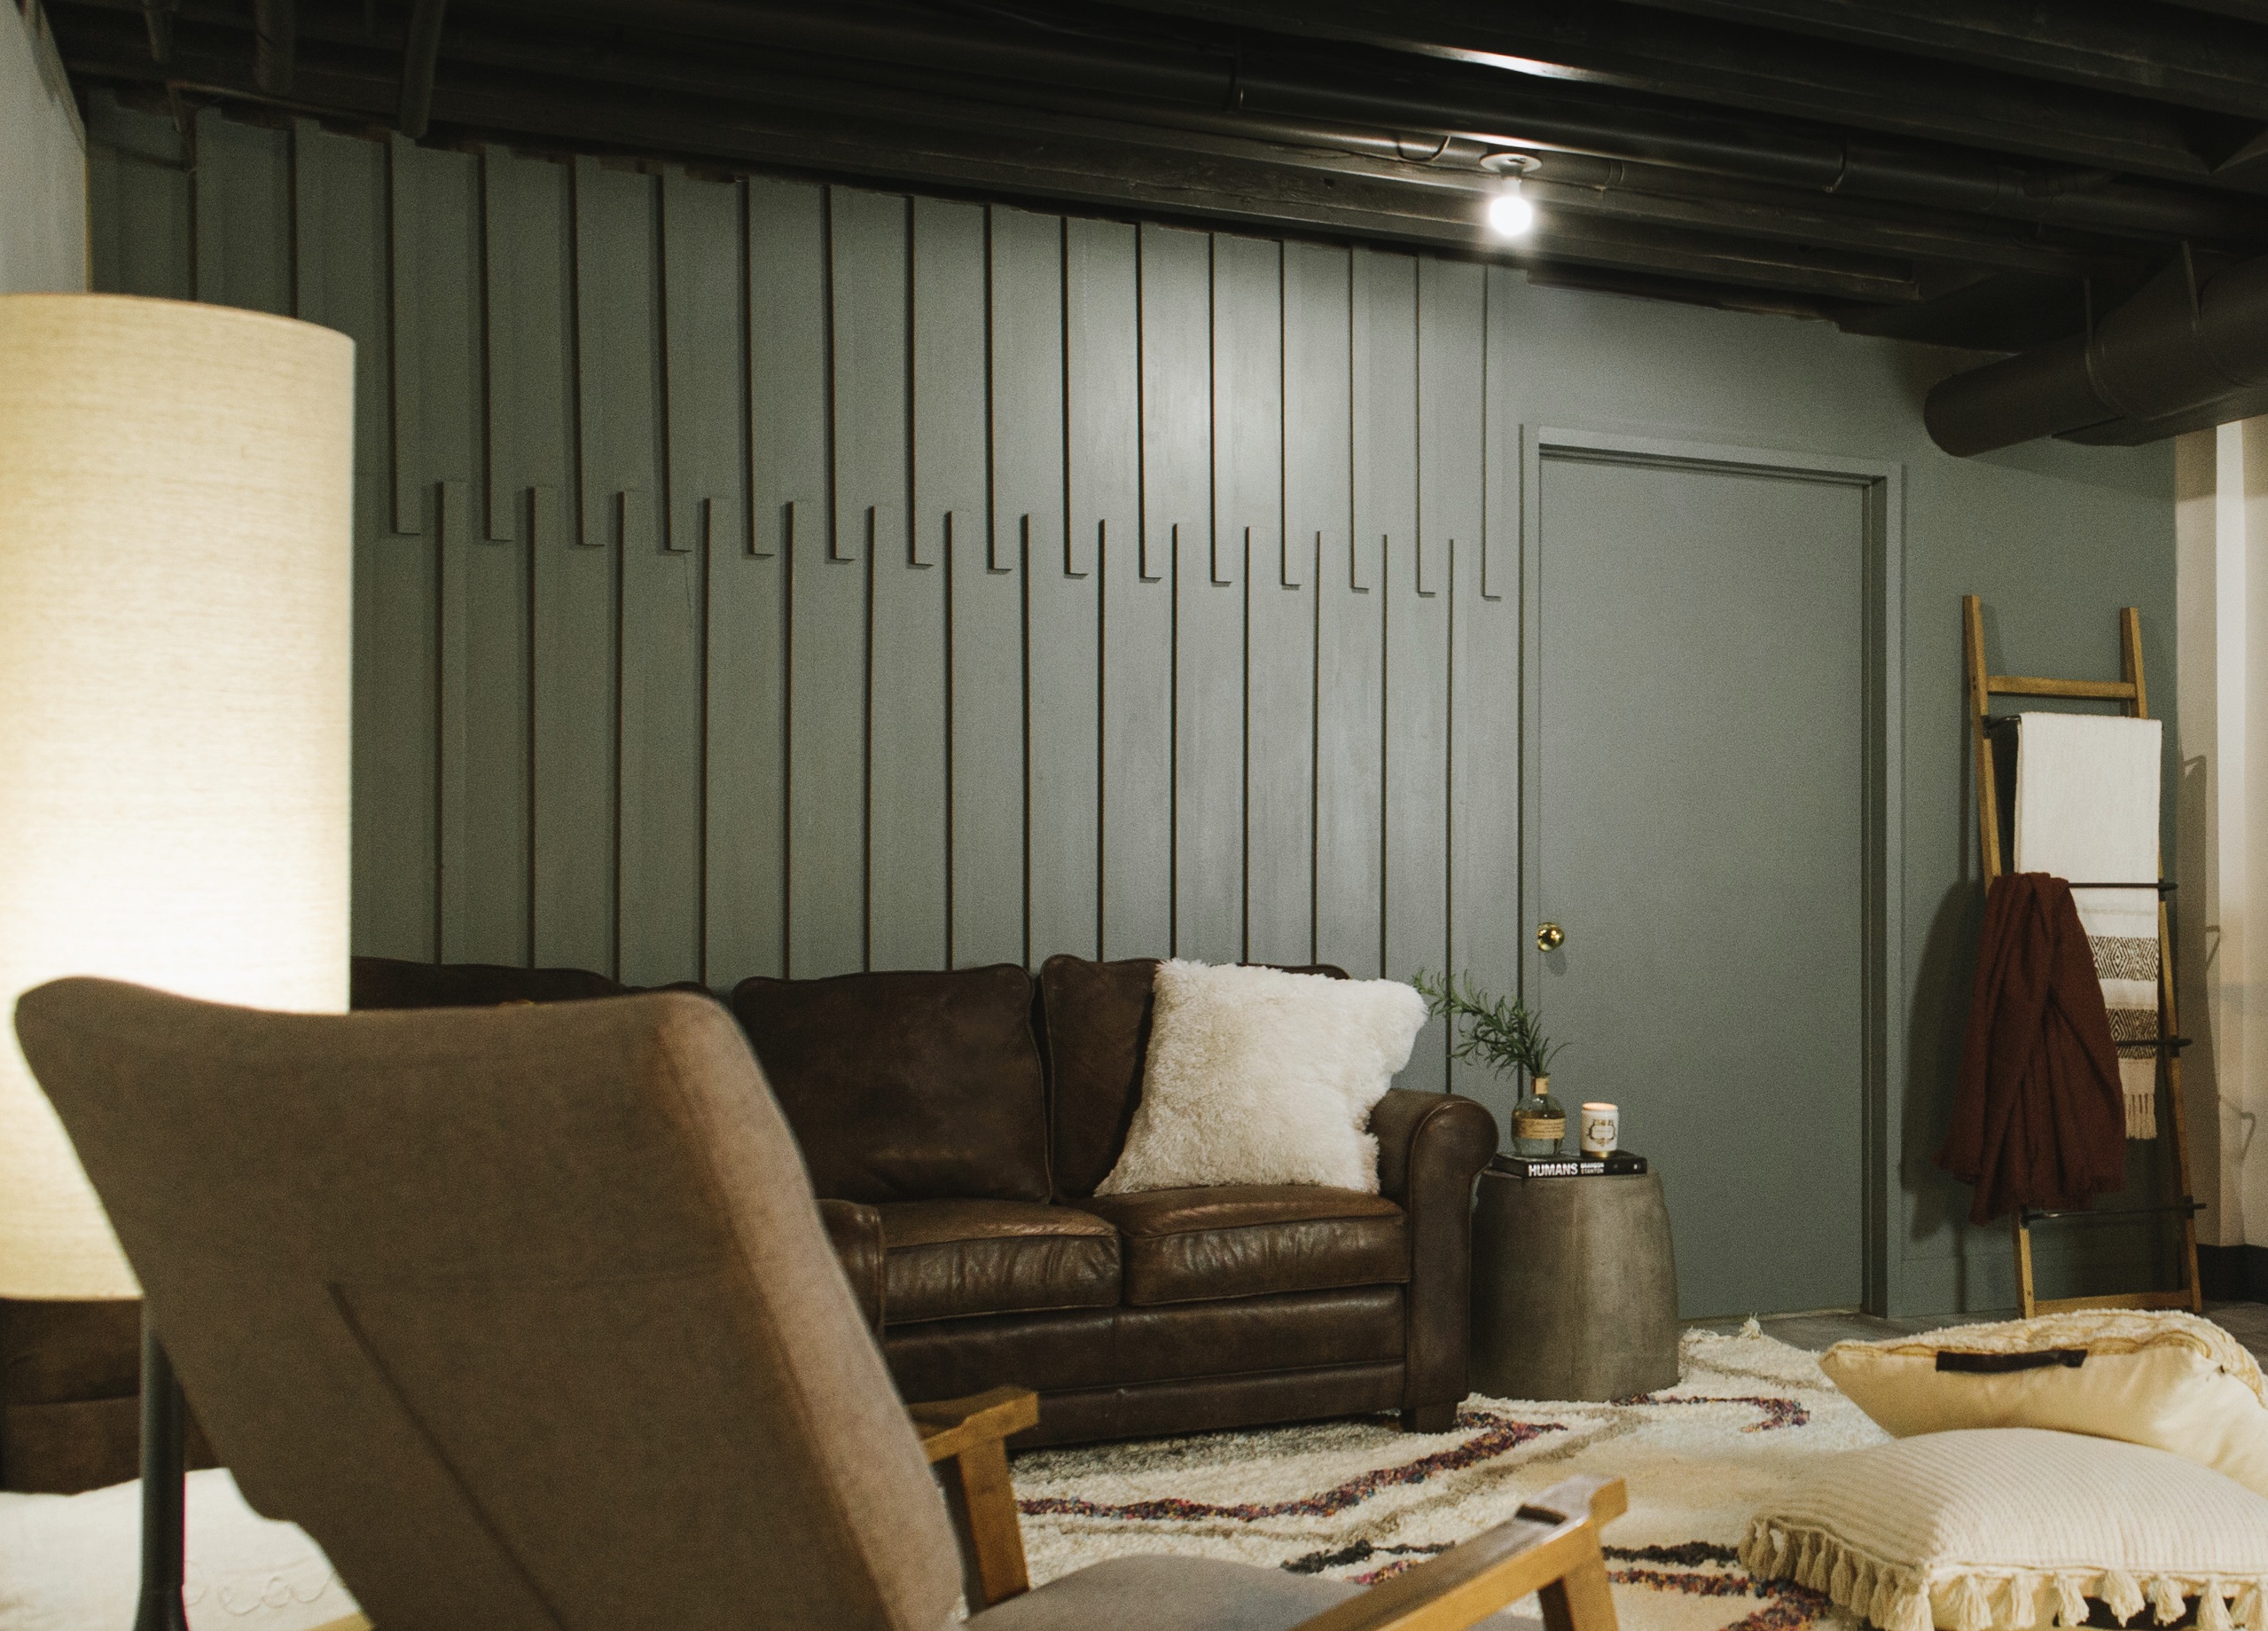
Hello Friends- I have a quick and easy DIY for you today. I am laughing as I write this as I am known for my accent walls (I have promised no more on a few occasions), and well, here I go again. 😉 Today, I am sharing my version of a Mid-Century Modern Wood Accent Wall.

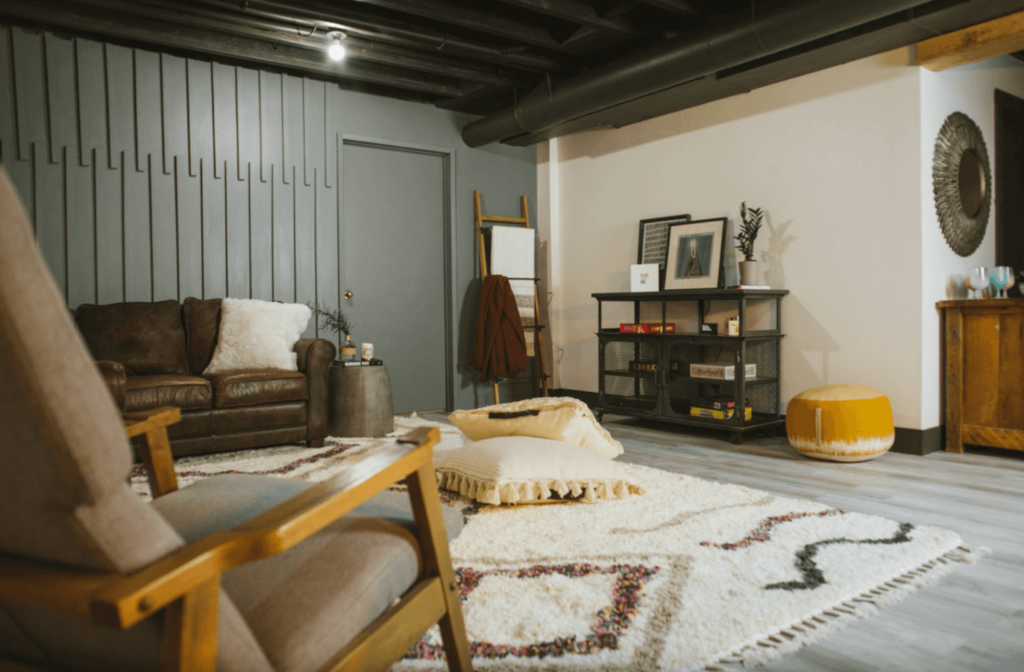
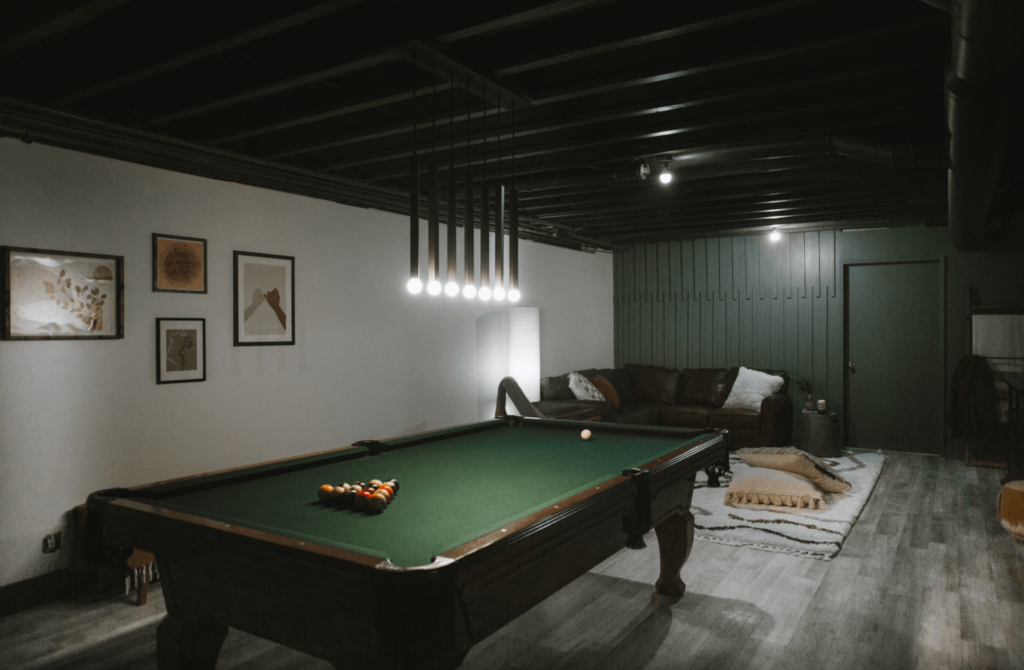
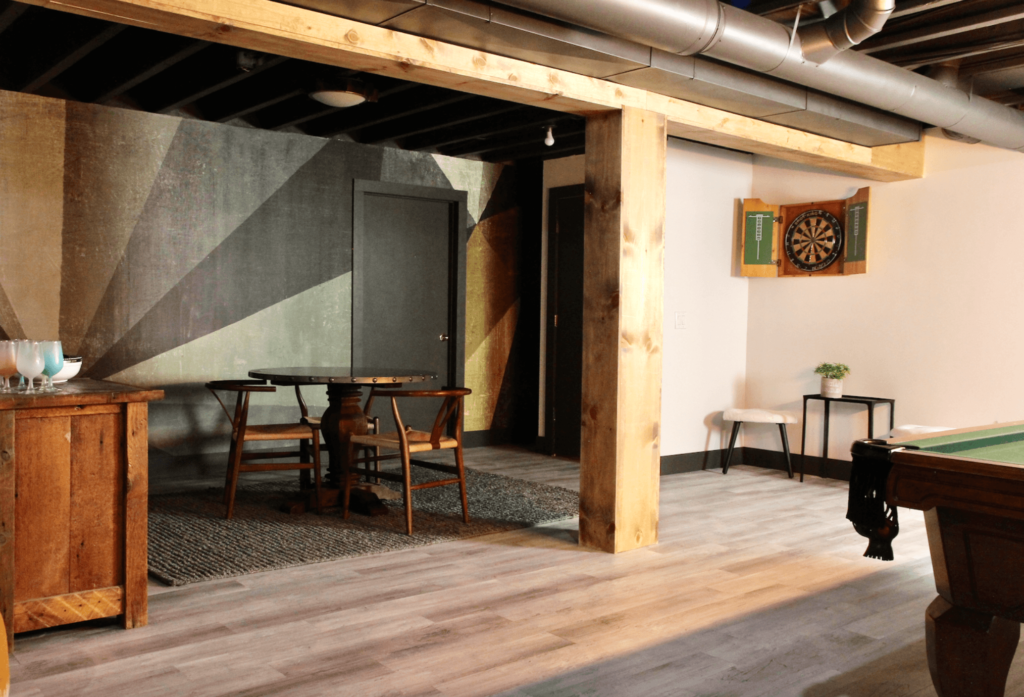
We recently renovated our basement into a game room of sorts (see it here). I planned a wallpaper mural on one wall that was a very, very bold choice for me, so I felt there would be plenty of visual interest. But as often happens in design, once we started on the actual space, I felt as if the wall at the very back of the room needed something to draw your eye back through the room.
Why Add A Modern Wood Accent Wall?
As I mentioned above, my inspiration for adding this mid century accent wall was to draw attention through the room. Here are a few reasons you may want to add an accent wall:
- Visual interest to the room. A bold or colorful accent wall is a great way to draw attention to a certain area of the room or to create a focal point.
- Quick and easy to do. The DIY wood accent wall in particular is great because it’s an easy process that you can do in a weekend.
- It’s an easy way to freshen up the whole space. If you’re feeling uninspired by your space but don’t have the time or desire to update the entire room, an aspect wall is a quick and easy way to change things up.
- Adds a focal point
What You’ll Need For a DIY Wood Accent Wall
You won’t need much for this weekend project – in fact, if you’ve been doing any type of homo reno, you may have most of these things on hand already.
*This post contains affiliate links; I may earn a small commission if you purchase them. I promise I only recommend products I use and LOVE! 🙂
- Boards – I used 1x2x10 boards but the amount you’ll need will depend on the size of the wall you’re covering
- Wood glue
- Nail gun
- Caulk
- Primer & paint
- Paintbrushes
- Moulding
How I built a DIY Mid-Century Accent Wall
This is straightforward DIY and took me less than a weekend to finish.
Getting Started
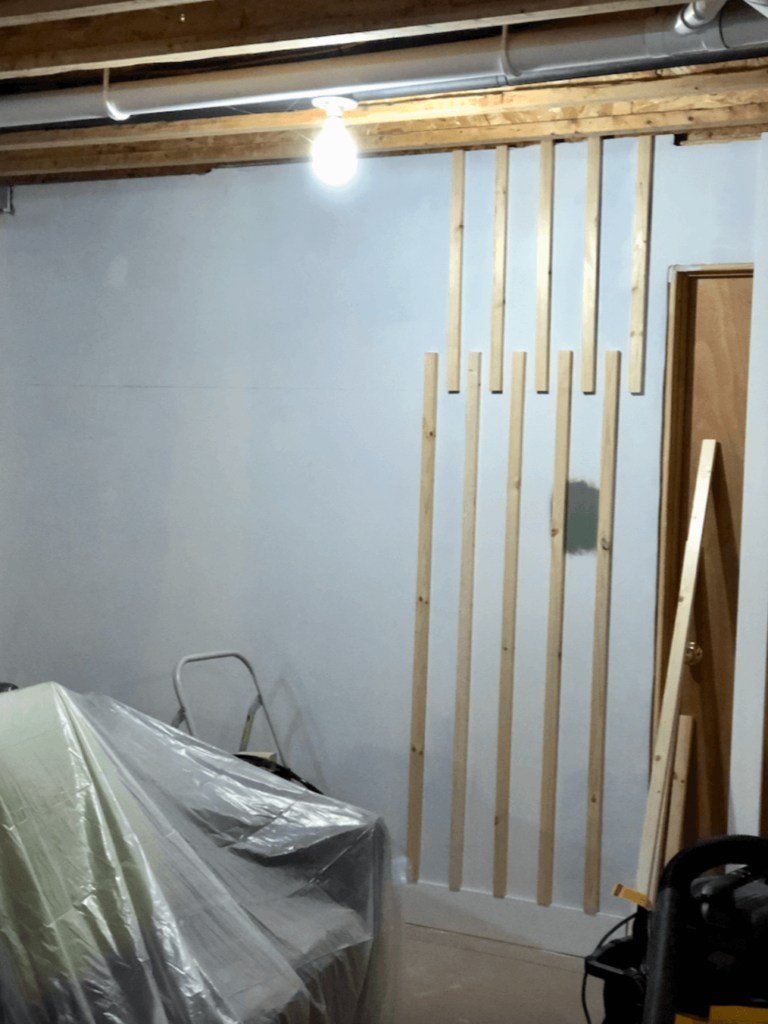
Measure and buy the boards needed. First up was a trip to my local Home Depot, and I bought twenty- 1 x 2 x 10 boards to cover the wall as far as the door. The amount of boards you’ll need will depend on the size of the wall you’re using.
Cut the boards. Then I used a saw to cut the boards so they overlapped in the upper third of the wall by four inches. I used the width of a board between each piece as a guide (because it was easy), and I liked the spacing.
Attach the wood to the wall. For the next step, I attached the wood with a bit of wood glue and a pneumatic nail gun. I use this nail gun but they are usually available to rent from your local home improvement store. I continued to attach the boards to the end of the wall. This goes quickly.
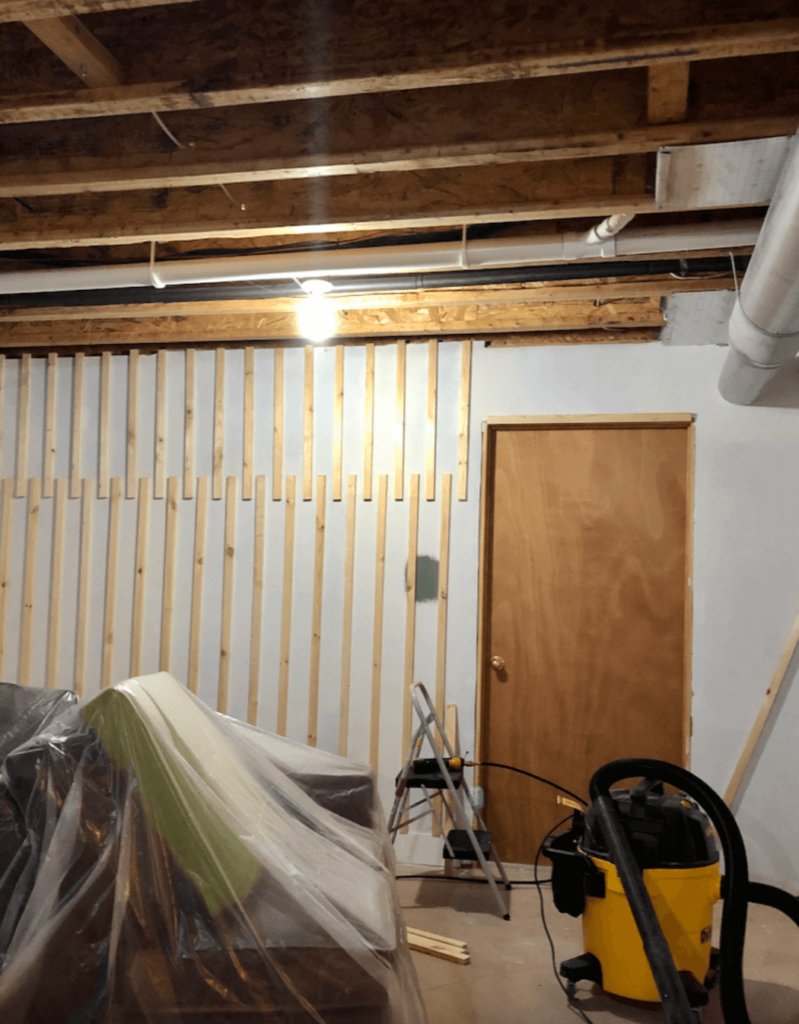
- Frame the door. Because I wanted to keep this accent wall as clean and modern as possible, I also framed the door in the same wood. I think keeping the pattern and door the solid green- and not breaking it up with any contrast with door moulding- makes it feel a bit Mid-Century Modern.
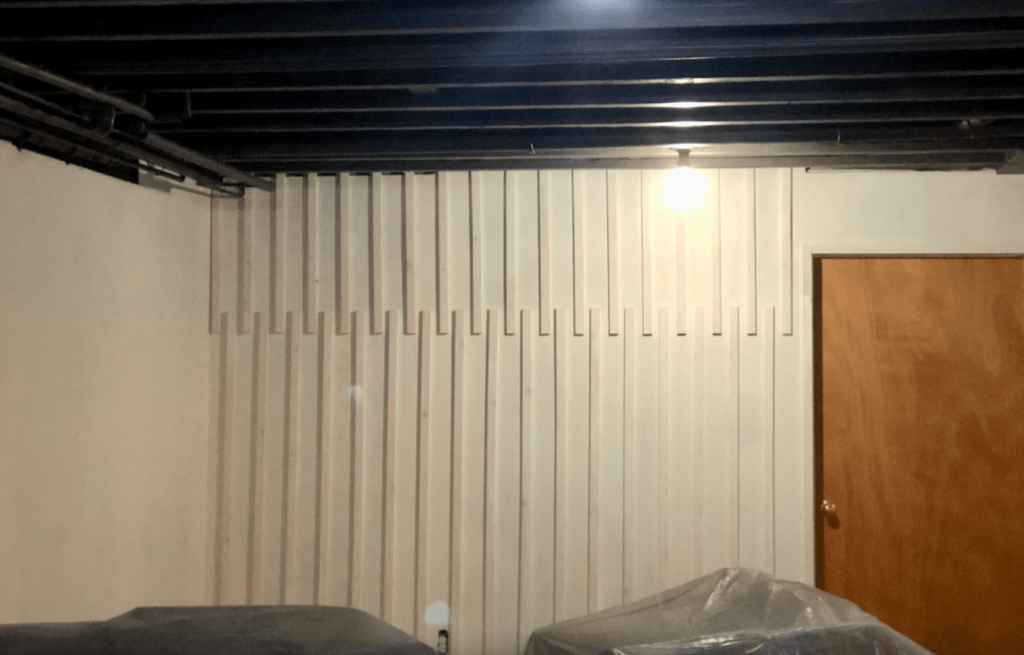
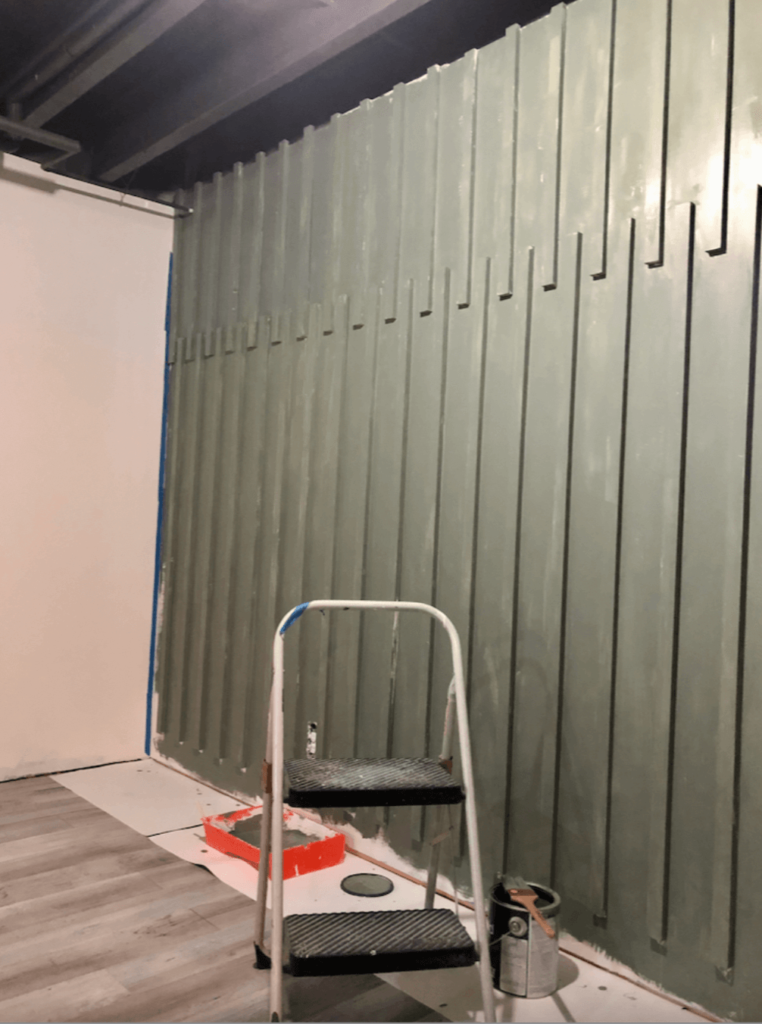
- Caulk the wood. Next up was calking the wood wherever it didn’t lie flat on the wall. I forgot to photograph this step, but it gives a more finished feel once it’s painted. I chose to leave the right side of the wall flat as I didn’t want to work around the pipes, and I also wanted to keep the lines simple. Then I primed everything.
Time to paint
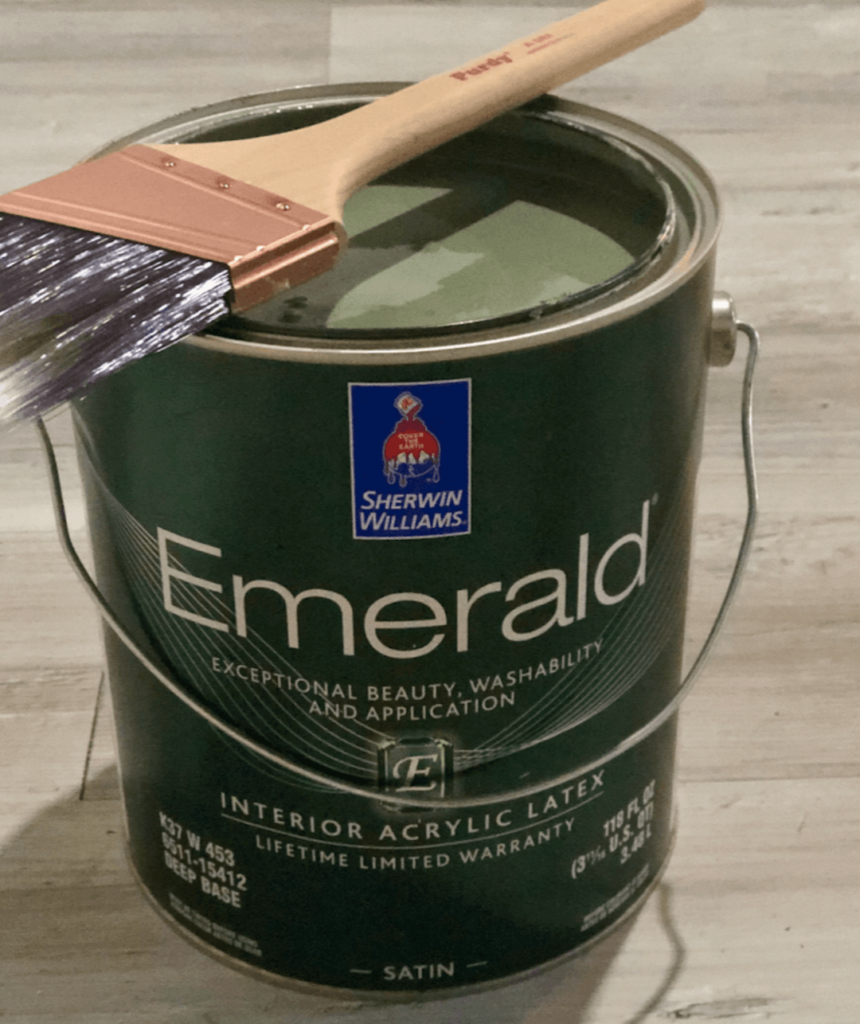
- Prime the wood. It took two coats of primer- in addition to priming the door. I am a huge fan of Sherwin-Williams paint, and in full disclosure, they sponsored the paint for my basement renovation. All opinions are (as always) my own. Here I am using SW 6207 Retreat. It was a wonderful compliment to the SW 7008 Alabaster on the walls and the SW 7048 Urbane Bronze on the ceiling.

- Paint. We were able to spray the primer, but I used a roller and brush for the paint. Spraying the paint would have made quick work, but I was too lazy to tape everything off again! I used two coats of paint.
- Add the moulding. The final steps were to add a five-inch moulding along the bottom, which I painted the same green.

How Long Did This Modern Wood Accent Wall Take?
The total time was about 30 hours, but that was because of all the waiting for the paint and primer to dry. Hands-on time was much less than that. I would recommend splitting this project over 2 days but it can easily be finished in a weekend.
What Wood Is Best For Accent Walls?
The key to any DIY wood accent wall project is to use a lightweight wood on the thinner side. You don’t want it to stick off the wall too far but, most importantly, the wall needs to be able to support it. I used pine here because it was inexpensive.
Best Colors for a Mid Century Modern Accent Wall
As you can see in the photos, I opted for a very earthy green (SW Retreat) for my mid century modern feature wall. The color you’ll want to paint your accent wall will depend on the rest of your decor, of course, but here are a few ideas if you want to go for the mid century modern feel.
- Mustard yellow
- Navy blue
- Burnt orange
- Rust
- Olive green
- Tan
- Brown
In general, mid century modern colors are muted earth tones with pops of brightness, so keep that in mind when choosing your colors.
Here is a close-up of the finished accent wall.
I think it was exactly what the room needed! It added enough visual interest that you look back when you walk into the room, which gives the room more balance. Here is the bold wallpaper that I was trying to balance.
Interested in shopping this post? Shop here:

Are you looking for more accent wall inspiration? Take a look at this article by Porch.com.
RELATED POSTS:
A quick and easy closet door update
That’s it. I hope I have inspired you to try your own DIY accent wall!
Until next time,
-Libbie
PS. These awesome pics are from my friend Helen Gardner. If you are looking for a photographer in the midwest, I highly recommend her!

Your accent wall is really stunning and the colour you chose is really beautiful.
Thank you, Anita! I am loving the green!
I can’t believe you did this yourself! It’s fantastic
Thanks, Michelle!
Didn’t think the room could get any better but that accent wall is just what it needed!
Oh my gosh! Thank you!!! It turned into my favorite element in the room.
Looks great! I was wondering what color you used for the other walls. Thanks!
SW Alabaster.
Libbie, what a fantastic transformation. Did you just color the ceiling or did you do any treatment as well?
Heike,
We used SW Urbane Bronze on the ceiling. 🙂
I really like how simple, yet SO effect for any style. What a fun DIY project for adding texture to a feature wall.
I just love a quick and easy DIY!
Nooooooooooooooo, I can’t believe it’s that easy. It looks gorgeous. The whole space is stunning though. So effective
It was so so easy!
I’ve been wanting to do a wall in my bedroom love this idea!
Thank you, Maria!
That’s an amazing wall! I love how it’s so simple, yet so different. I’ve never seen a wall like that! Looks great!
Thank you, Katherine! You made my day!
Love this wall! That Retreat paint really modernizes the space. Great job!!
Thank you, Erin! I love the green!
Hope you had a great new year, I’ll be featuring you this week. See you next time at the To Grandma’s house we go link party!
Thank you!
I’m featuring you at Vintage Charm Party tomorrow morning! I LOVE this wall and the color is divine:) Thanks and see you again at the party! xo Kathleen
I am sorry I missed this! I took two weeks off to be with the grand littles! I’ll see you this week though. 🙂
Your whole basement is gorgeous, but that wall. I love how different your decor is, so inspiring.
What a lovely compliment! Thank you, Leanna. You made my weekend.
OMG !!! Just so beautiful and very unique !!!! Love the color too !! I have to find a wall in my house !
[…] time to choose a pattern and color for the inside of the frame. I was thinking something like this accent wall pattern I used last year, and it’s simple yet modern, which is what I was looking […]
Where is the wallpaper from? I found it at one time, but can’t locate it.
Hello Katherine,
Here is the link. https://www.photowall.com/us/triangulawesome-wallpaper?_gl=1*1k126je*_up*MQ..*_ga*NDM3NTE2MzY2LjE3NDE3MTQ0MjI.*_ga_BRJ4PT0LDW*MTc0MTcxNDQyMS4xLjEuMTc0MTcxNDc2OS4wLjAuNzUyMzM5MjIx