
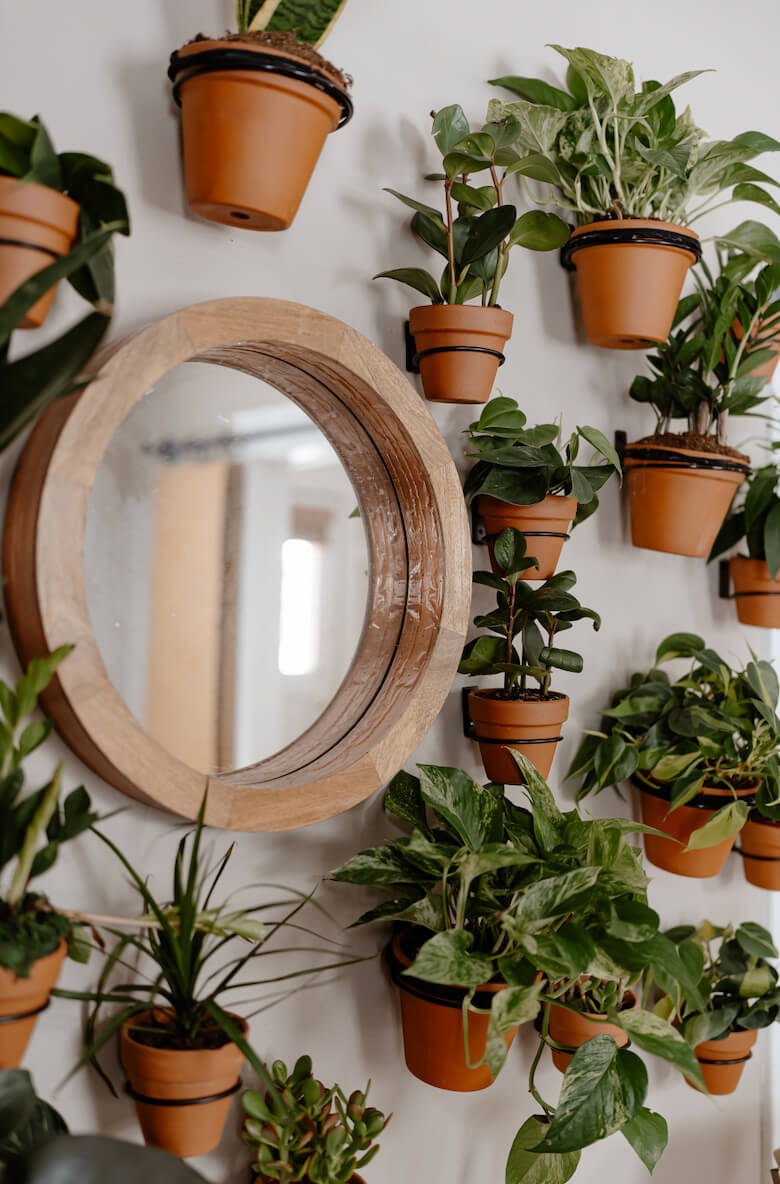
I am sharing the easiest DIY idea for Plants on a Wall today. This is so incredibly easy, but you do have to be committed/brave enough to put some holes in your wall. Each time I have posted pictures on IG, someone has asked me how the plants are attached to the wall. So here goes.
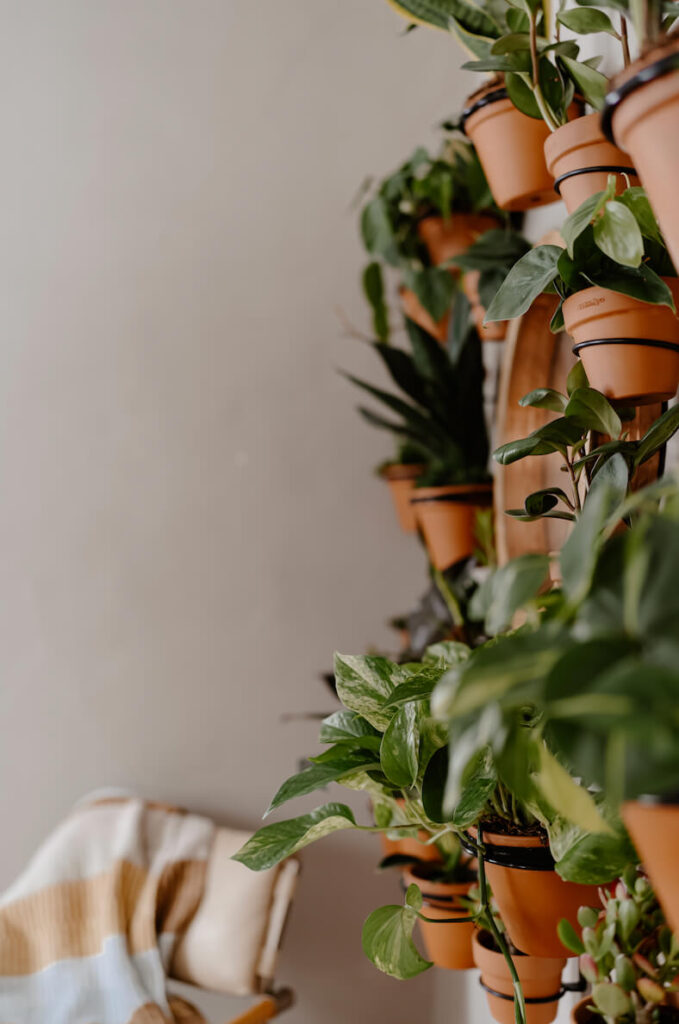
I have a very blank wall in my office space. When you enter the front door, it is immediately to your left and the first thing you see. I wanted to add warmth and life to the small space. Vertical planters are an excellent idea for an accent wall!
*This post contains affiliate links. Full disclosure can be found here.
Why Go Vertical:
I ADORE plants in my home. If you have followed the blog for any length of time, you might know by now plants are my happy place. I have them in my own home and all of our furnished rentals. What becomes tricky is finding a place for my beloved plants. Creating a living wall in your home is a wonderful space saver and creates a beautiful focal point in your home.
What I used for My Plant Wall:
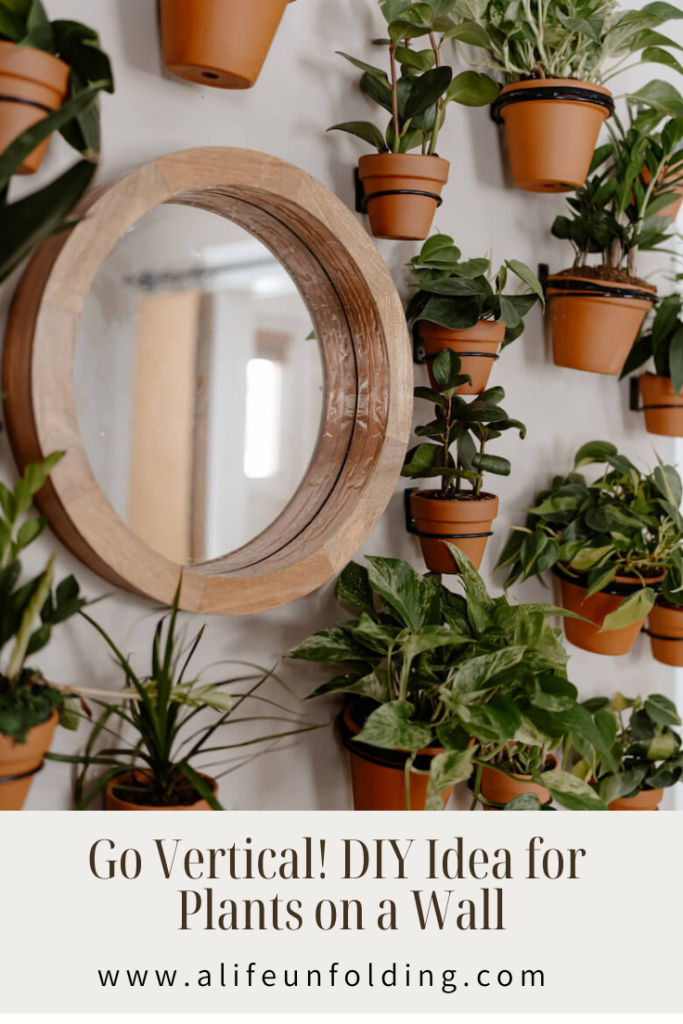
- Mirror (similar here and here)
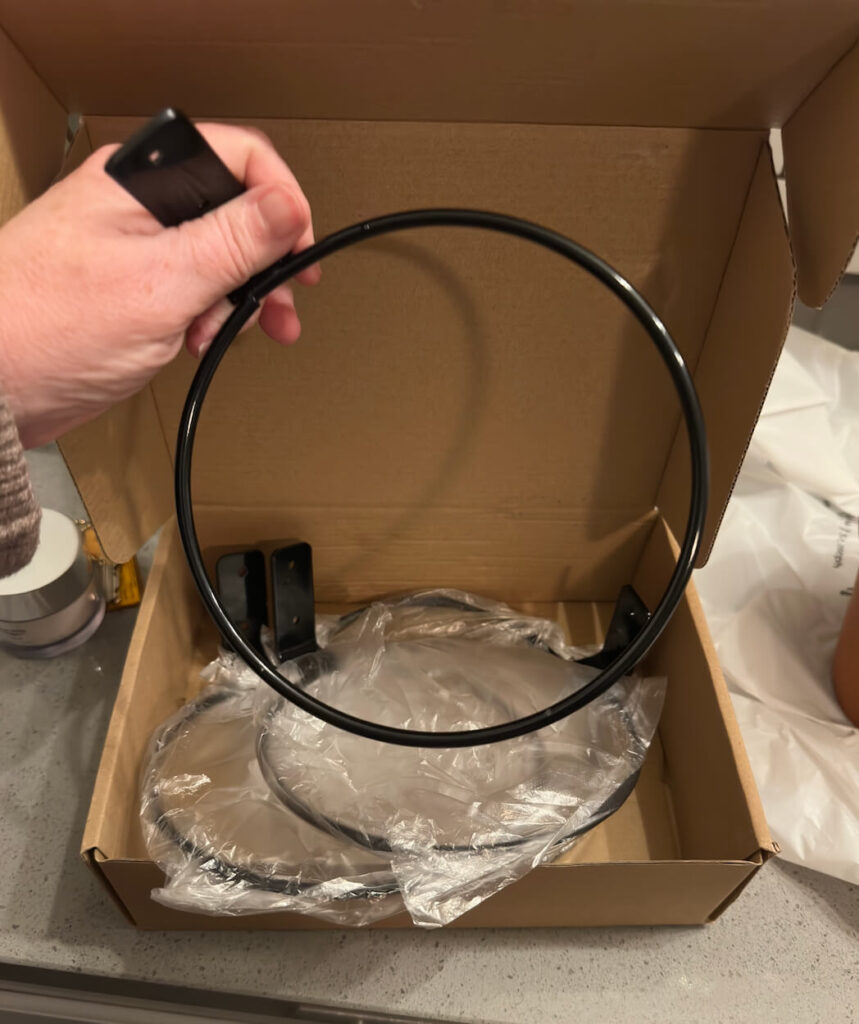
- 4–inch and 6-inch Pot Holders
- 6-inch clay pots
- 4-inch clay pots
- Plants
- Rope
- Glue Gun
I like to combine the four and six-inch sizes for variety. Feel free to do you and go with one size if you prefer.
Assembling Your Plants on a Wall:
Gather your pots.

Okay, so here is something I have run into before. Most inexpensive six-inch clay pots actually measure 5.75 inches! Why is that?????? When you place your six-inch pots into the holder, the pots may fall through.
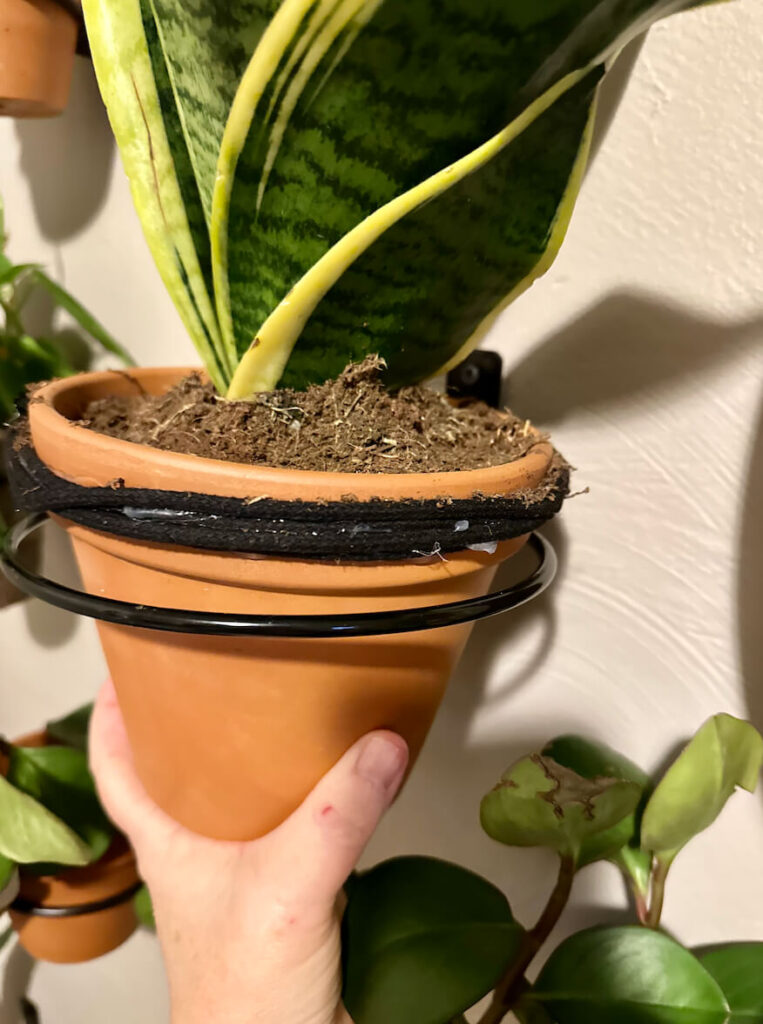
To ensure the pots will not fall through, I am adding a cord around the edges, allowing these weird-sized pots to work. By all means, if you want to skip this step, take the pot holders to the store with you and try the pots there. Occasionally, I have found a true six-inch clay pot!
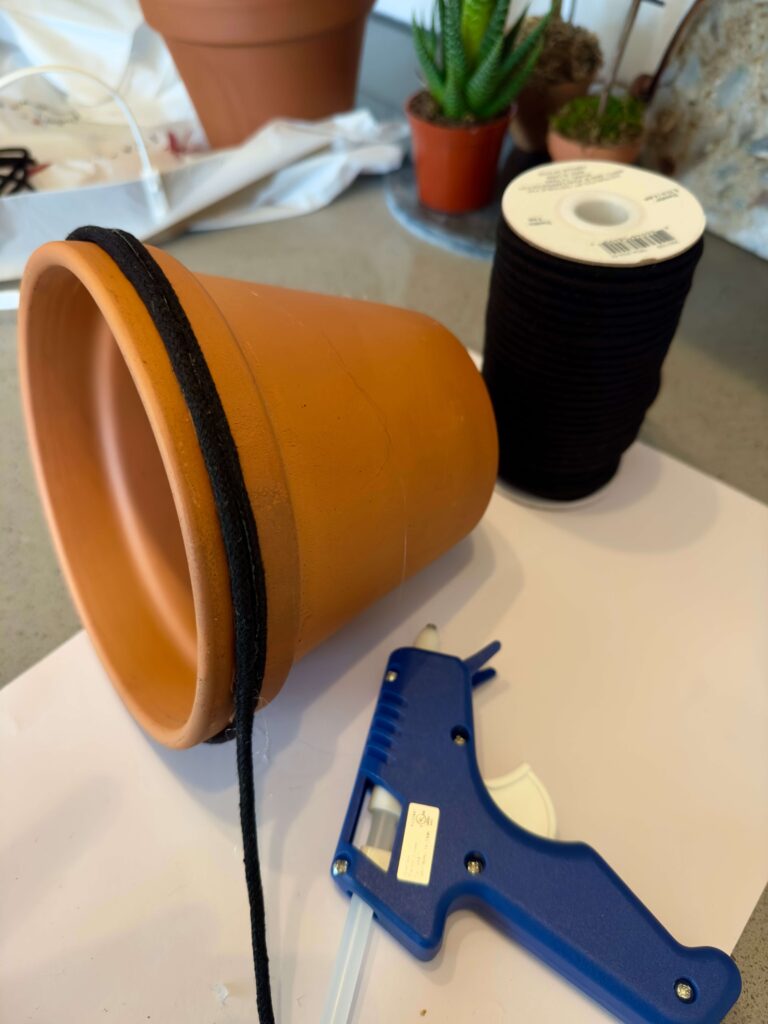
I am using a black cotton rope from Micheals and a glue gun to adhere it to the pots. I wrap it several times to make the pots’ rims wider than the pot holders’ opening.
Attaching the pot holders to wall:
Please do not come after me here. I am using the anchors that came with the pot holders and attaching them directly to my wall. The wall is older and plaster and not in great shape, so I am not concerned that when the day comes when I want to change this out, I will probably skim-coat the wall. If the idea of holes in your walls make you cringe I made a indoor vertical green wall at one of our rentals where I secured pots to plywood.
I hung the mirror in the middle of the wall and attaches the pot holders randomly after that.
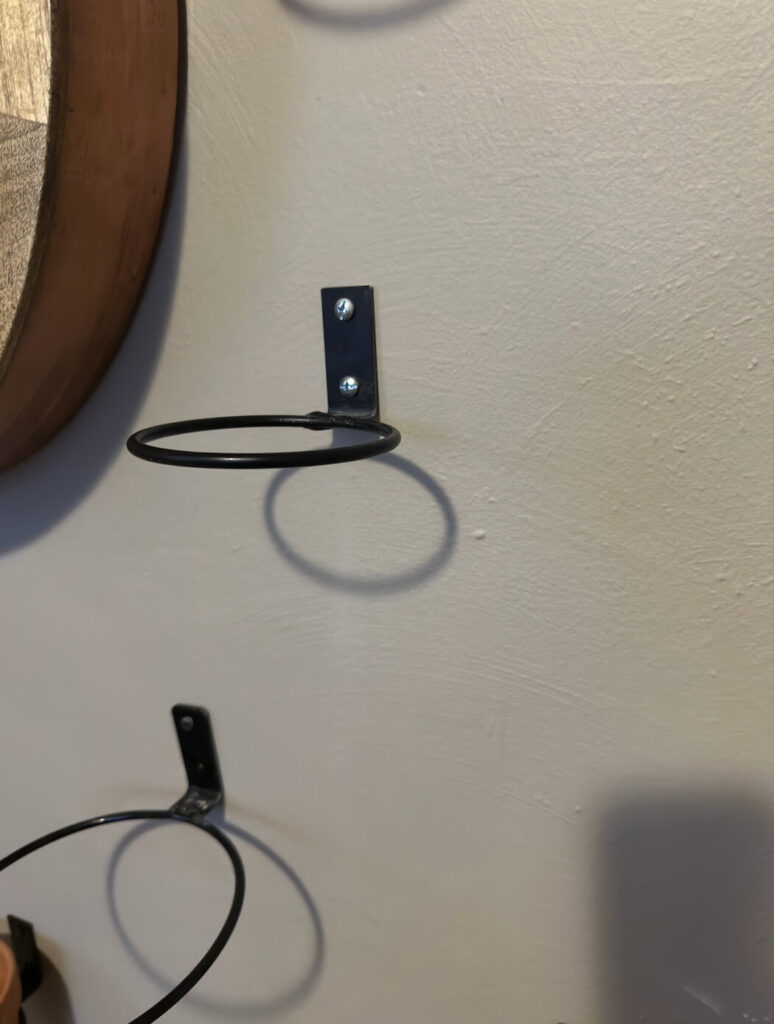
I tried to hit studs with the six-inch plant holders, but the weight will be fine with the large anchors included with the holders.
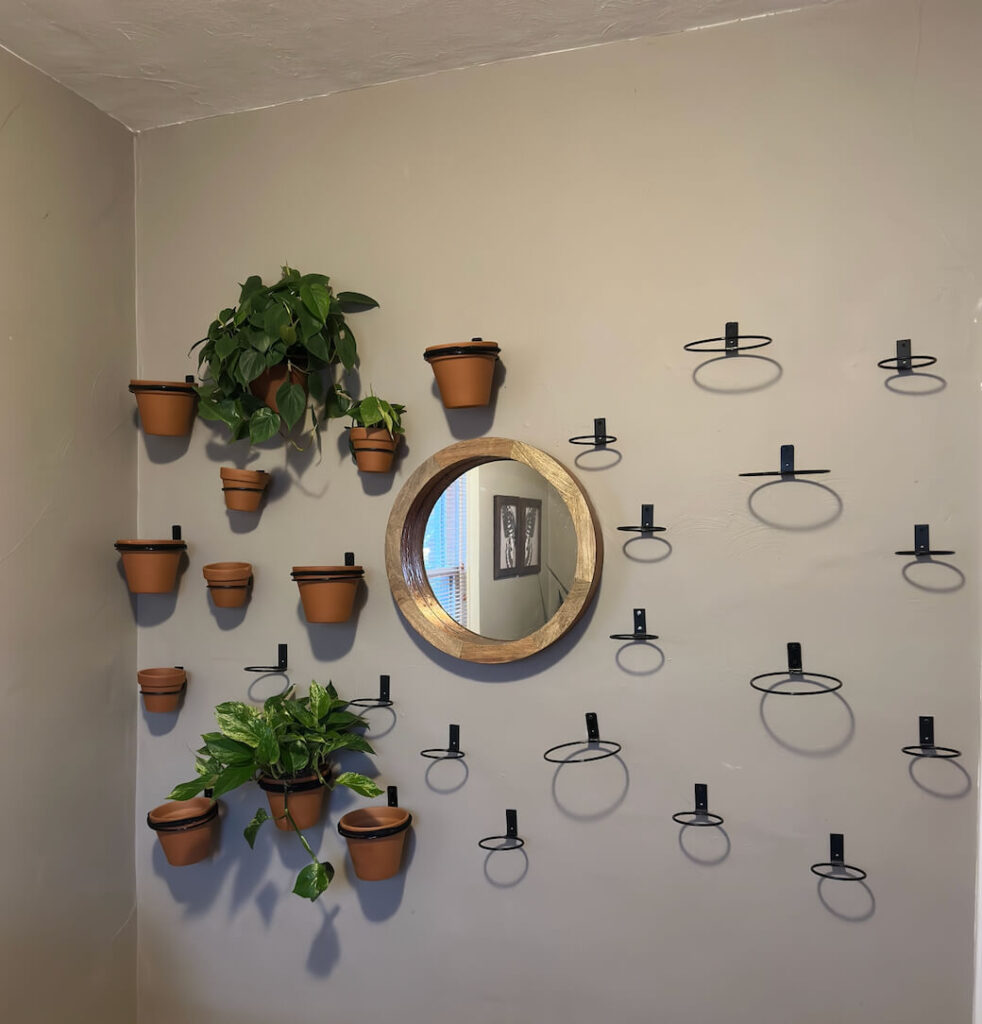
And there you have it. The entire wall, including arranging the plants just so, took us about an hour to install.
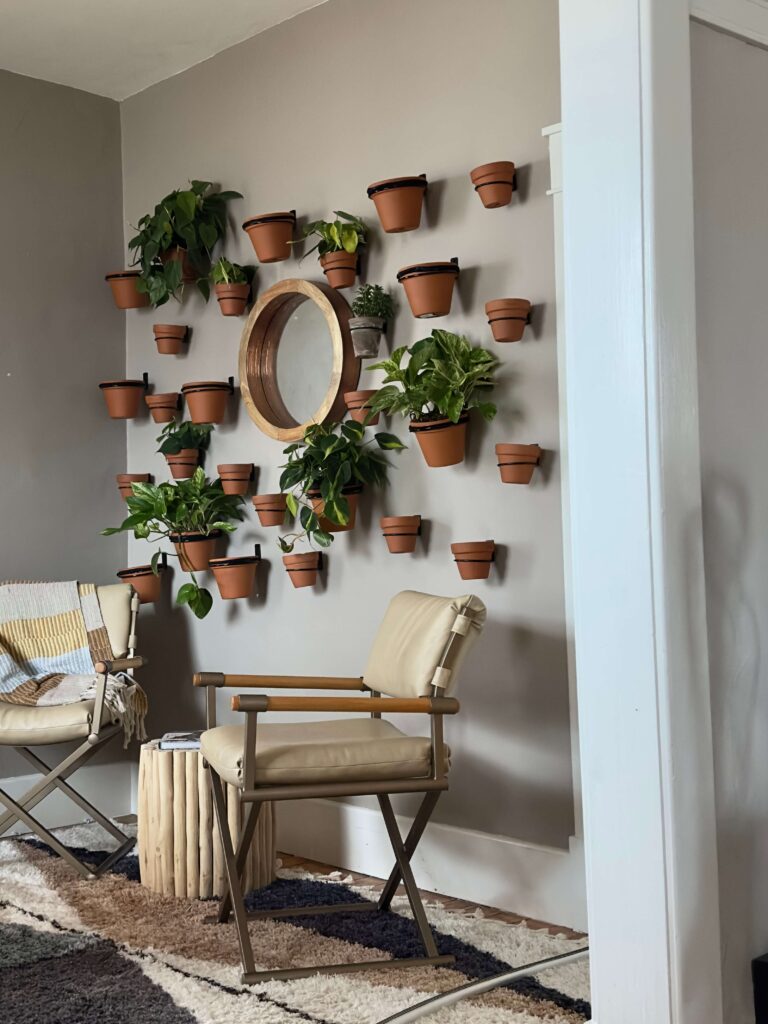
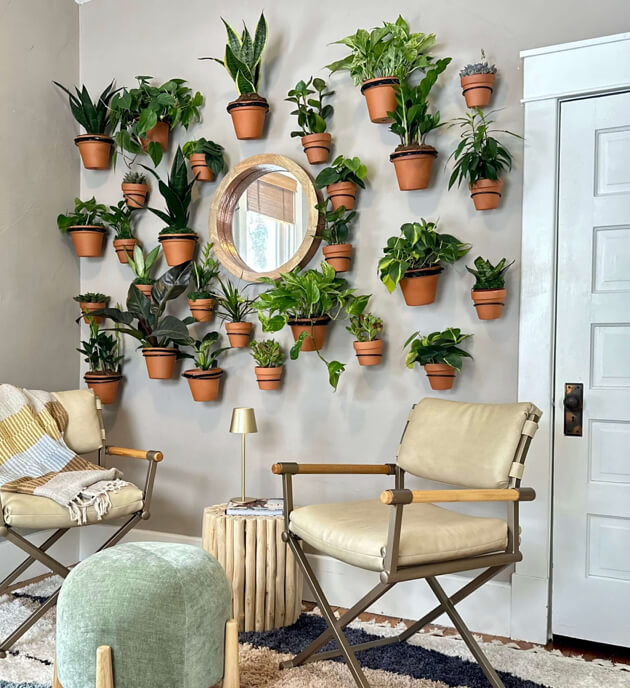
I LOVE the way it turned out!
Types of Plants I Used:
I choose easy-care plants that thrive in bright but indirect light and don’t require much water. For variety, I am mixing taller plants with vining plants. You don’t have to have a green thumb to have a plant wall; the most important thing is your plant selection.
Here are some of my favorites. I used most of these varieties:.
- Philodendron
- Pothos
- ZZ Plants
- Sansevieria
- Echeveria
- Snake Plants
- Haworthia
You could also use:
- Rubber Tree
- Aglaonema
- Anthurium- Great for a pop of color
- Peperomia
- Spider Plants
Air plants would also be wonderful.

Caring for your plant wall.
I water once every week to ten days in the winter -the smaller pots may need to be watered more frequently, so I keep an eye out to see if they are getting dry. Summertime it’s more often. I bring all the plants down and dust and water them in the kitchen sink.
*****The clay pots I bought had drainage holes that were covered with a sticker with a plastic coating; I left those on so that the water would not drip on the wall.
In the spring, I use water-soluble fertilizers for all my houseplants, and I use this neem oil if my plants get gnats.
If you have a limited amount of sunlight, you can buy these clip-on grow lights to help with light requirements.
If plant maintenance is not your thing, a self-watering planter can cut your watering by half. Choose a planter that fits into the clay pots.
That’s it for today. What do you think? Let me know in the comments.
Until next time,
-Libbie
You may also like:
How I Designed an Outdoor Living Wall

I am really loving this idea! I love having plants around the house, but don’t have much space. This would be perfect
Wowza, what a beautiful statement wall! That looks gorgeous! Wish I had your green thumb. Thank you for linking up. Hope you link up again soon. pinned
What a fabulously fresh idea Libbie. Thank you for sharing your vertical DIY ideas at Create, Bake, Grow & Gather this week. I’m featuring your post at today’s party and pinning too.
GORGEOUS and ELEGANT!!
Don’t forget to join us over at the Creatively Crafty Linky Party every Wednesday through Sunday
https://creativelybeth.com/creative-crafts-linky-party-2/
Pinned!
Creatively, Beth