
Since it’s Memorial Day and the unofficial 1st day of summer today, I thought I’d share my latest outdoor project with you.
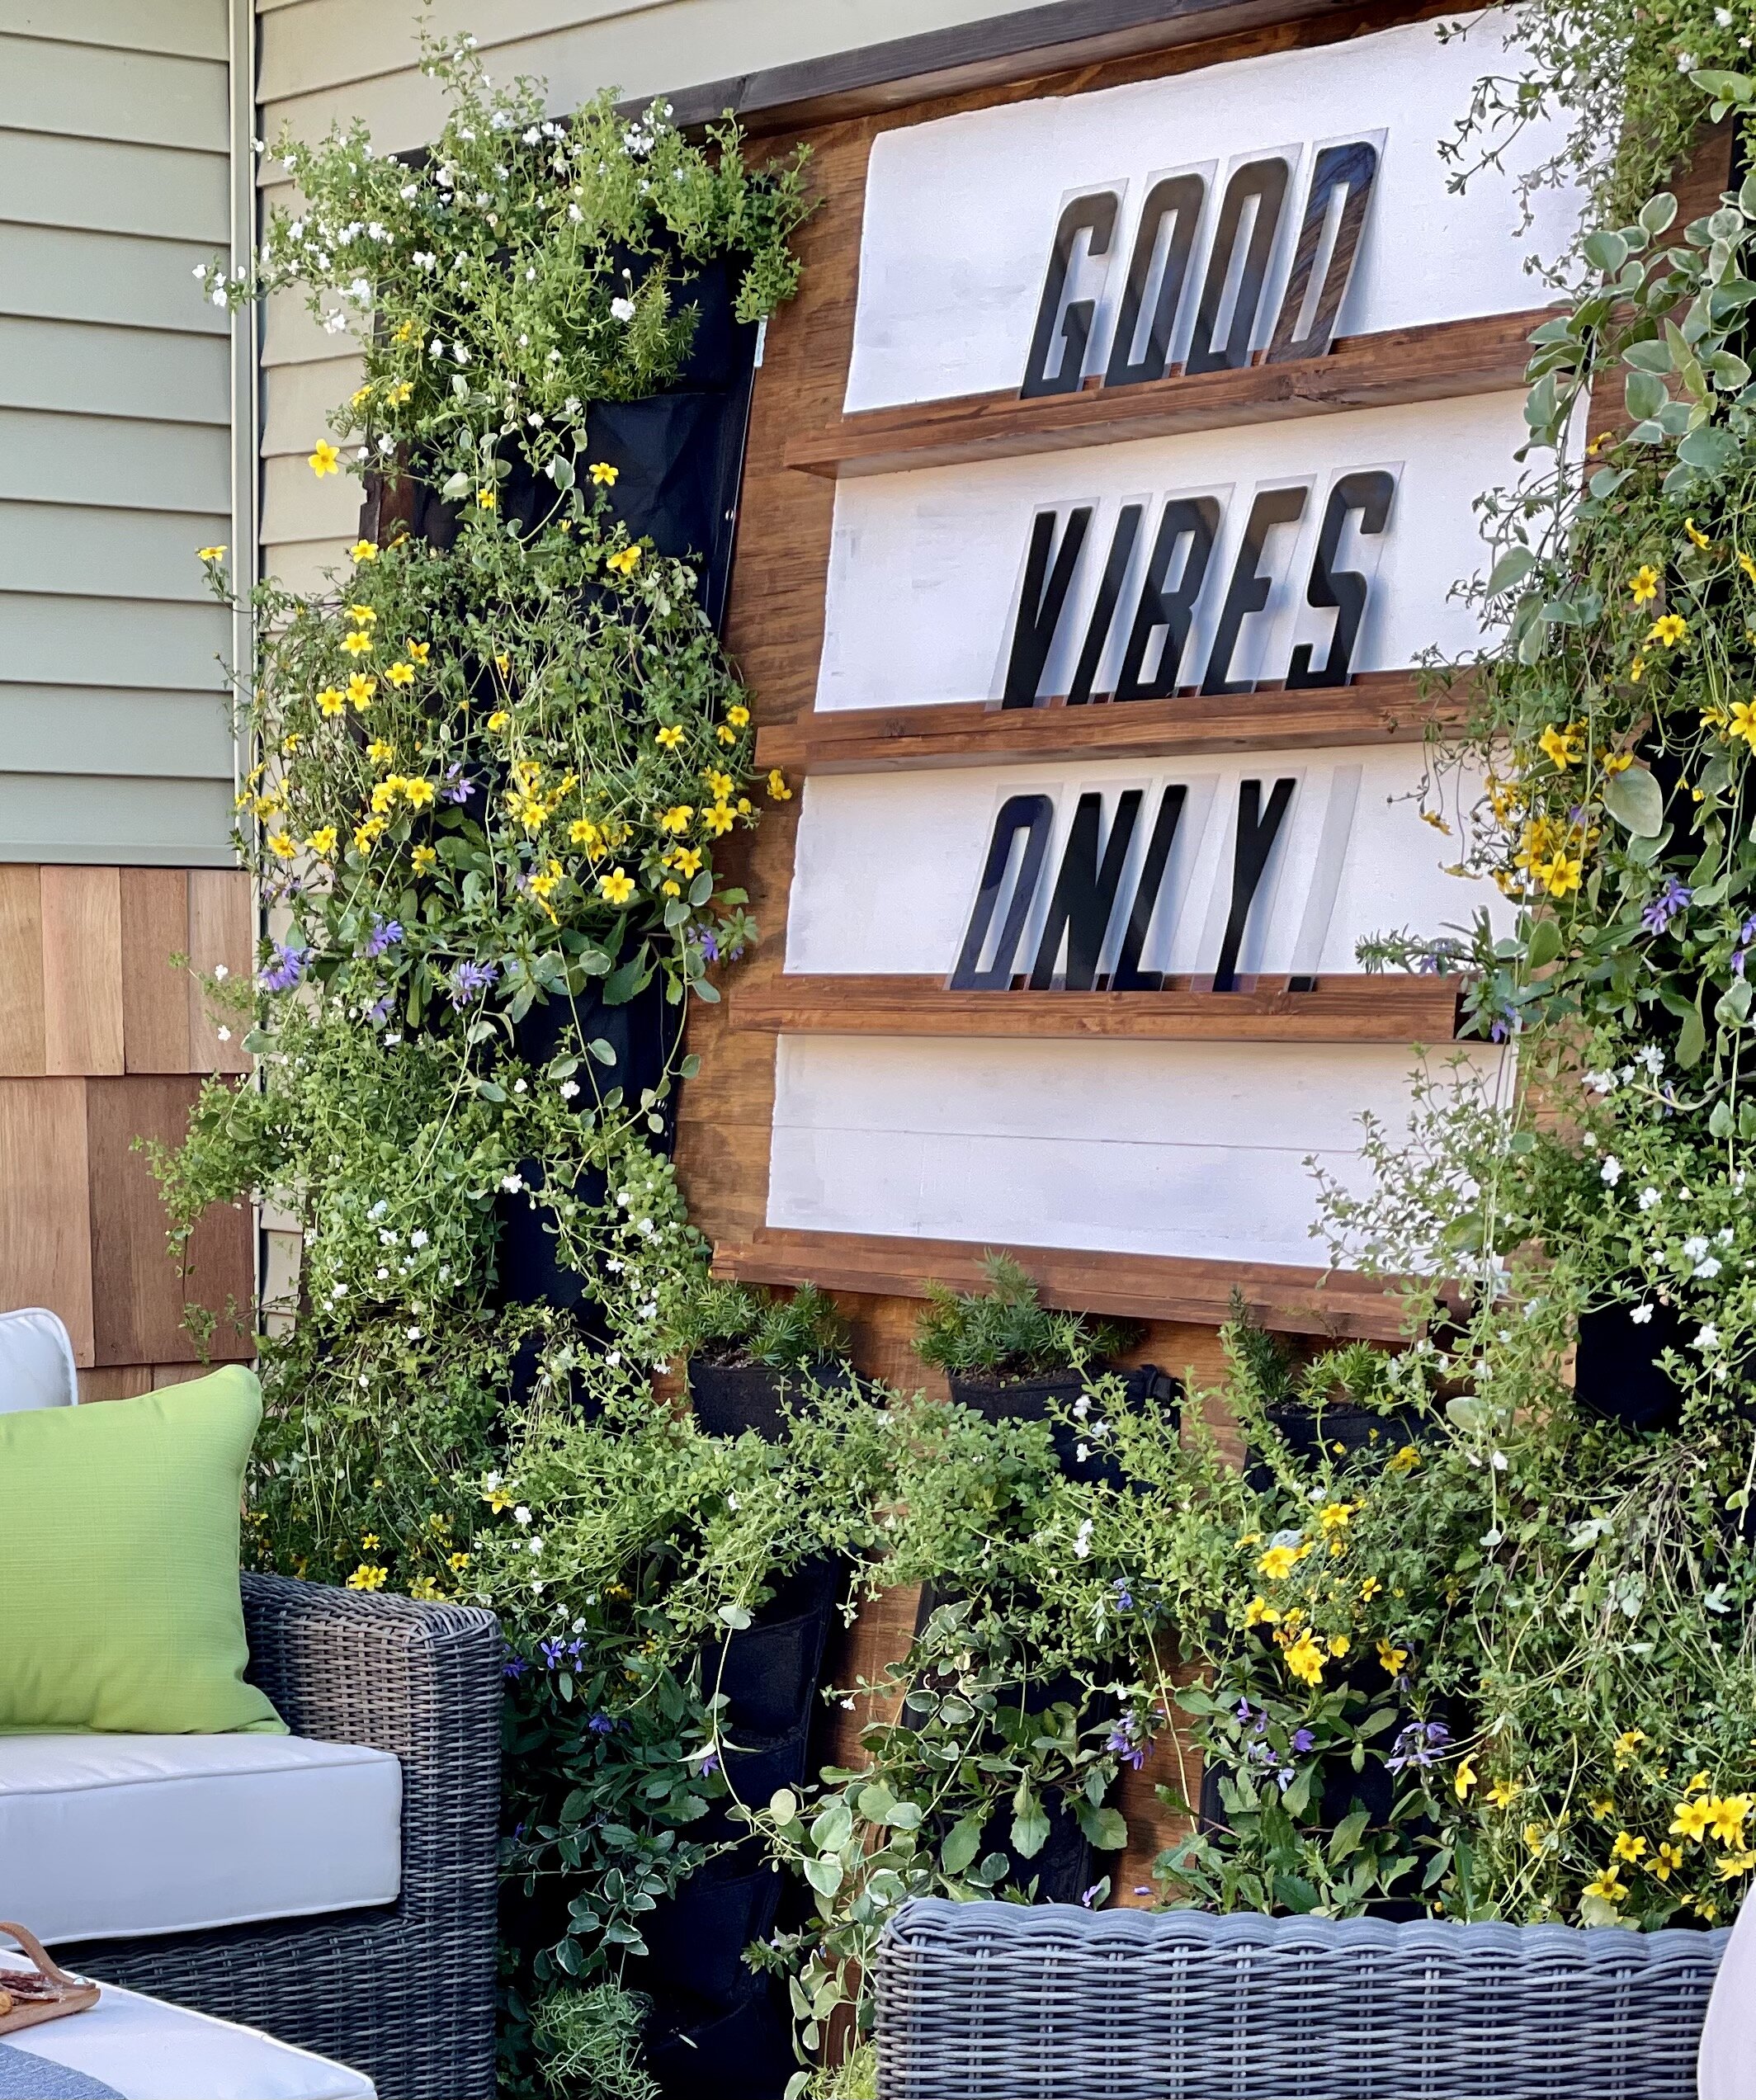
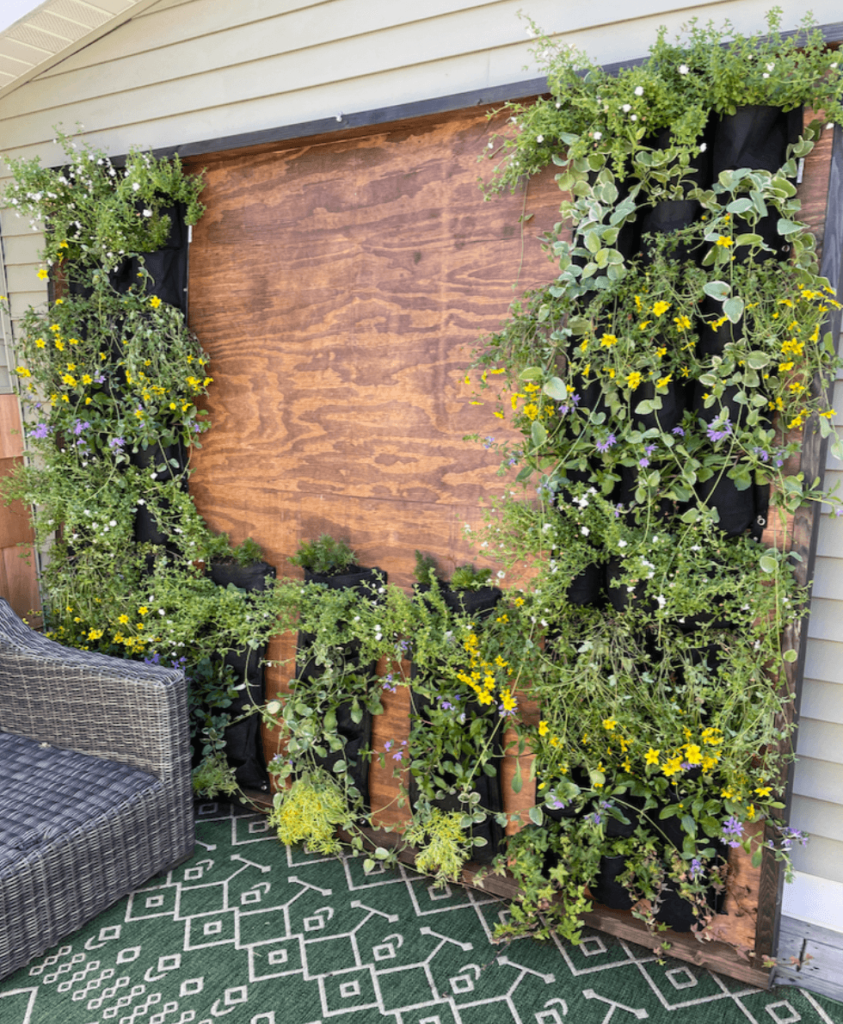
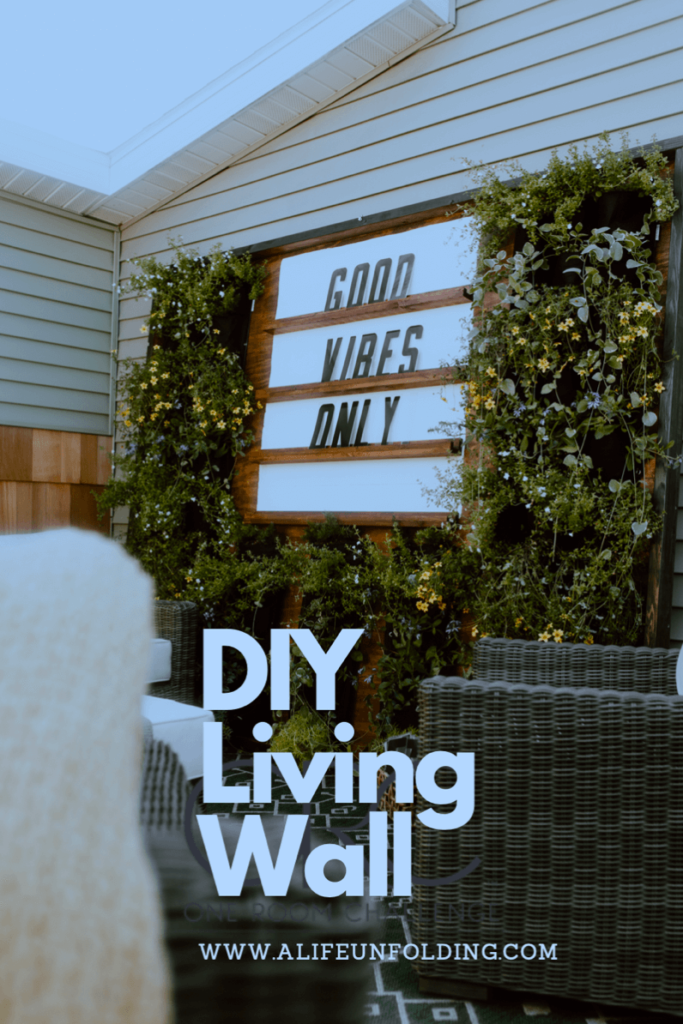
I DIY’d an easy outdoor living wall and have to say I am delighted with how this one turned out!!
I have wanted to add an outdoor green wall to our small deck space forever and finally decided to go for it.
Today, I am sharing how I made it, why I chose the plants, and what I will do differently next year!
Designing an outdoor living plant wall

Choosing a space
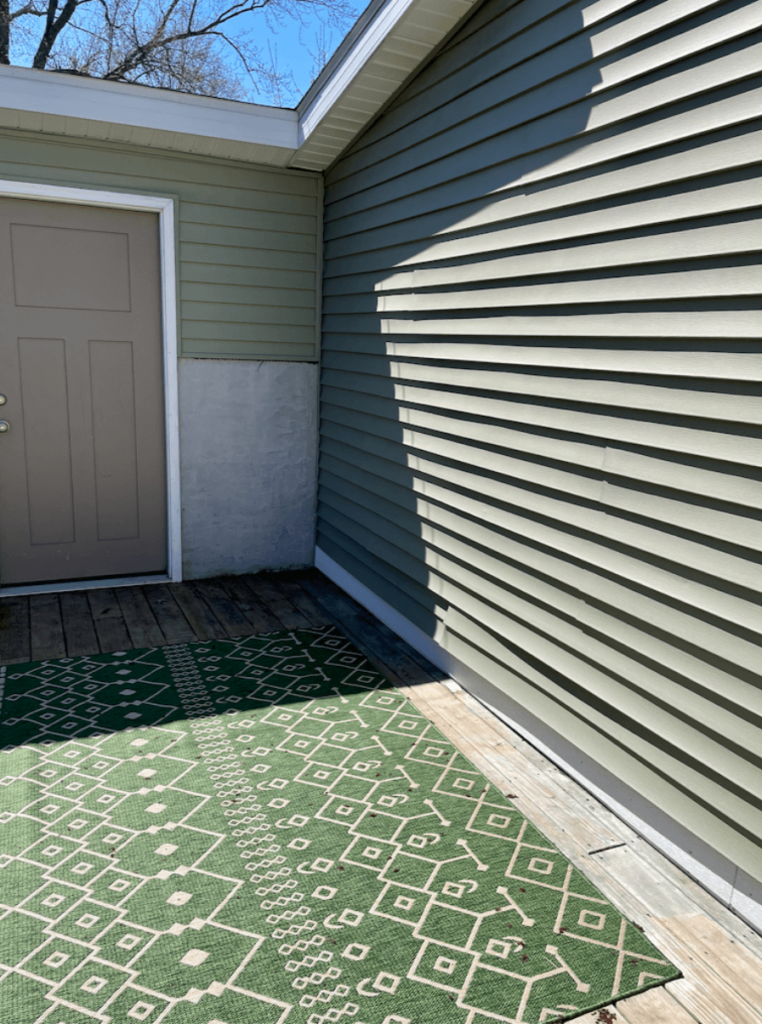
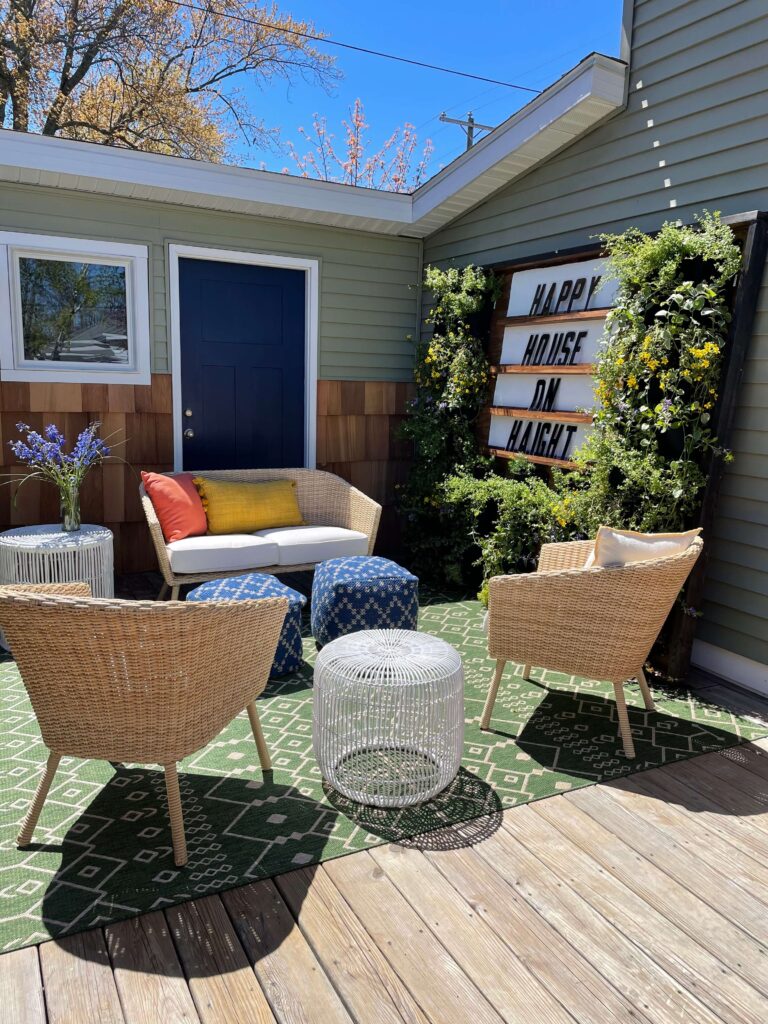
I decided to add a living wall of plants to our outdoor space at our Ludington, MI, Airbnb.
We already planned on refreshing this deck for our Airbnb guests, and there was a blank wall that I wanted to make a focal point. Being able to use the vertical space was the best part!
And the eastern sun exposure will provide plenty of light.
Once I had chosen the space, It was time to figure out how large I wanted the DIY plant wall to be.
*This post contains affiliate links.
Measuring the Space
To make a statement, I wanted to build the structure to fill the entire wall. But I did not want the structure to be permanent.
Instead, I wanted something we could change or remove if we decided to sell the house.
Ultimately, I decided we would need to lean it rather than attach it to the house.
Building the Living Wall Frame
Materials Needed for wall portion.
- Two sheets of 4 x 8 plywood
- Minwax stain in Early American
- Minwax stain in Ebony
- Polyurethane
- Plant Pockets
- Plants
- Screws
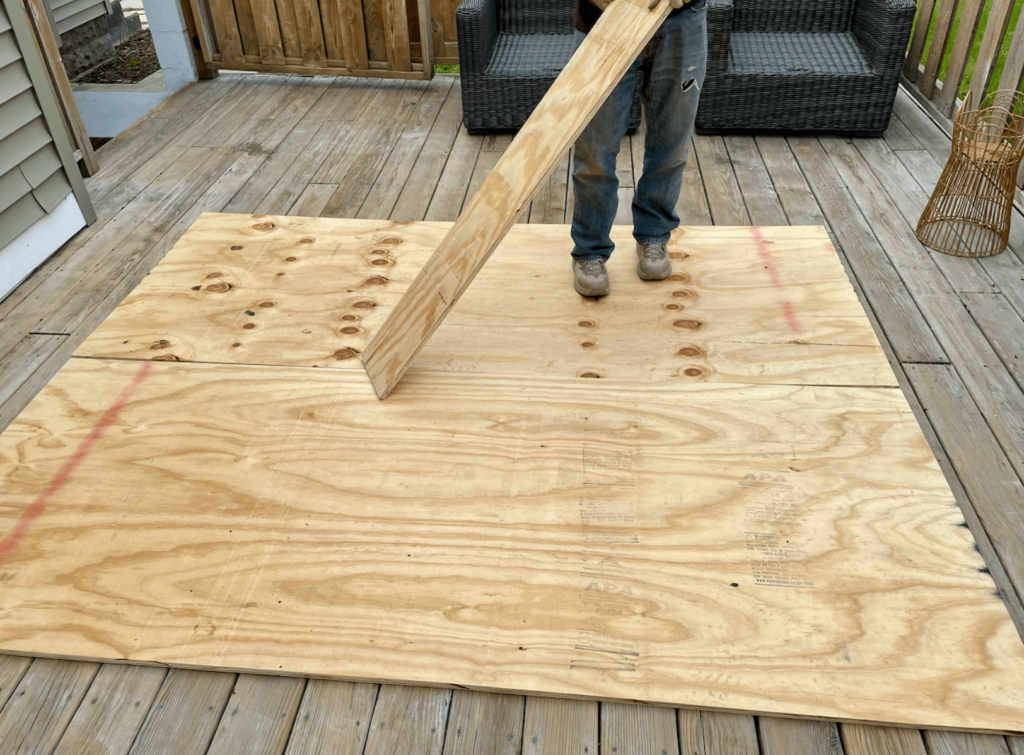
We started with 2- 4 x 8 pieces of plywood that we cut 6 inches from, giving us a frame of 7 ft x 8 ft.
The next step was to secure the two pieces of plywood together with one strip of plywood from what we had cut off the original pieces to the back of the plywood to give it some additional support.
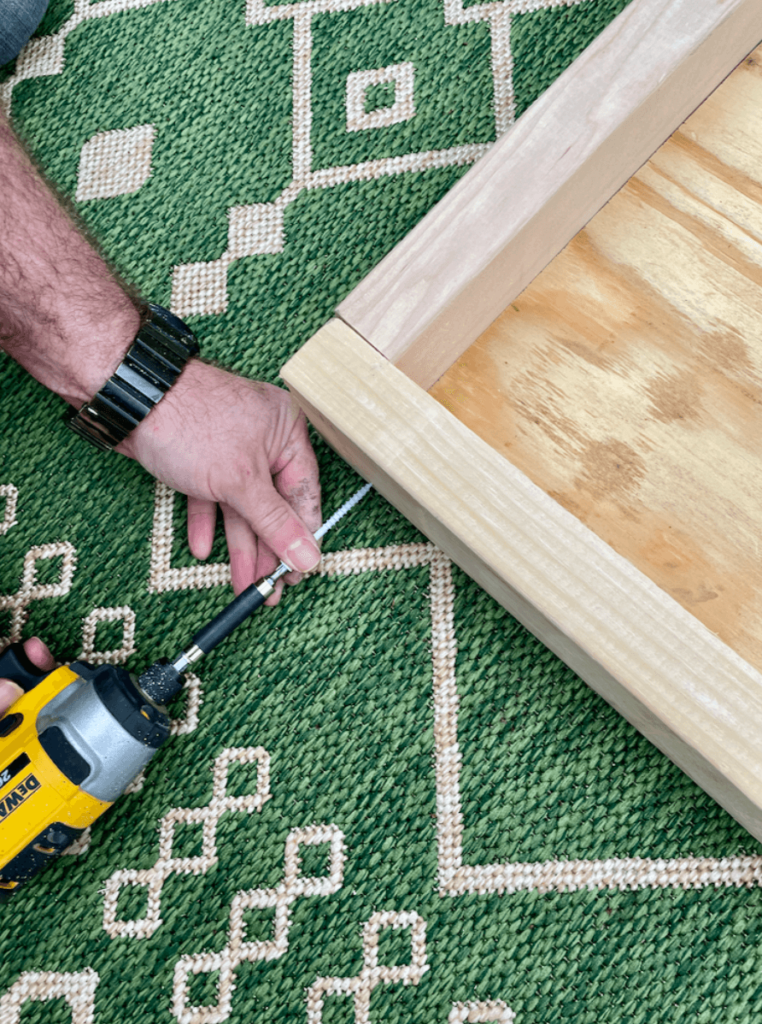
Once we had our base, we built a frame around it.
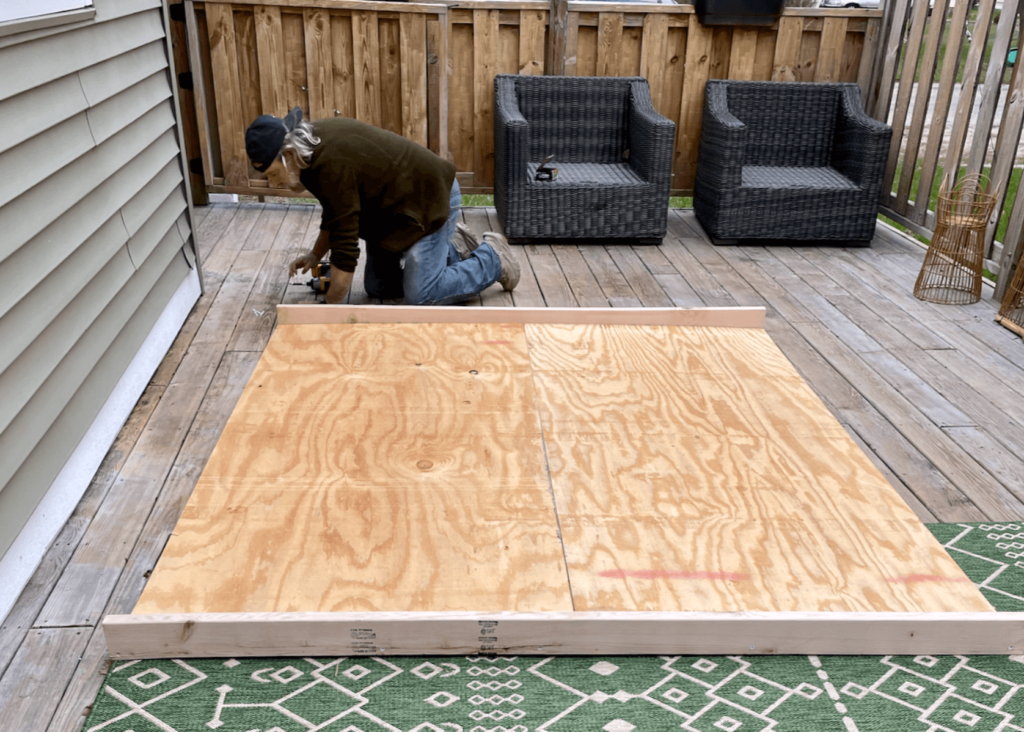
I wanted the plants to sit inside a frame.
Using screws, we secured the 4- 2 x 4 x 8 boards cut to fit along the outside of the plywood to frame it.
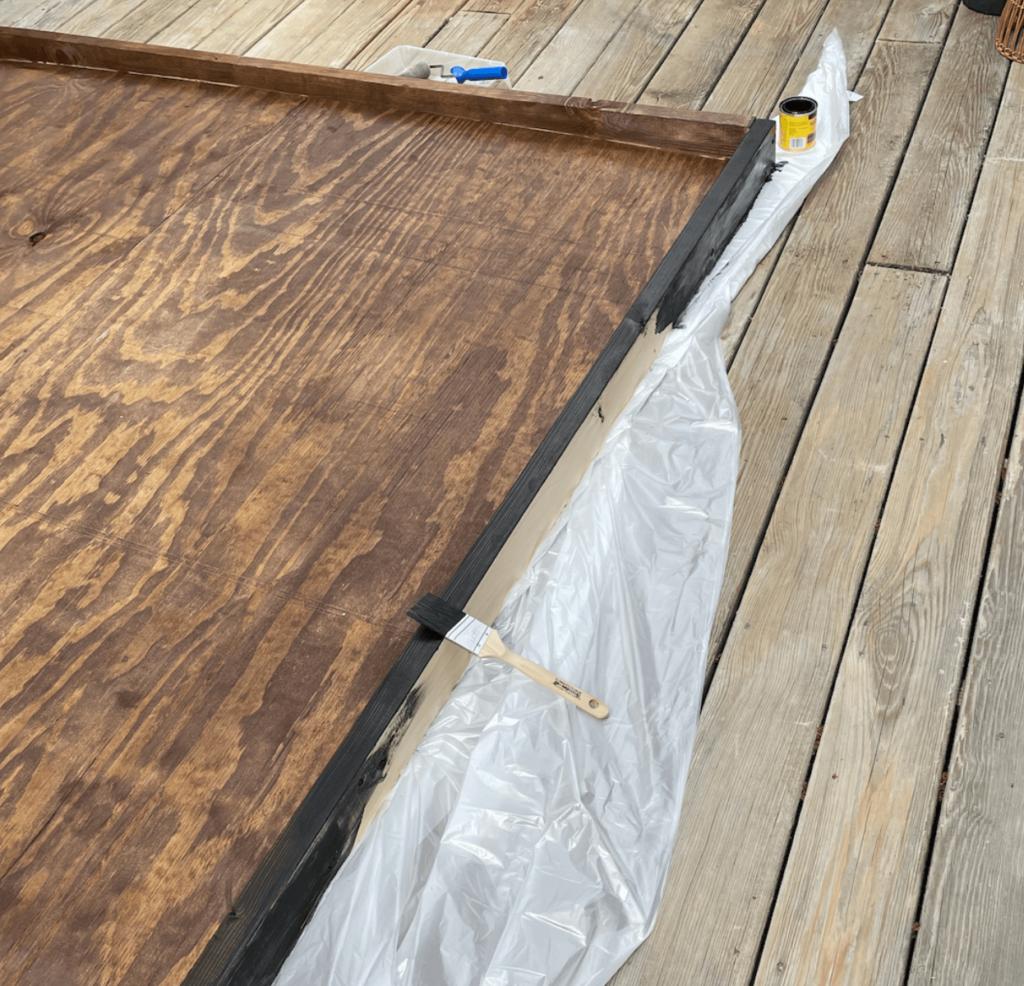
Once the frame was completed, I stained the plywood (inside)with Minwax Early American stain and the frame with Minwax Ebony, which is black, to add some contrast.
Then, I used three coats of polyurethane (letting them dry thoroughly between coats) to seal the entire piece for added protection against the elements.
I will probably add another coat in the fall.
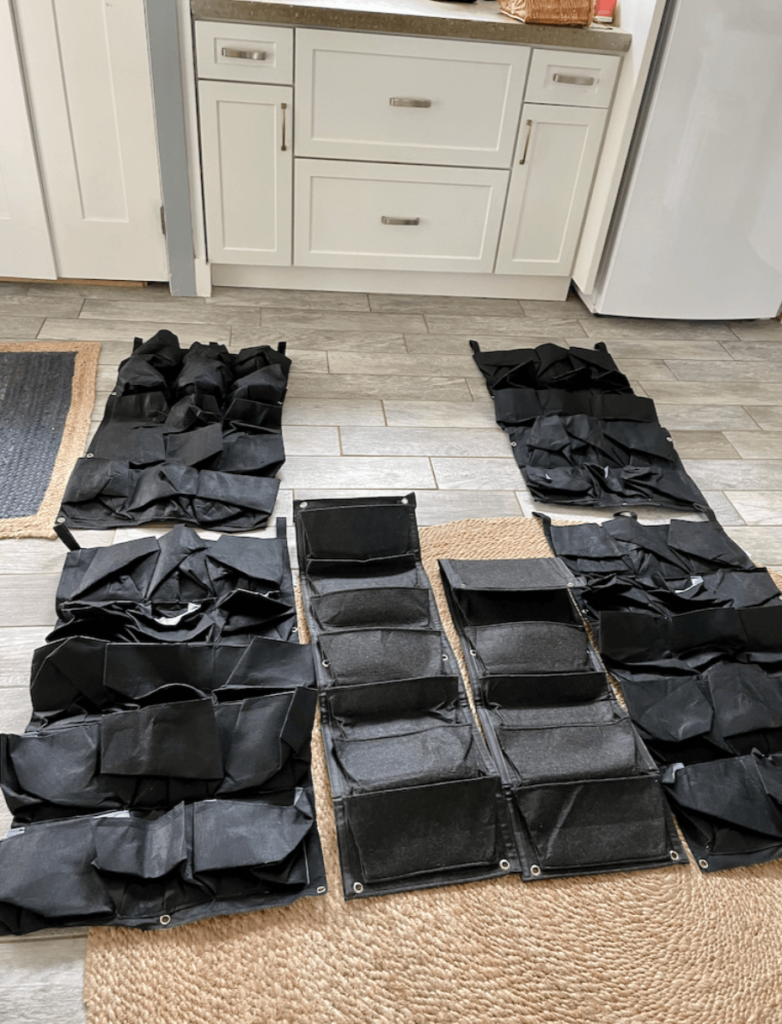
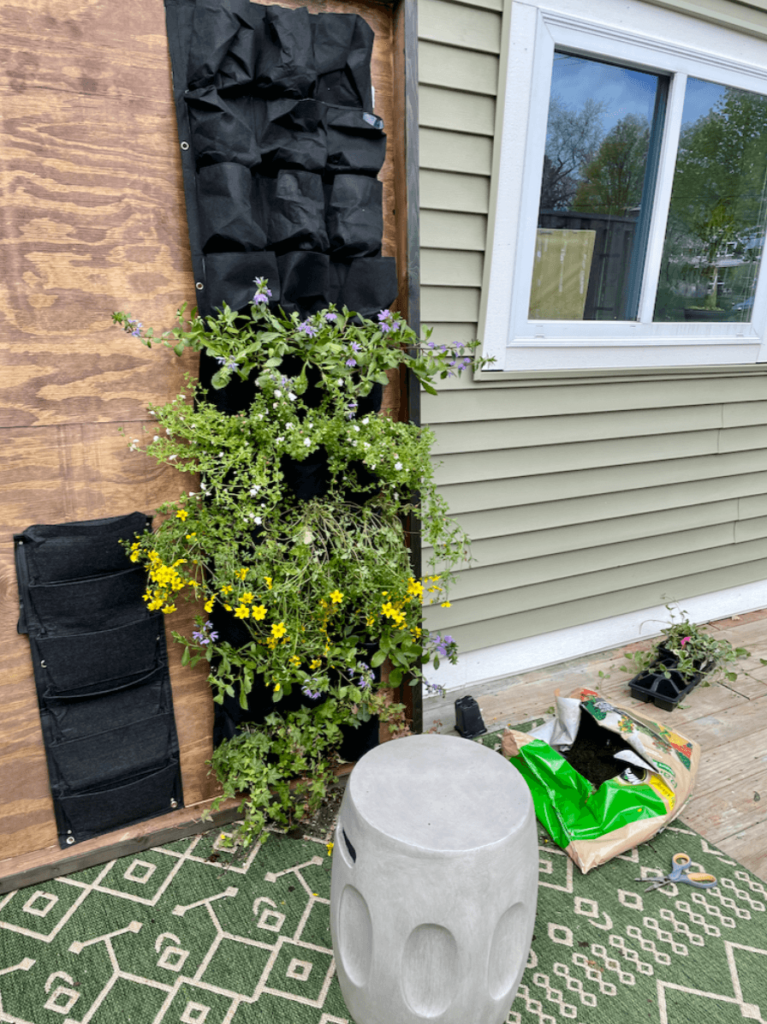
Add the plant bags.
Before I attached the plant bags, I laid them out to see how I wanted to attach them.
Once I saw the whole wall laid out, I realized I wanted to add another design element to this piece.
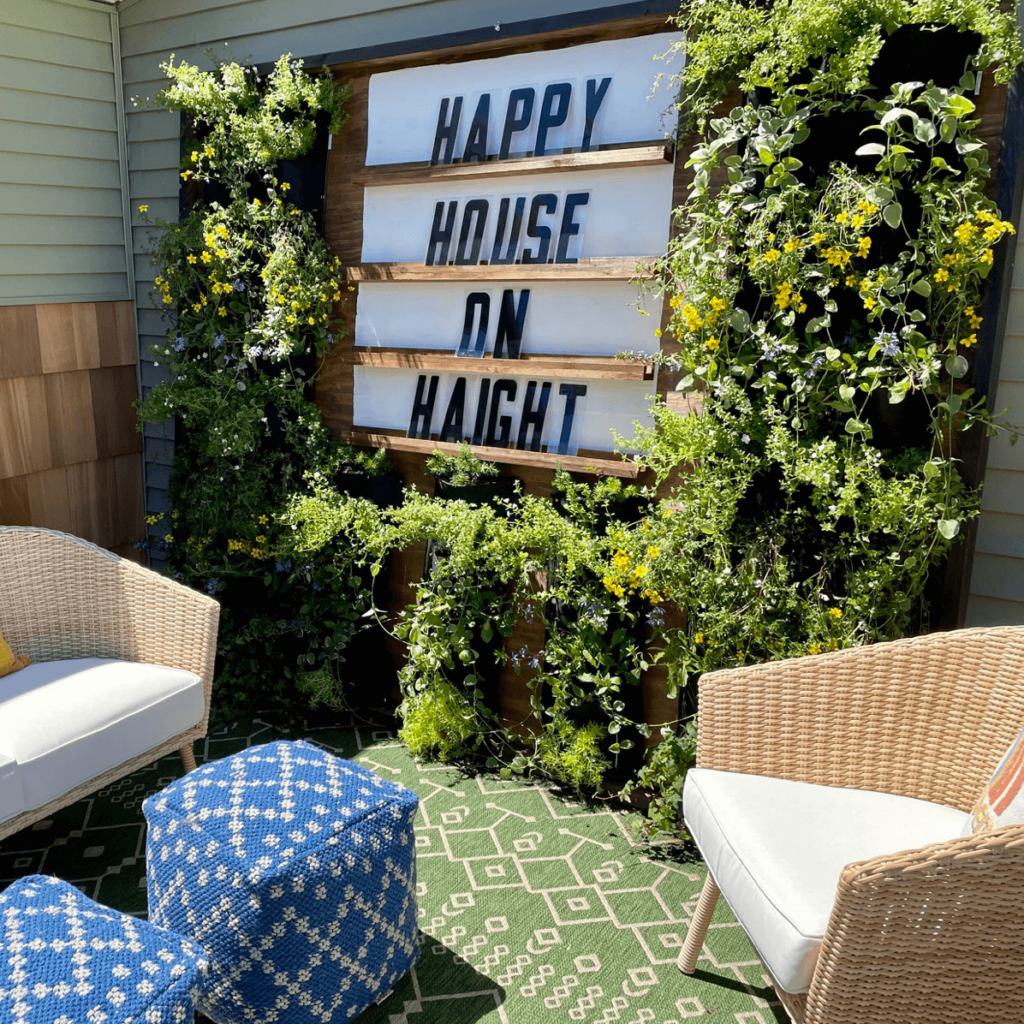
After some thought, I settled on a Giant Letter Board to leave welcome messages for our Airbnb guests.
How fun!
Now that my layout was decided on, I added the grow pockets.
They are made of a heavy-grade felt material.
We used these large vertical wall pockets from Amazon for 4.5-inch plants.
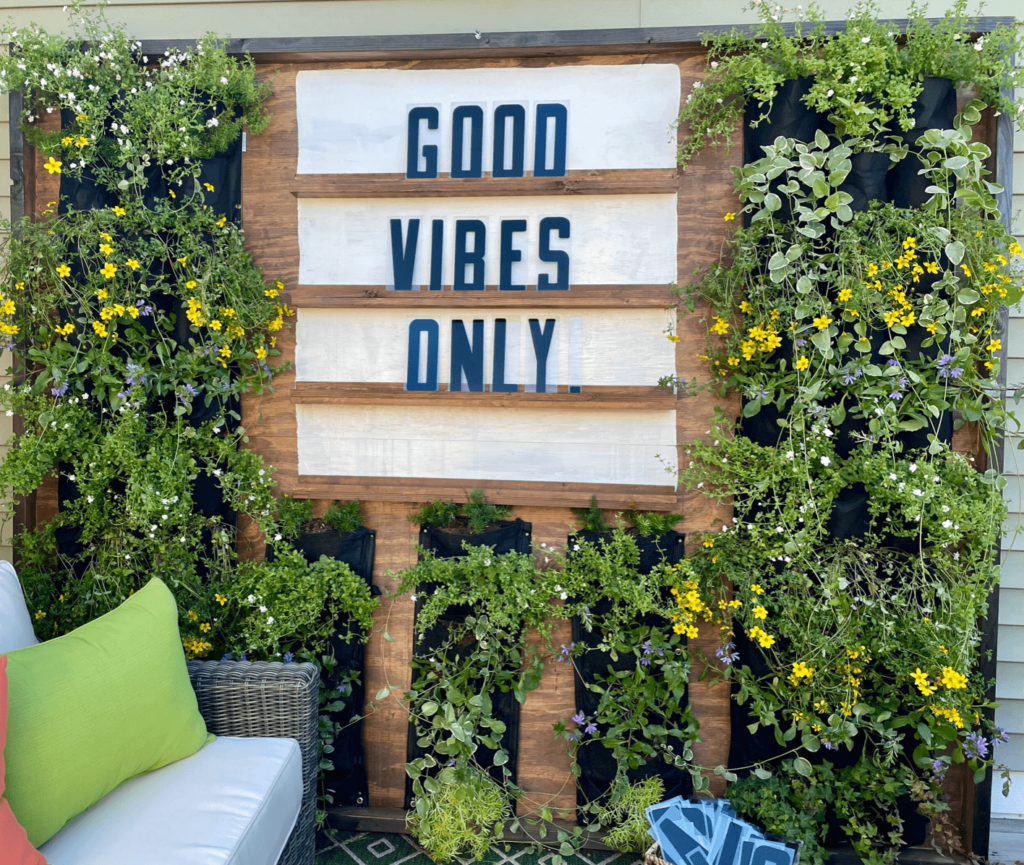
I mixed a variety of the seven-pocket version and the 12-pocket version, leaving room for the giant letterboard in the middle.
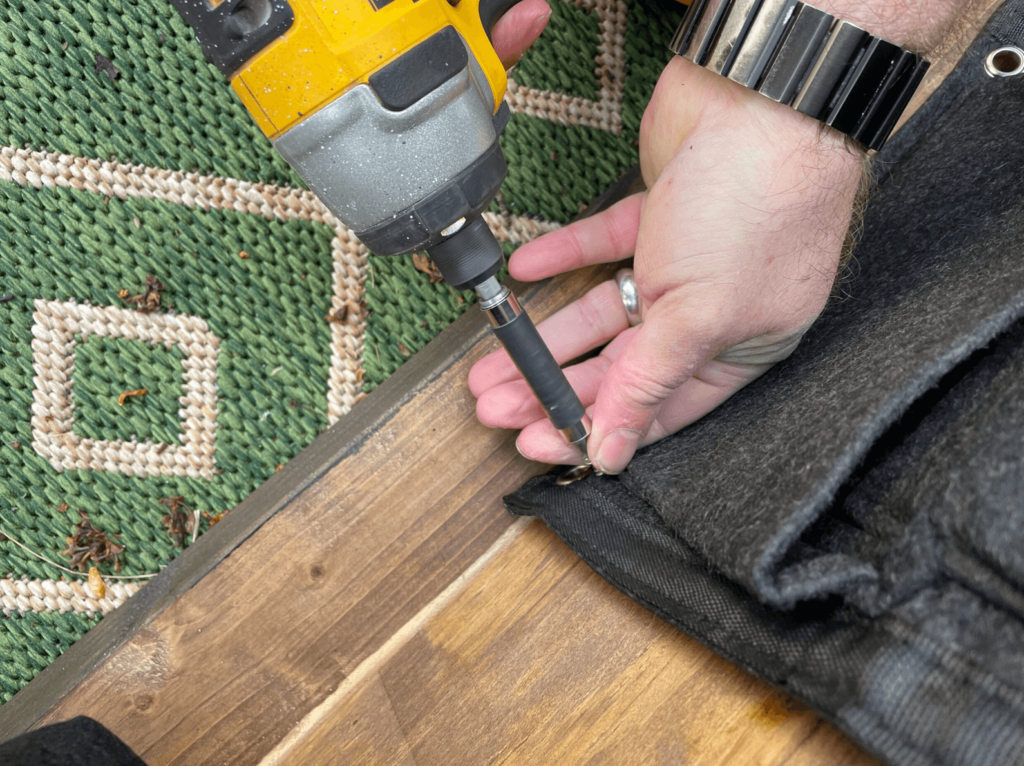
Once the vertical wall pockets were attached, it was time to start planting.
Choosing the plants for our DIY Plant Wall
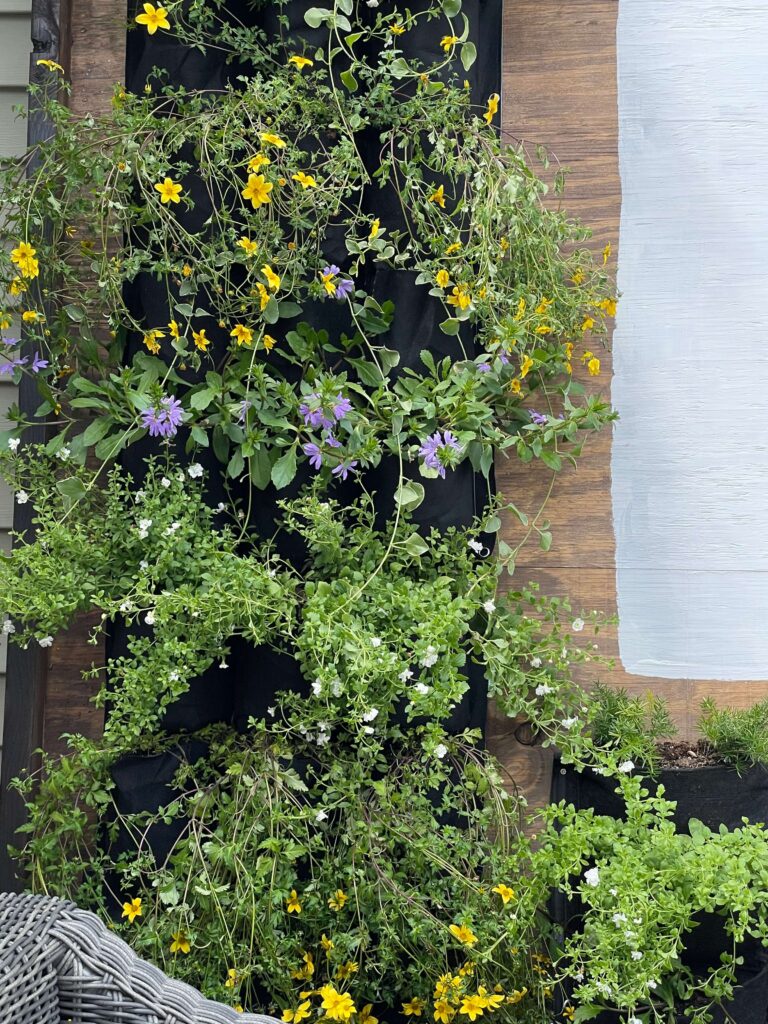
Ideally, as the plants fill in, I hope it will be the perfect mix of a bit of greenery with pops of bright colors.
The plants I chose:
Moonbeam Coreopsis
Vinca Vine is a perennial vine; I may leave these and see if they return next season.
Ajuga Bugleweed
Campanula (white) -top Row
Asparagus Fern
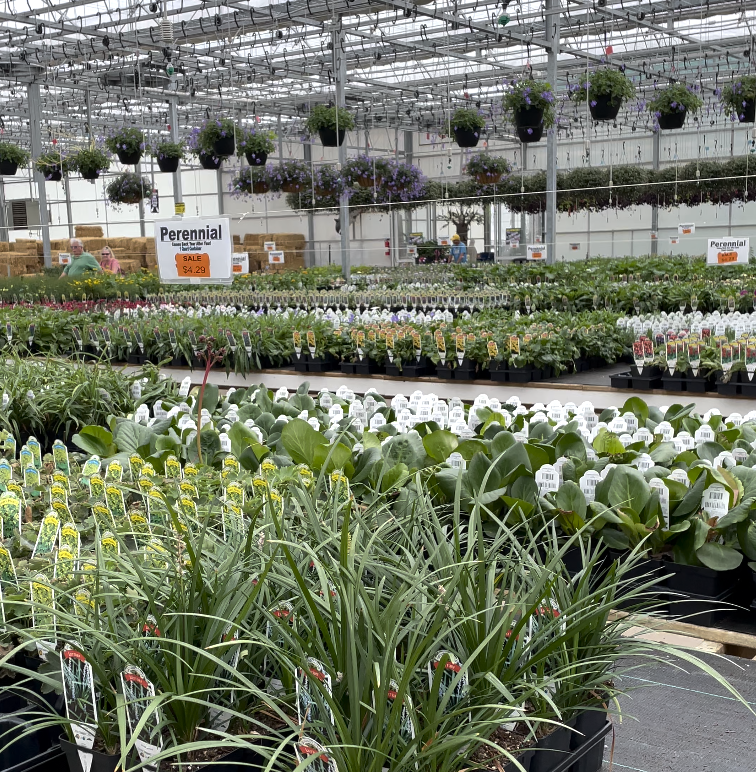
When planning any garden structure, it is essential to select the right plants. I was careful to chose plants with similar light and water requirements. Low-maintenance plants were my first priority!
With the help of my local nursery staff, I chose these particular plants because they are drought-tolerant and will thrive in full sun.
This, combined with the water-storing crystals, will help immensely with watering this summer.
The Best Way to Care for Your Living Wall
Your plants will need regular watering and the occasional pruning (I love these pruners).
Because I used small plants (4-inch, which tend to dry out quickly), I added a product that I have had success with in the past to the soil.
Miracle Grow Water-Storing Crystals.
These were a great way to keep up with my patio containers last year, and I have my fingers crossed they can save me some time with watering this year.
When planting, you mix the crystals with the soil (I like to avoid the roots). If you are adding this product to existing plants, follow the directions. You have to be careful not to add too many crystals.
Watering needs are essential to consider for an outdoor plant wall. I may add an irrigation system like this one next season (you may also find something similar at your local garden center) if I think it will be less maintenance and the plants require too much water to keep up with.
I love the look of this modern living wall, and the different plants add a “cottage feel” to the deck. I might try a smaller version at my own home and use it as a “kitchen Garden” or vertical herb garden. Fresh Rosemary, anyone??
The Giant Letterboard
- Porch Paint
- Primer
- 4 pieces of 1.5 x 36 inch wood
- 4 pieces of 1.5 x 50 inch wood
- Stain (leftover from structure)
- Polyurethane
- Vinyl Letters
For the giant DIY Letterboard, I painted the square with primer and then two coats of porch paint, followed by three coats of polystyrene to seal it.
We then ripped four pieces of wood to 36 x 1.5 inches and four pieces 36 x.50 for the ledge.
I stained them with Minwax stain and sealed them with polyurethane since they were outside.
We attached the ledges with a pneumatic nailer.
Easy peasy!
We chose 7-inch letters for the giant letterboard, although the Vinyl letters are not cheap!
That is it for our easy DIY outdoor living wall.
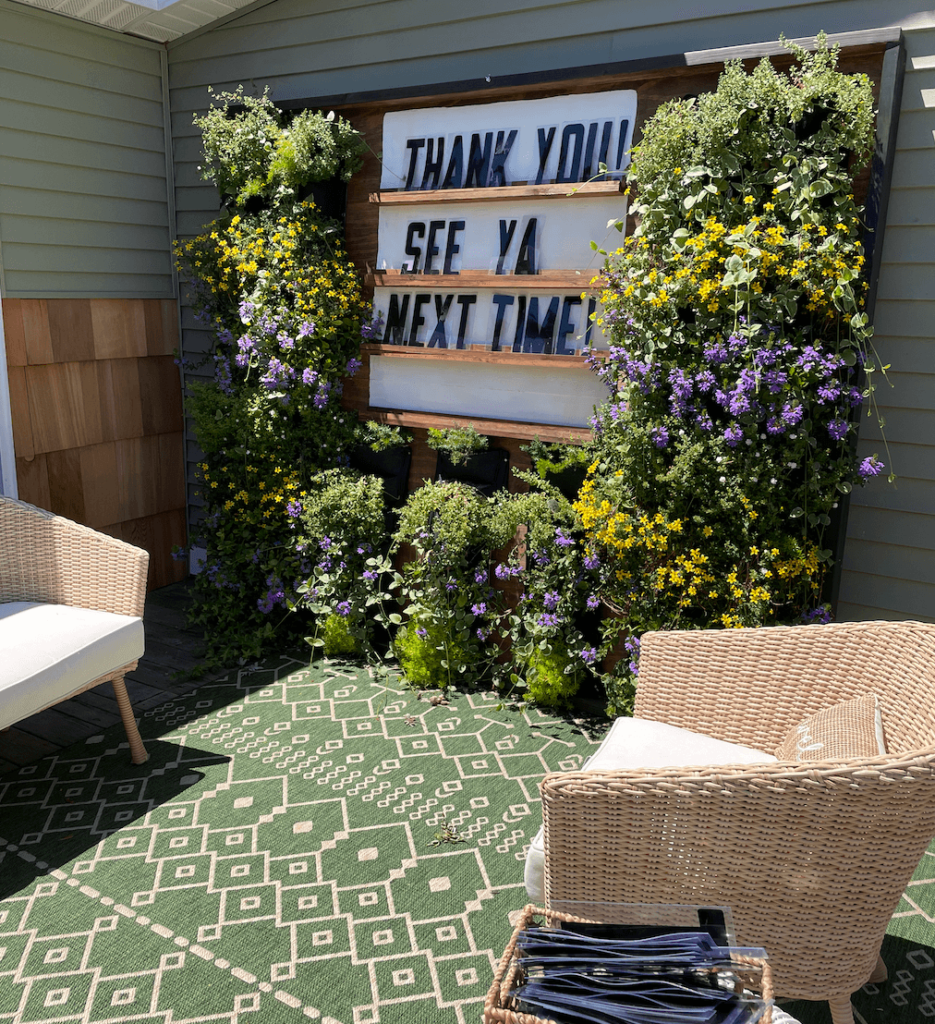
I’m excited to say the plants are already beginning to fill in nicely, and we still have frost warnings here!
I’ll post another pic once it fills in.
Our final step was securing the entire piece to the house with a large hook and eye to prevent falling.
The Airbnb guests love leaving us messages.
That’s it for today; if you’d like to shop the post, you can do so below.
And be sure to check out my Amazon Store for more outdoor decor pieces.

Until next time,
Libbie
If you liked this post, I have a couple of others you may enjoy! I am a sucker for indoor plants, and you can find posts featuring wall planters, an indoor plant wall, and the best plants to use in your own living wall. Check these out:
Until next time,
-Libbie

That is awesome! I’m looking for something to cover our fence for more privacy so I may need to borrow this idea 🙂
Thank you, Sara! I am pretty excited about this one. 🙂
I love it! When I first saw the wall, I thought, "How did she get those flowers to climb up that wall, and then I saw the rest. That is awesome. I have a wall and that is what I’m going to do!
Thanks Deana,
The wall is filling in nicely so I am excited!
Great project I learned something about finishing the edges I want to make a table and this is how I want to
Finish the sides.
Maria,
Yay! Love when I find an idea in the details!!
This is such a great idea, I am already envisioning a wall like this on my own property! Thanks so much for sharing!!
Thank you, Sherri! I love how it is filling in.
What an amazing project ~ it looks great! Looks like it should be on an HGTV show!
Allyson,
Thank you, you are so sweet.
Libbie
I love this project! And that letter board! It will be so fun to have guests leave messages! Thanks for sharing!
Last week I found the cutest thank you message from our guests!! 🙂
Gosh, that turned out so great. Do you think you’ll have to restain it once in awhile?
XOOX
Jodie
http://www.jtouchofstyle.com
Jodie,
We may have to restain in a few seasons, but I hope all the extra poly keeps that to a minimum!
Libbie
Libbie
This looks amazing, I love it. I have never heard of vertical pockets, I will be having a look for them. I have tried the vertical garden but after a few months, the plants got too heavy and started to fall out. You did a great job and the sign is awesome too.
Anita,
I am watching the pockets carefully. So far, so good!
What a beautiful way to add personality to any outdoor space. Very nice, Libby!
Thank you, my friend! 🙂
Wow, this is awesome – love this idea! I have the perfect spot between a couple of windows on the back of our house to do this for an herb garden. Thanks for the inspiration!
Marie,
I would LOVE to do an herb garden wall!!!
This looks so inviting and lush. You made it look easy to replicate this. I bet your guests will enjoy sitting there.
Marijke,
Thank you! I am excited to see how it fills in this summer!
Wow! This is so, so cool! Thank you for sharing. I almost feel like I could do it too with your great instructions! Enjoy your summer on the deck! Best, Jen
Oh, this is so cool…it would be great for herbs or strawberries, too!
Interesting! Love the idea. I don’t have a green thumb, but his idea seems so doable!
Love this idea and you made the sign at center! So cute for your guests to take photos too!
This is brilliant!
What a lovely compliment!
What a beautiful addition to your outdoor space! Thank you for sharing at Party In Your PJ’s.
Thank you for hosting such a great link party!
Such a wonderful project. Perfect to add some interest and freshness to your patio. I have always wanted to create one. I am happy to feature your diy living wall at Love Your Creativity.
Wow, I love this idea! It really fills out the space nicely. The letter board is a nice touch, too! Thanks for sharing at Vintage Charm. xo Kathleen
I have been wanting to do this for so long and have all sorts of plans saved. Thank you for your tips! Sharing today at Inspire Me Monday
Thanks for sharing with us I’m featuring you this week! To Grandma’s house we go!
THANK. YOU!! 🙂
Really great idea. I want to make one!
This really is an amazing project! I can’t wait to read about the creation of the letterboard. What a wonderful combination of projects!
Thanks so much for joining the Grace at Home party at Imparting Grace. I’m featuring you this week!
Richella,
You are always so kind! Thank you!!
It’s amazing! I am happy to feature you at TFT this week. Thanks for sharing!
https://followtheyellowbrickhome.com/celebrating-national-gardening-week-tft/
Thank you, Amber!!
AWESOME project!!
I’d love for you to join us over at the Creative Crafts Linky Party every Wednesday through Sunday
https://creativelybeth.com/creative-crafts-linky-party-45/
Followed and Pinned! 🙂
Creatively, Beth
Thanks, Beth!!
I will do that!
Libbie
This is freaking awesome!!! I absolutely love the live wall (I think I need one now) and the good vibes only sign just puts it over the top!!!
Thanks so much for sharing this project:)
[…] A Life Unfolding/ How I Designed An Easy DIY Outdoor Living Wall […]
Hi Libbie,
This DIY outdoor living wall is amazing! Now to add this project to our to-do list; I can just see it on our back porch!
We loved having you join us for this week’s Welcome Home Saturday series.
xoxo,
Brendt
[…] are excited to have Libbie of A Life Unfolding as our guest host this week. Thank you so much Kelly of The Tattered Pew for organizing the posts […]
This is just the coolest project! I love it and I’m so glad you chose it to share this week on Welcome Home Saturday! Thanks for joining us!
So much fun. Looks like a perfect spot for meditation. Thanks for posting at Funtastic Friday.
[…] out this very cool tutorial for a diy living wall by Libbie at A Life […]
[…] A Life Unfolding/ How I Designed An Easy DIY Outdoor Living Wall […]
Hi, love the plant wall idea!! Do you have a link you can share for renting your cottage? Thank you in advance.
Hello Trina,
The link is https://airbnb.com/h/elleryandthirdstreet
🙂