
Hey everyone!
I’m so excited to finally share the step-by-step process of my penny tile with typography project, which I completed for our first short-term rental, a charming 100+ year old foreclosure we’ve lovingly restored. This tile project was completed as part of the One Room Challenge. This entryway makeover was a labor of love, and I’m thrilled with how it turned out – a total “wow” moment for our future Airbnb guests!
*This post contains affiliate links.

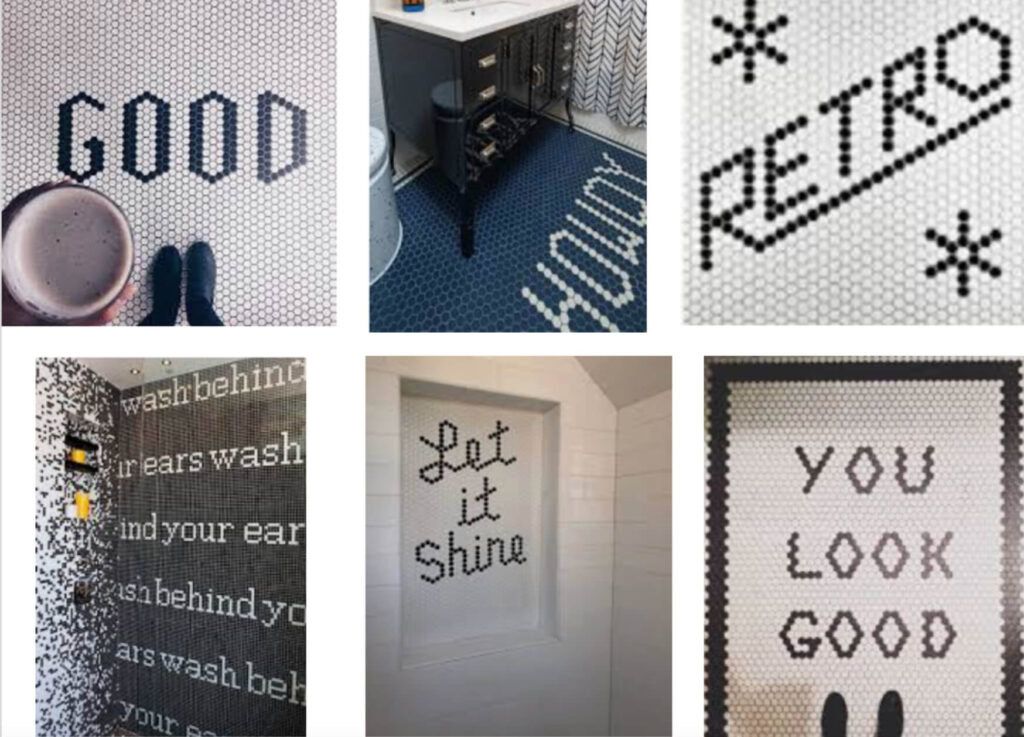
Why I Chose Typography Penny Tile for the Entryway.
Our little house is packed with character (or at least, the potential for character!), and I wanted the entryway to make a statement. It’s the first thing you see when you walk in, opening directly into the stairway and living area, so it needed to be a focal point – an Instagram-worthy moment! I explored tons of tile options online, but kept coming back to penny tile. It felt perfect for the age of the house, and since we were already using black and white penny tiles in the upstairs bathroom, it created a nice sense of cohesion throughout the home.
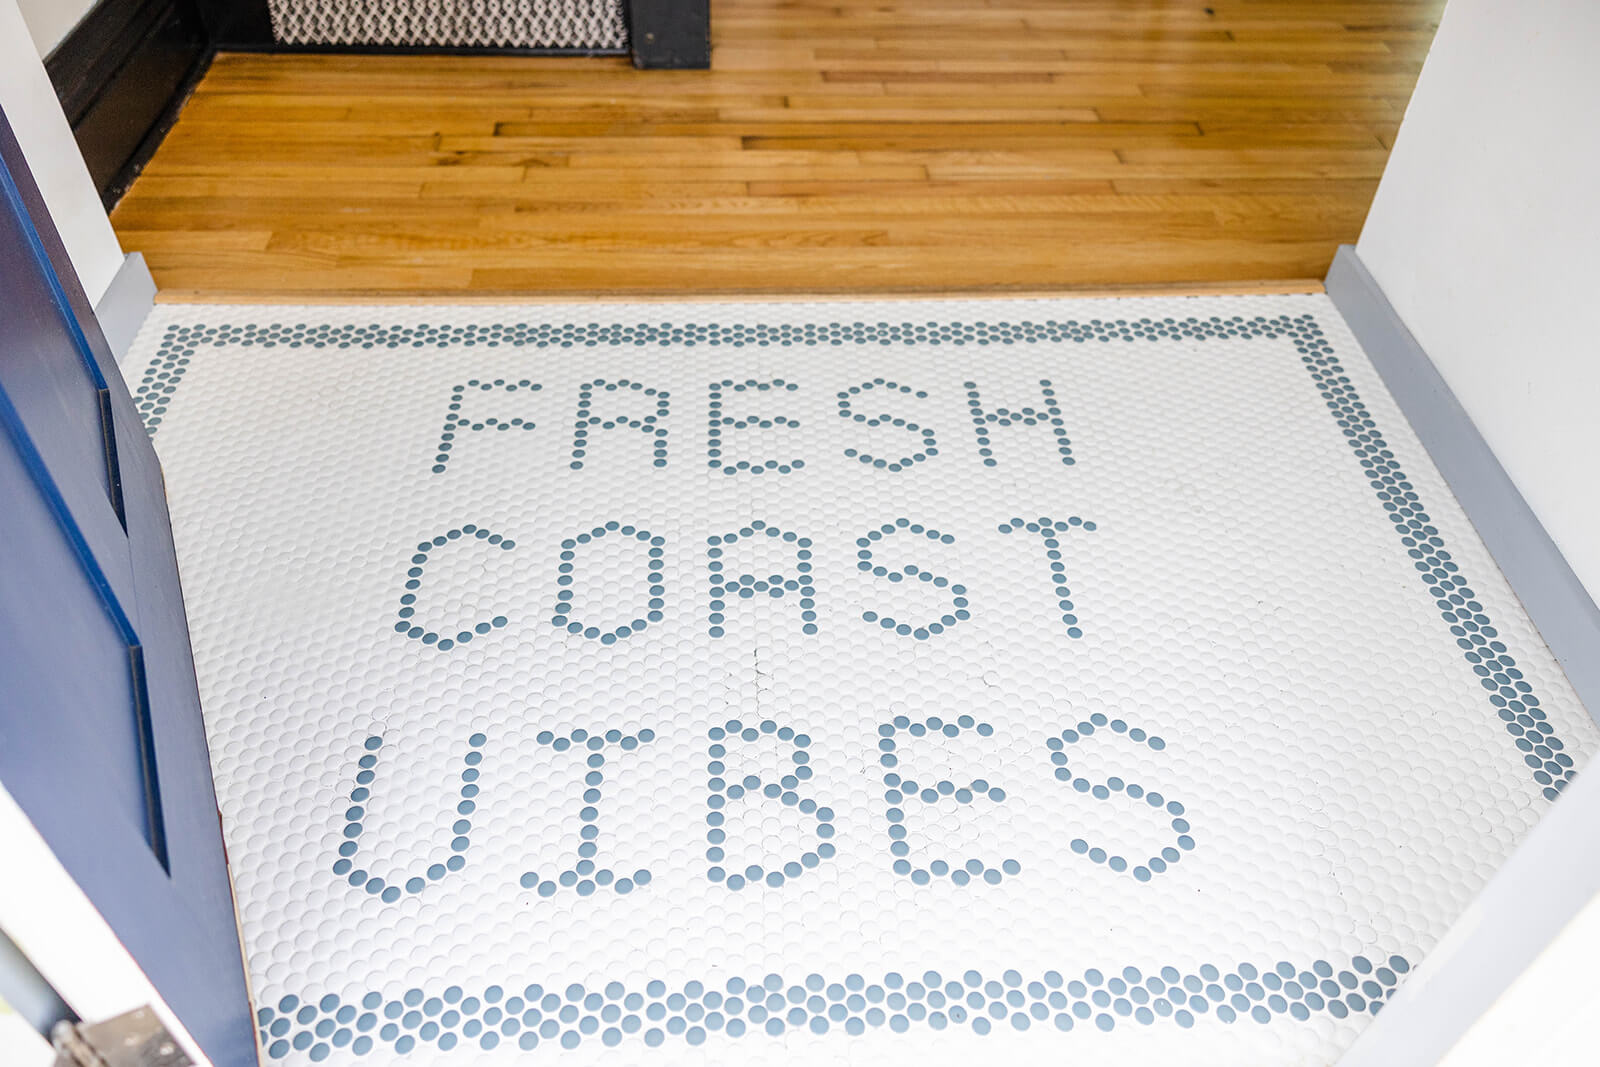
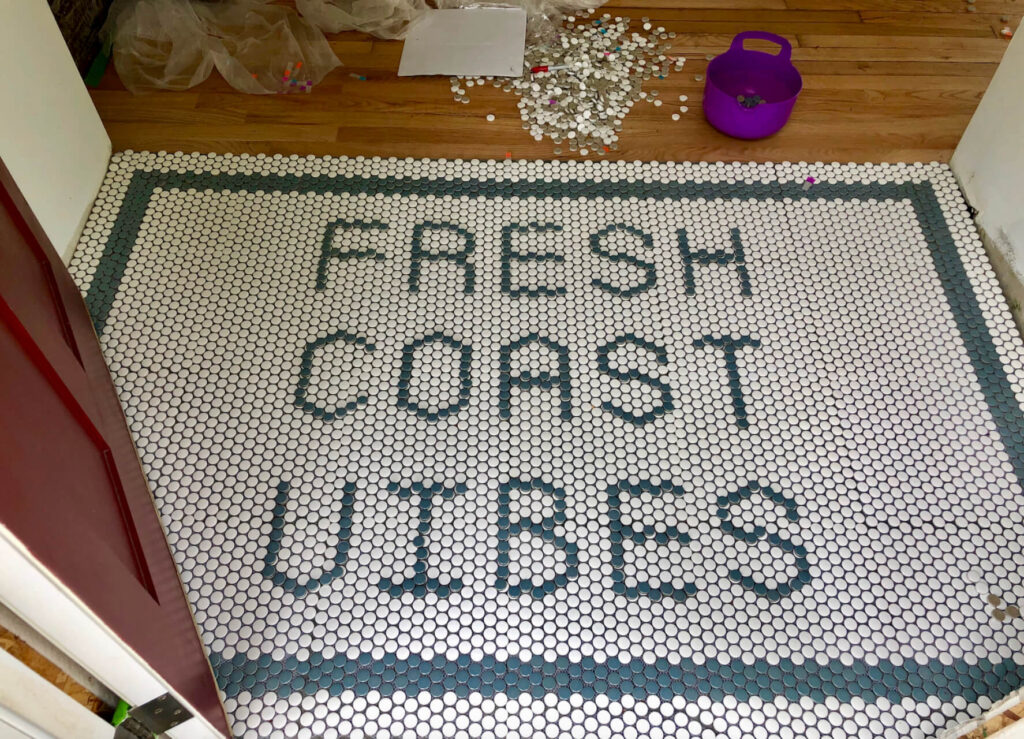
After much deliberation (and I mean much deliberation!), as to what the typography should say, I narrowed down my phrase to “Fresh Coast Vibes” – a nod to our location in Ludington, MI, right on the beautiful shores of Lake Michigan.
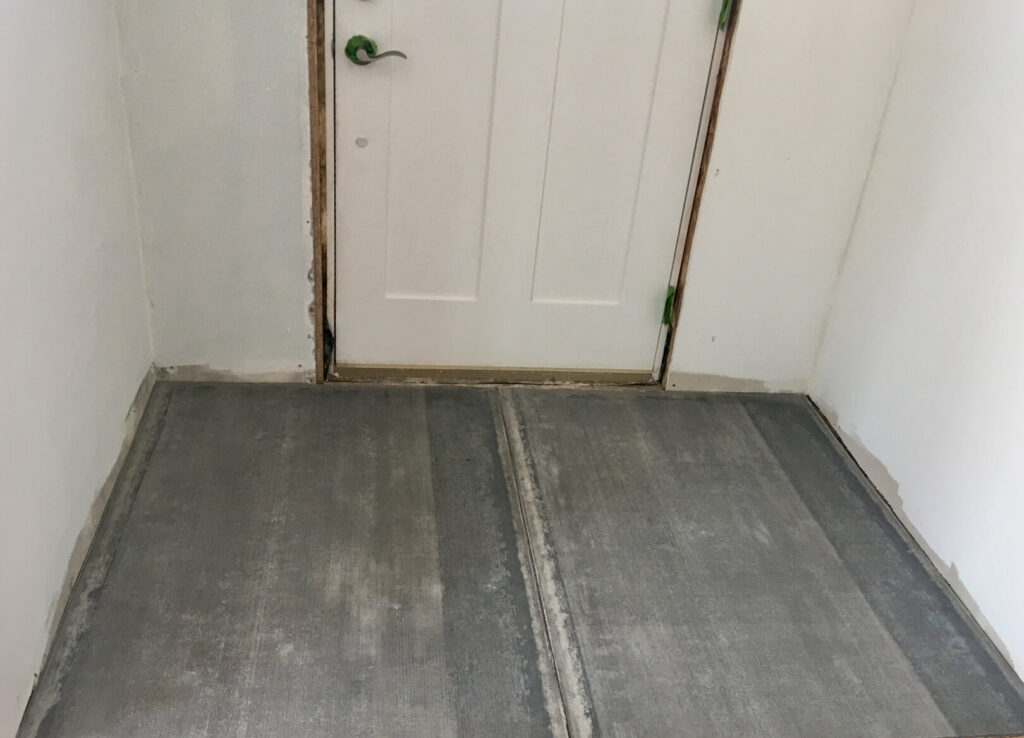
With the phrase settled on it was time to get started. I prepped the entryway.
The Materials Needed for Penny Typography Tile.
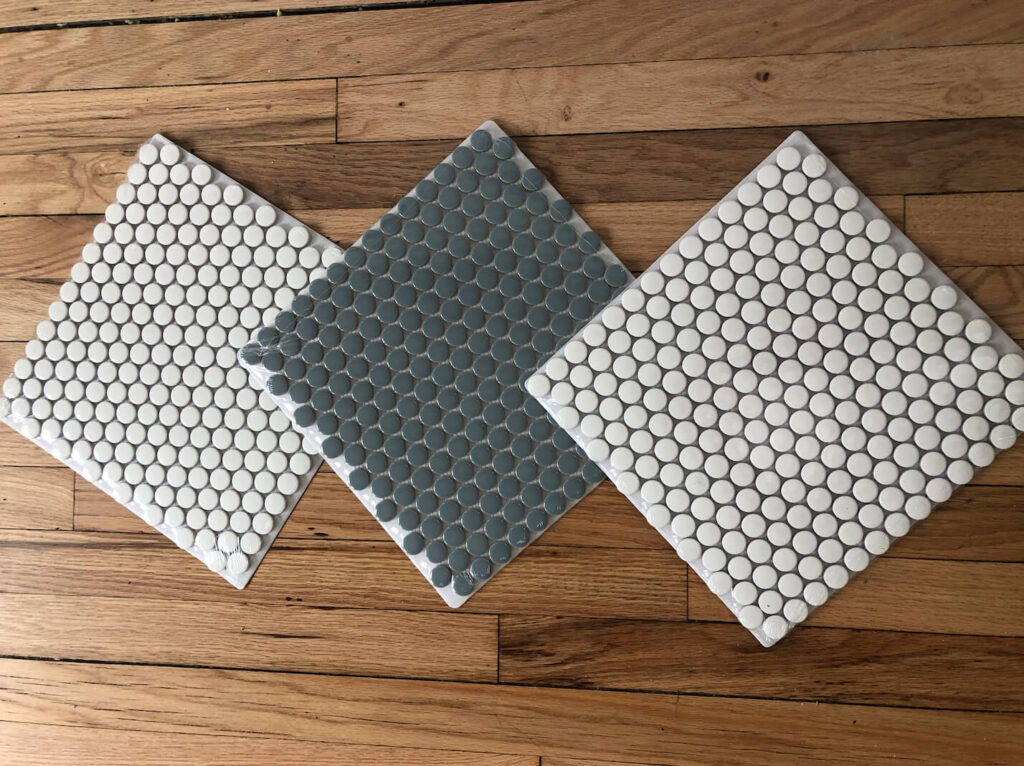
For this project, I ordered my penny tile from Lowe’s. It was so convenient! Shop My Lowe’s Storefront here for all the details. Penny tile is conveniently mounted on a woven mesh backing, making installation so much easier. I chose a classic white penny tile for the background and a smoky blue for the lettering. Beyond the tile, here’s what I used:
- Penny tile (white and blue)
- Thin-set mortarGrout (I used a medium grey)
- Grout float
- Sponge
- Bucket
- Marker
- Measuring tape
- Level (optional, but helpful for straight lines)
- Trowel
You can shop for this product at my Lowe’s Storefront here.
The Process I Used for Installing the Tile and Defining the Words.
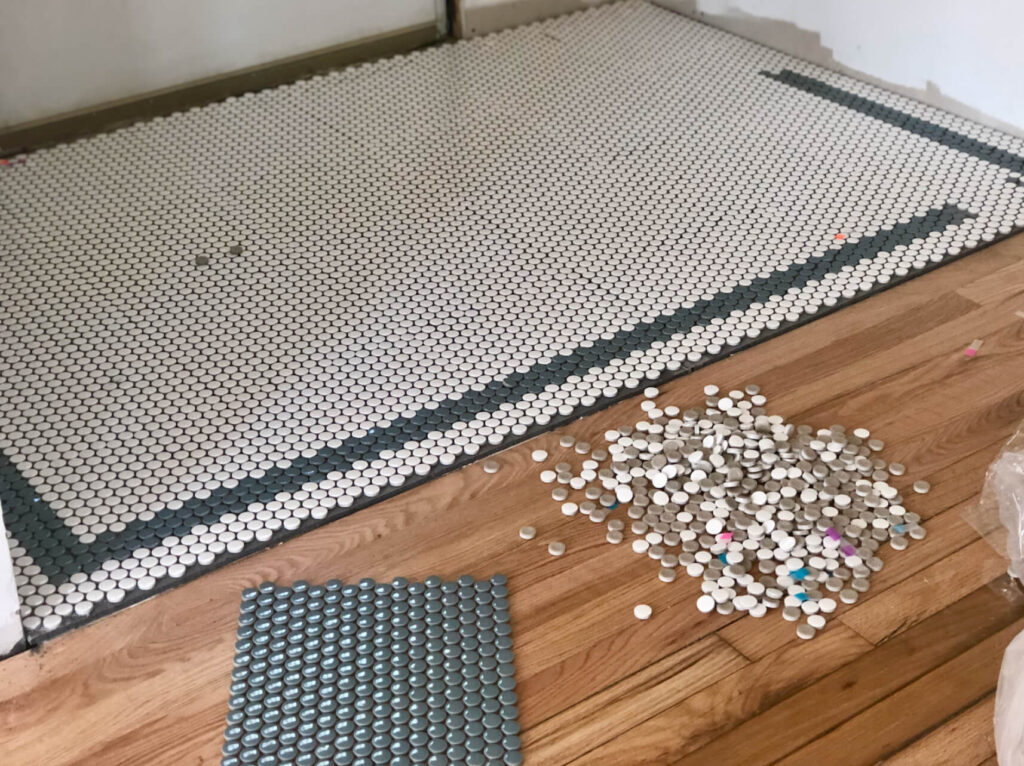
This was the most time-consuming part of the project, but so worth it! I started by dry-fitting the white penny tile across the entire entryway floor. Since the space was large, I decided to incorporate a blue penny tile border around the entire design. I played around with the width of the border, laying blue tiles on top of the white ones until I achieved the look I wanted.
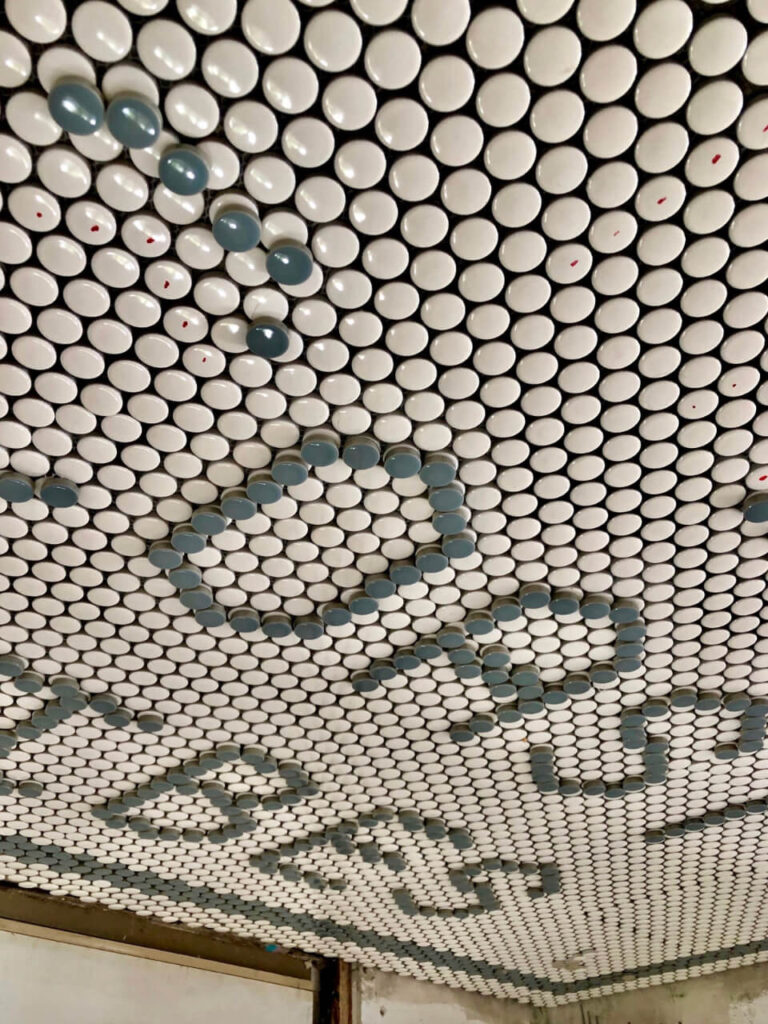
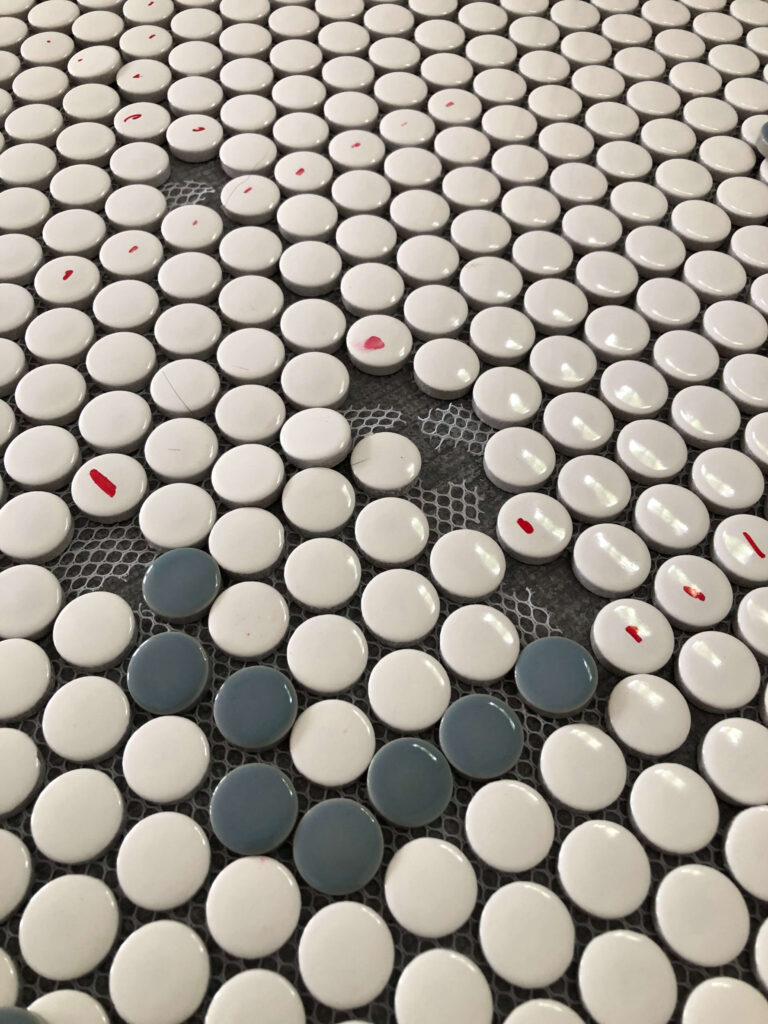
Once I was happy with the border, it was time to tackle the lettering. I carefully laid out the blue tiles on top of the white to spell “Fresh Coast Vibes.” This was a bit like putting together a giant, tiled puzzle! I used a marker to mark the white tiles that would eventually be replaced with blue. This part took a solid 7 hours! Seriously, I can’t emphasize how much time the layout took! But I loved the process, and I’d totally do it again.
Once the entire design was laid out and marked, I carefully moved the tiles aside, making sure to keep the pattern intact. Then came the (slightly scary) part: popping out all the marked white tiles. With the white tiles removed, I was ready to apply the thin-set mortar. I used a trowel to apply the thin-set evenly to the floor, then carefully reinstalled the white penny tile (minus the ones I had removed) and replaced the marked tiles with the blue ones. The actual tiling process went surprisingly quickly!
After letting the thin-set dry completely, it was time for grouting. I used a medium grey grout, which made the blue lettering pop against the white background. I applied the grout with a grout float, pushing it into all the spaces between the tiles. Then, I used a damp sponge to clean off any excess grout from the surface of the tiles. Once the grout had set, I sealed it with 511 Impregnator sealant.
How The Penny Tile Typography Turned Out.
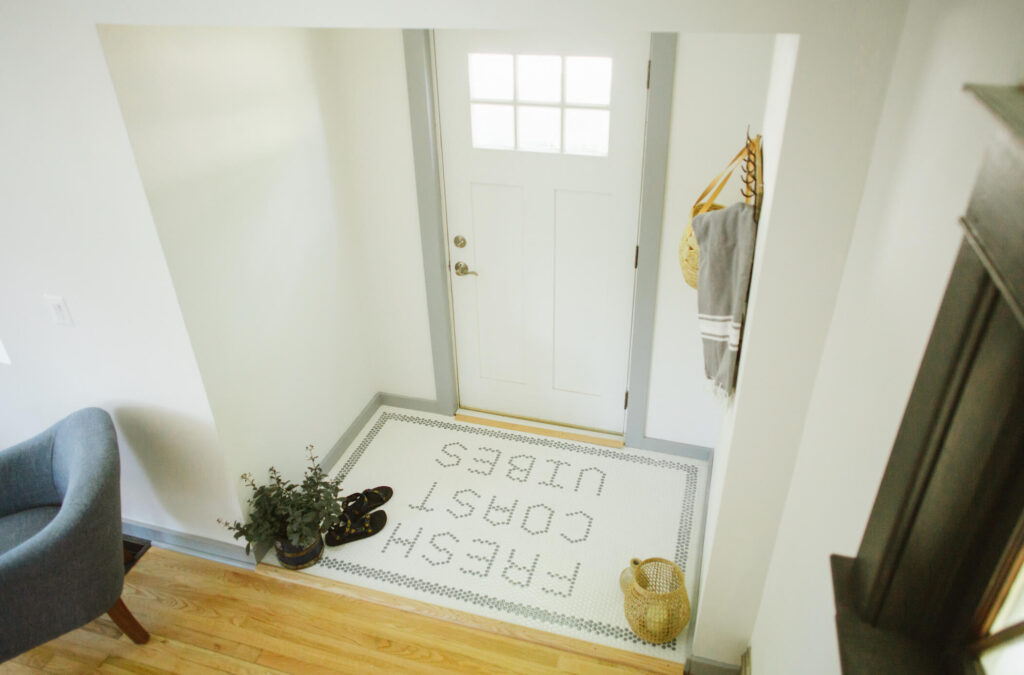
I absolutely love how the penny tile typography turned out! It feels so authentic to the house, adds the perfect touch of personality, and gives that “wow” factor I was hoping for. Plus, I get to say I did it myself! It’s such a unique feature, and our Airbnb guests mention it often in our reviews. 🙂
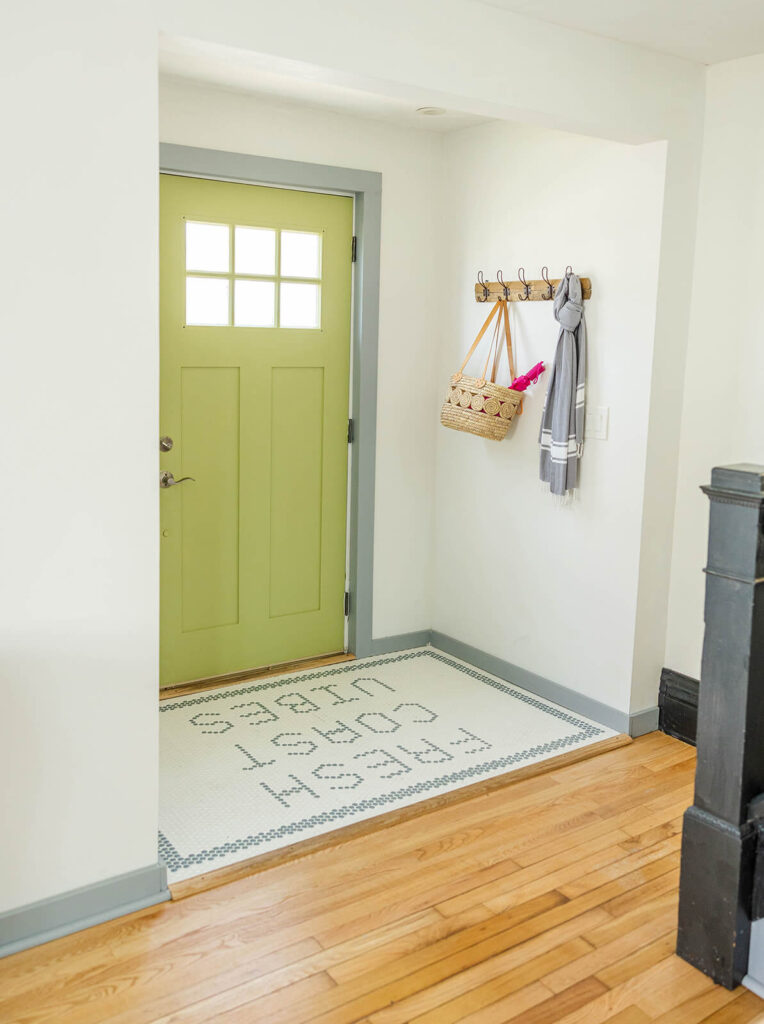
After a few weeks, I decided to add another pop of color and painted the door a bright green.
If you want to see how the rest of the house turned out, you can see it here.
This project was definitely a labor of love, but the result is even better than I imagined. It just goes to show what a little creativity and a lot of patience can do! I’m already thinking about new spaces where I can use penny tile typography. Stay tuned!
-Until next time,
Libbie
You may also enjoy:
Mussel Bound Tile Adhesive Mat Review
Choosing Porcelain Tile for the Back Entryway and Mudroom.

I love this tile work so much, I have been thinking about penny tiles for our basement bathroom and this is such a selling point.
This is SO cool! Love that it’s in the entryway – what a fun way for guests to start their stay!
OMG SO cute! I LOVE floors like this, it looks amazing!
I am so in love with this! The border is my favorite touch – it’s such a perfect dose of retro charm.
So so so awesome Libbie!!! I’m dying over this, it came out so great!!!!
That looks awesome! I love it!
This looks awesome!!! I can’t wait to see it all come together, great job Libbie!