
Hello!
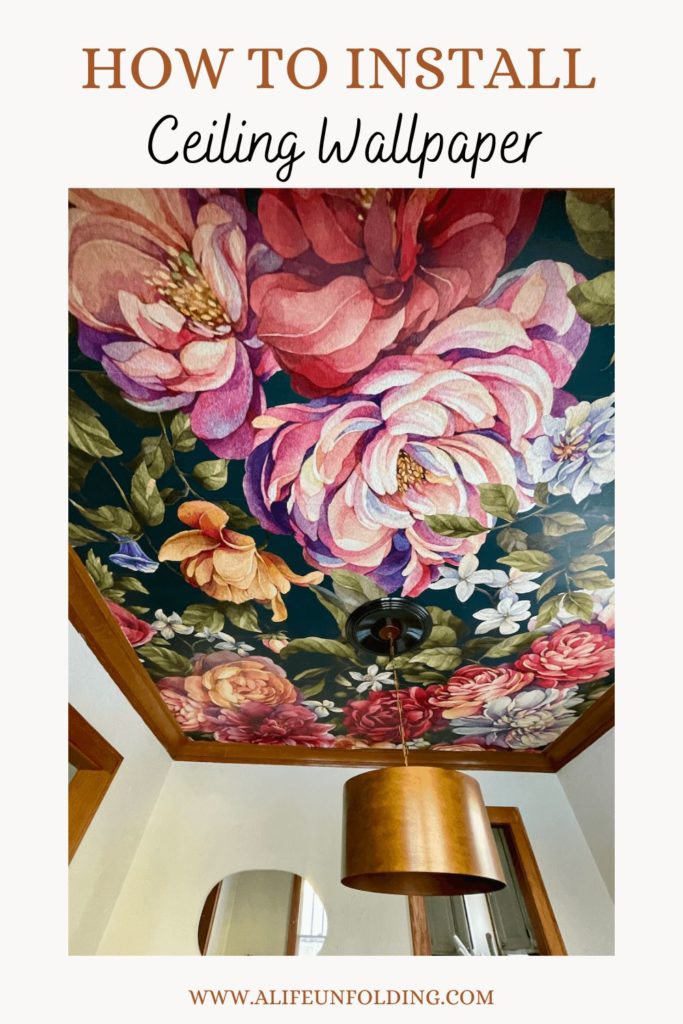
We just finished wallpapering a ceiling at our latest rental property, and I can’t wait to share it with you!

Getting Started
Have you seen a wallpapered ceiling and thought you could not do it yourself? I am here to say that if I can do it, you can too! My friends at Photowall made it very easy.
*Photowall provided this Wallpaper, but all opinions are my own.
This was the first time I had used Wallpaper on a ceiling. I have put up several wall murals from Photowall (you can see them here and here) and traditional pasted Wallpaper and peel-and-stick Wallpaper.
Ordering the Wallpaper
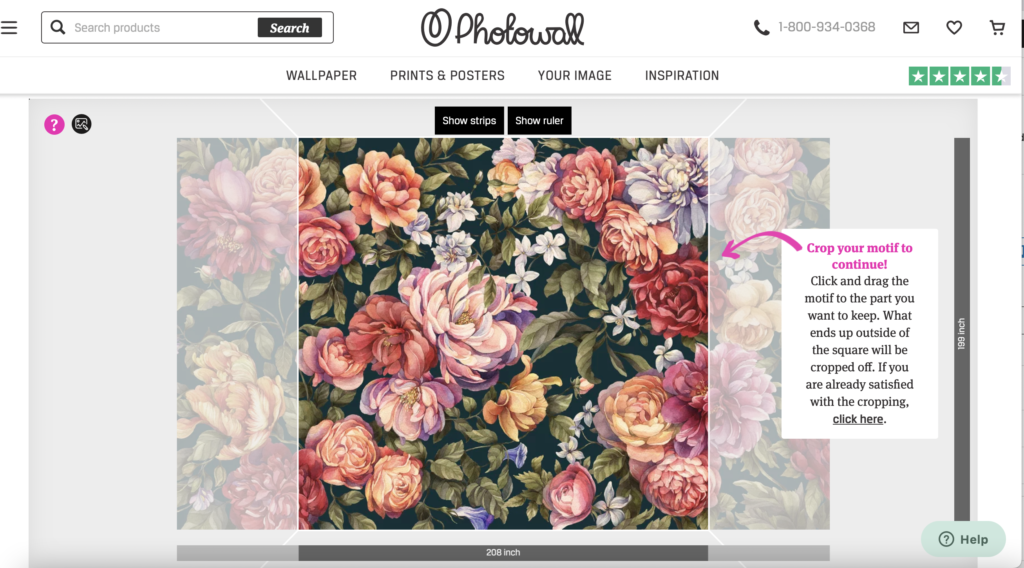
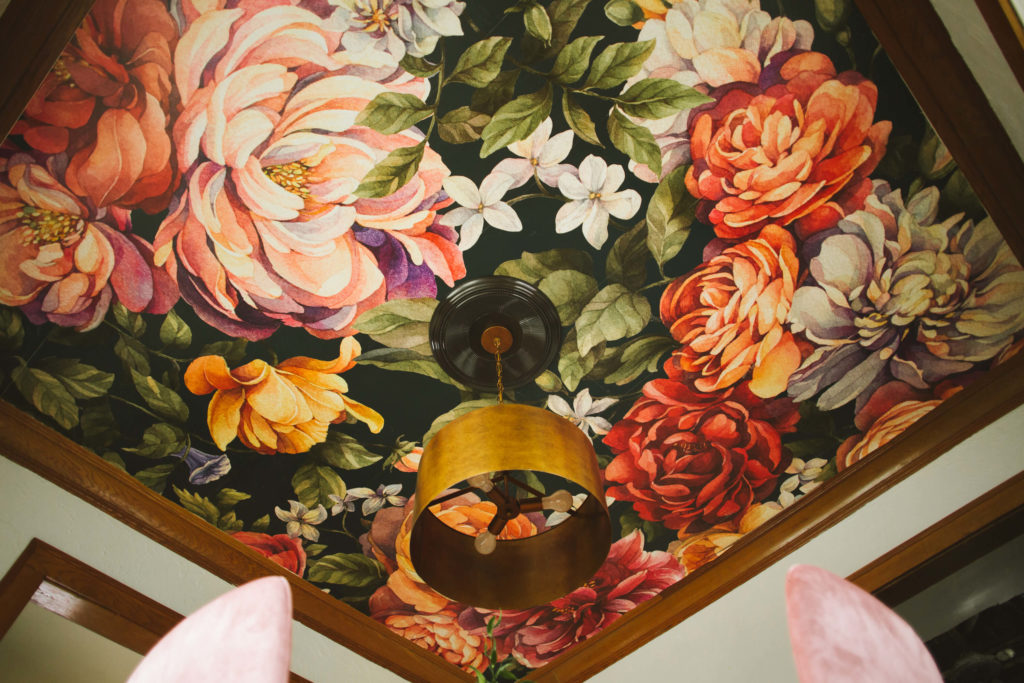
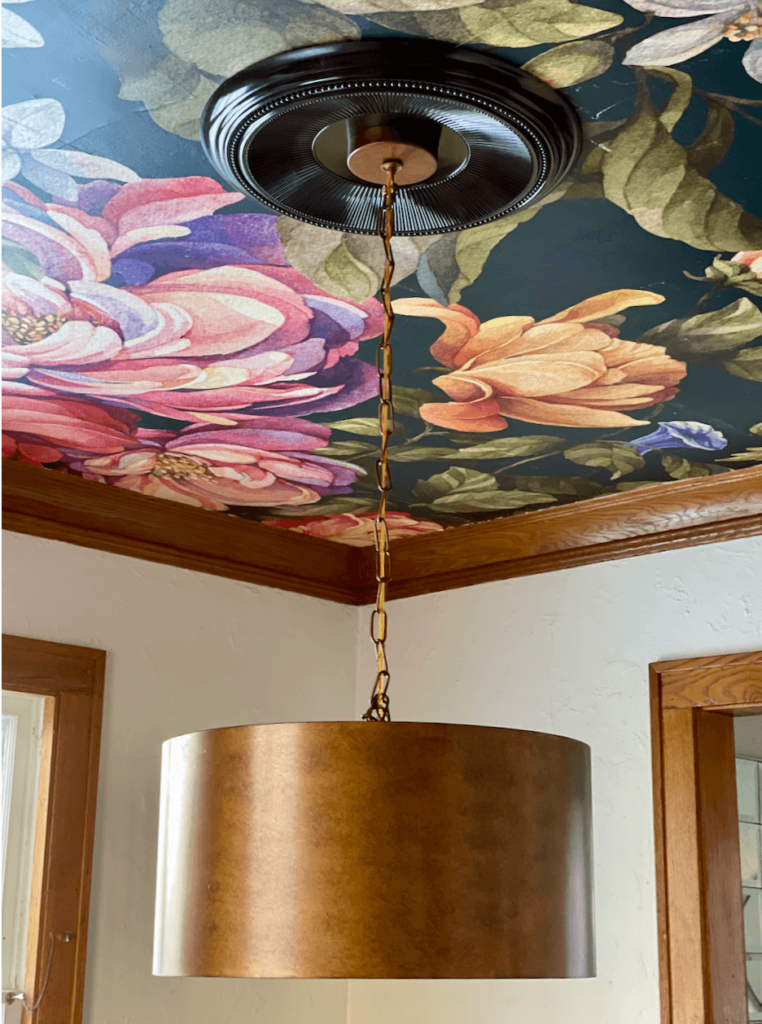
Ordering was easy, and the site walked me through the steps and even allowed me to crop your pattern precisely as I wanted. In my case, it allowed me to keep the biggest flower from being in the center of my room where the light fixture would hang.
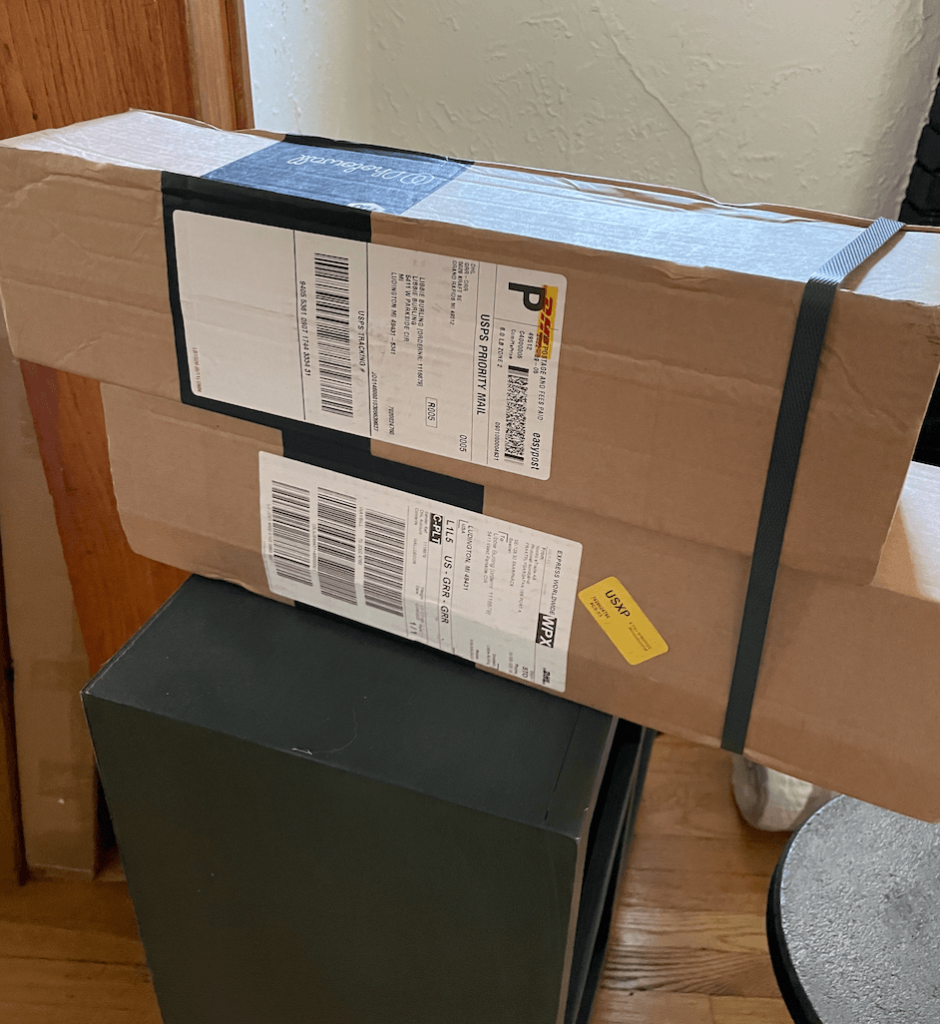
Photowall prints their paper on numbered rolls to make installation easy! It took about five days to arrive and included the paste you will need for installation, and I also added one of their wallpaper installation kits.

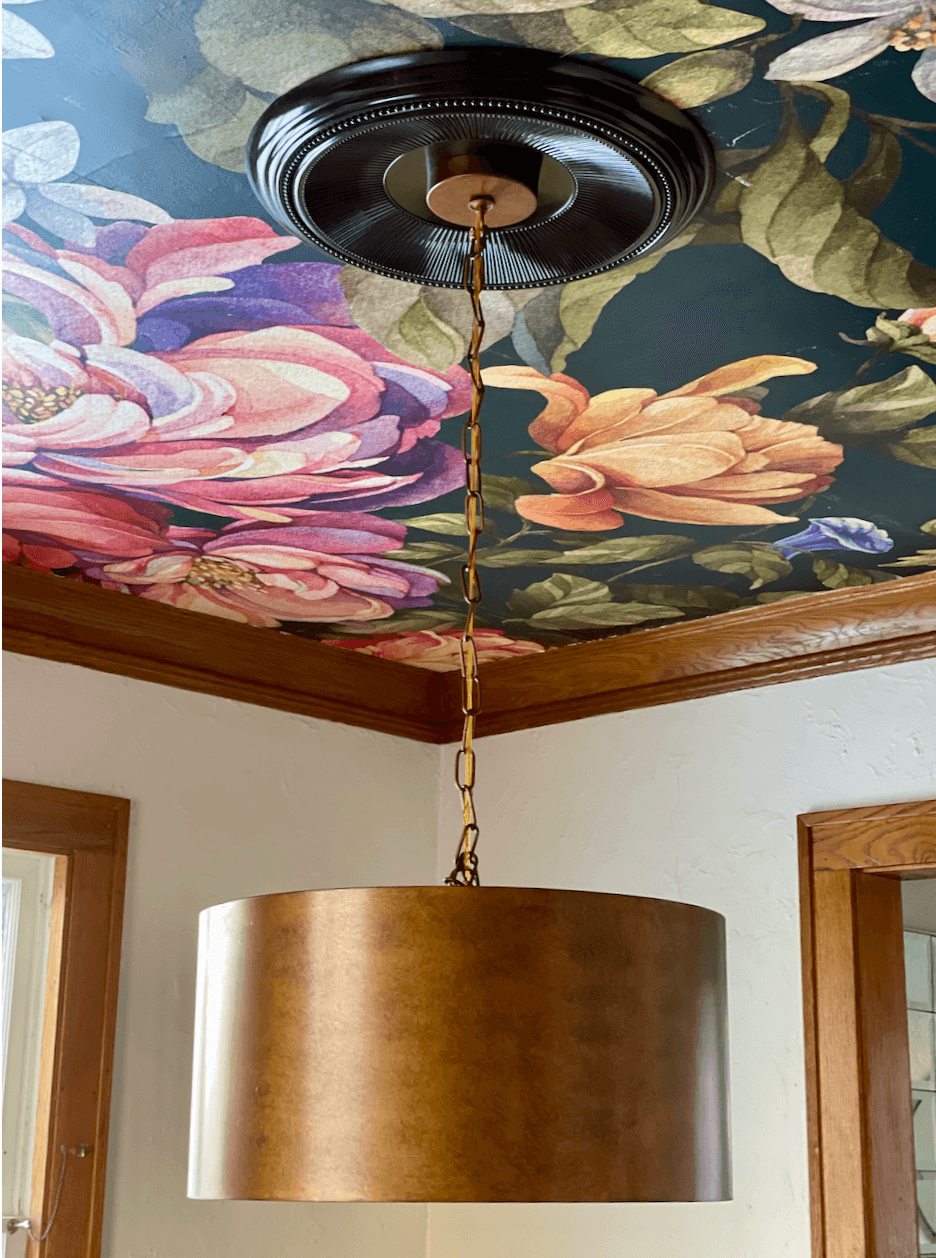
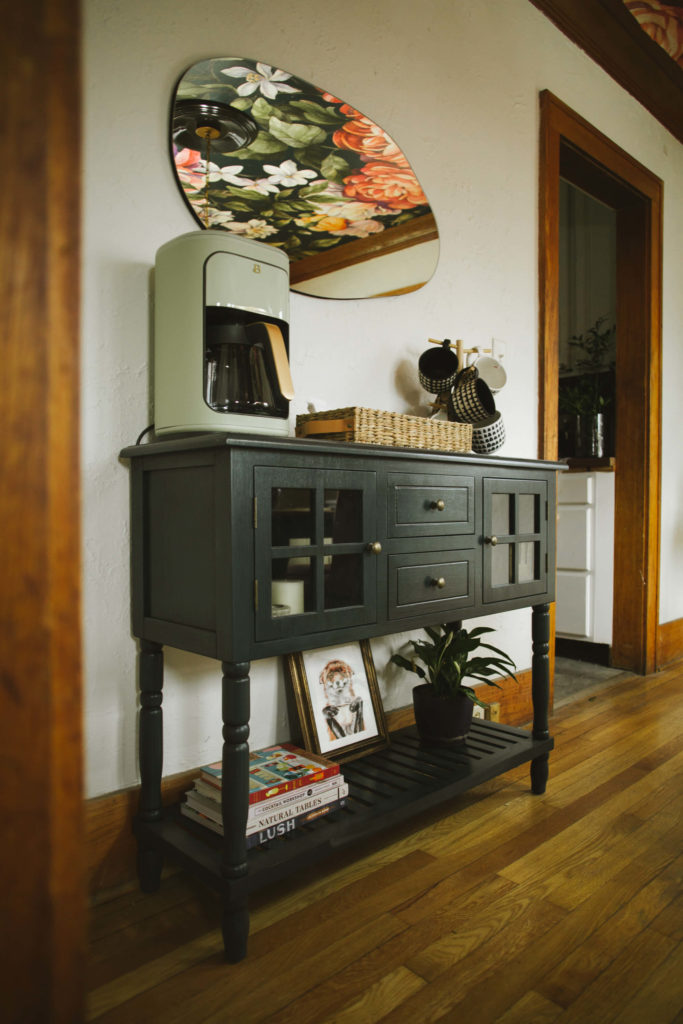
I choose the Floral- Dark Blue for my ceiling.
Prepping the ceiling
This house is a rental that we own, and to say it was dirty when our tenants moved out would be the understatement of the year. We dusted the ceiling thoroughly and even used a degreaser when we found some oily food stains????
Installing the Wallpaper
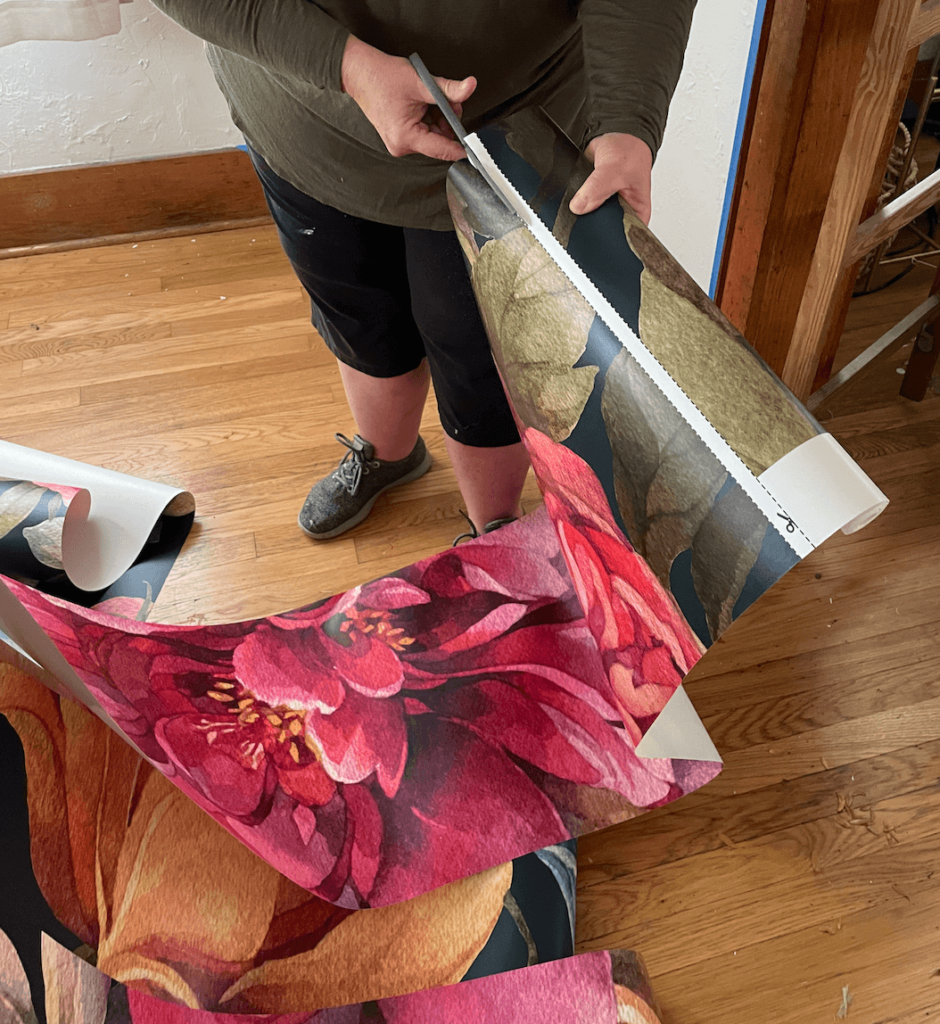
Cut the Wallpaper into numbered strips. I needed eight strips for my ceiling.
I laid out the tools I would be using.
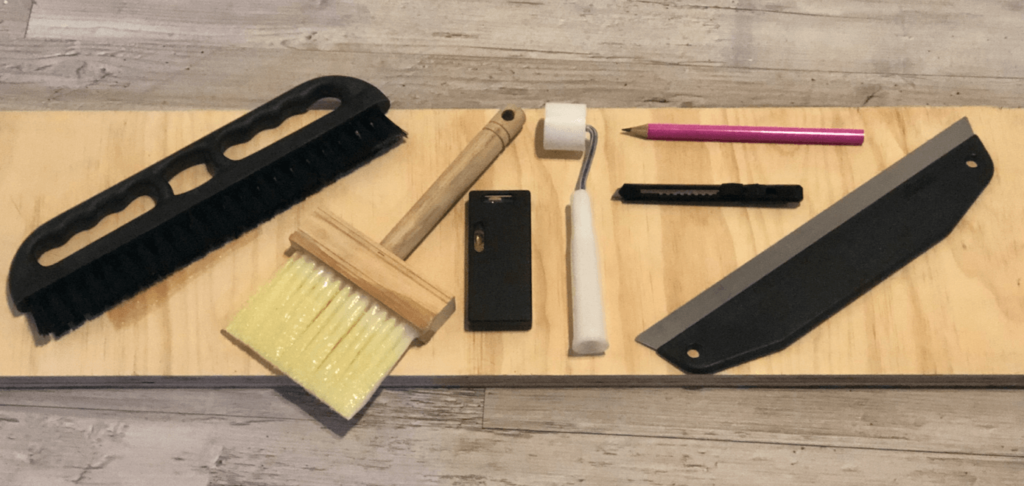
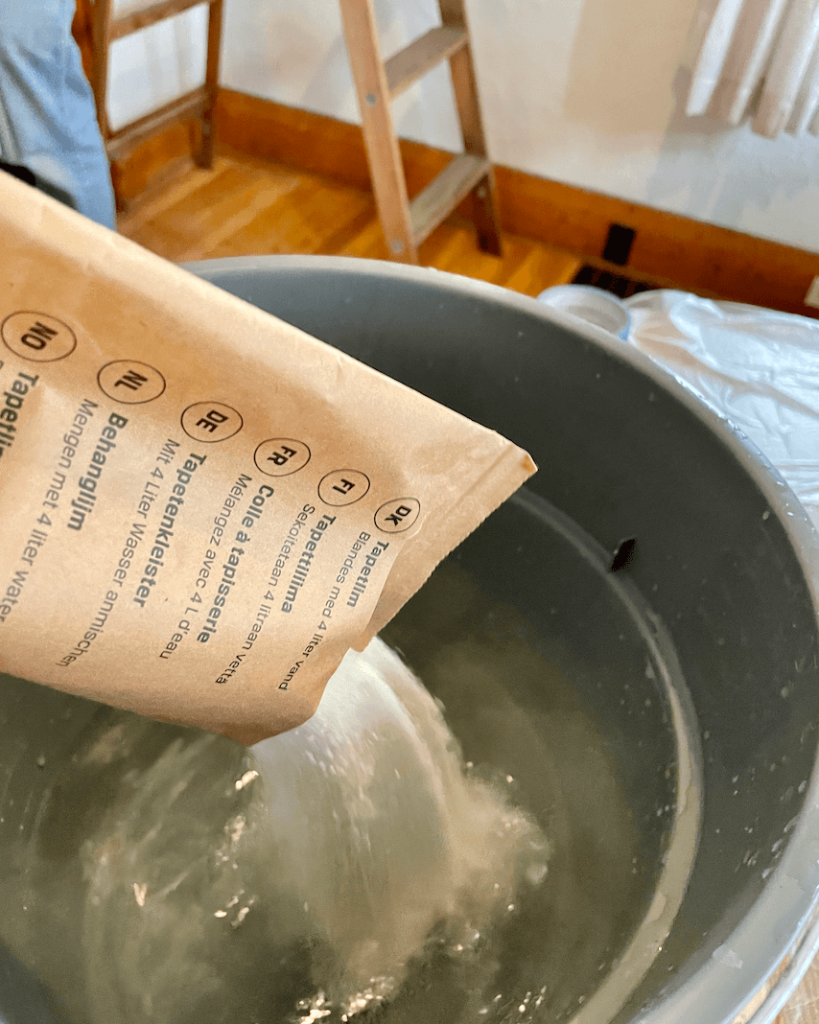
The next step is mixing the wallpaper paste in a bucket.
Now the fun begins. This, for me, was a two-person job. One person to spread the paste onto the ceiling (me) using the wide brush – make sure to cover the length of a strip plus about an inch to ensure the paper adheres to the ceiling. My husband held the length of the paper (also from a ladder) while I applied the paper strip to the ceiling making sure it was straight (which is a fluid term when working with a 100 + year-old house). Hang the paper strips from left to right and edge to edge- don’t overlap the paper.
Use the smoothing brush to eliminate bubbles and wipe off any glue on the paper. Then trim the excess paper, and you are ready to begin the next strip.
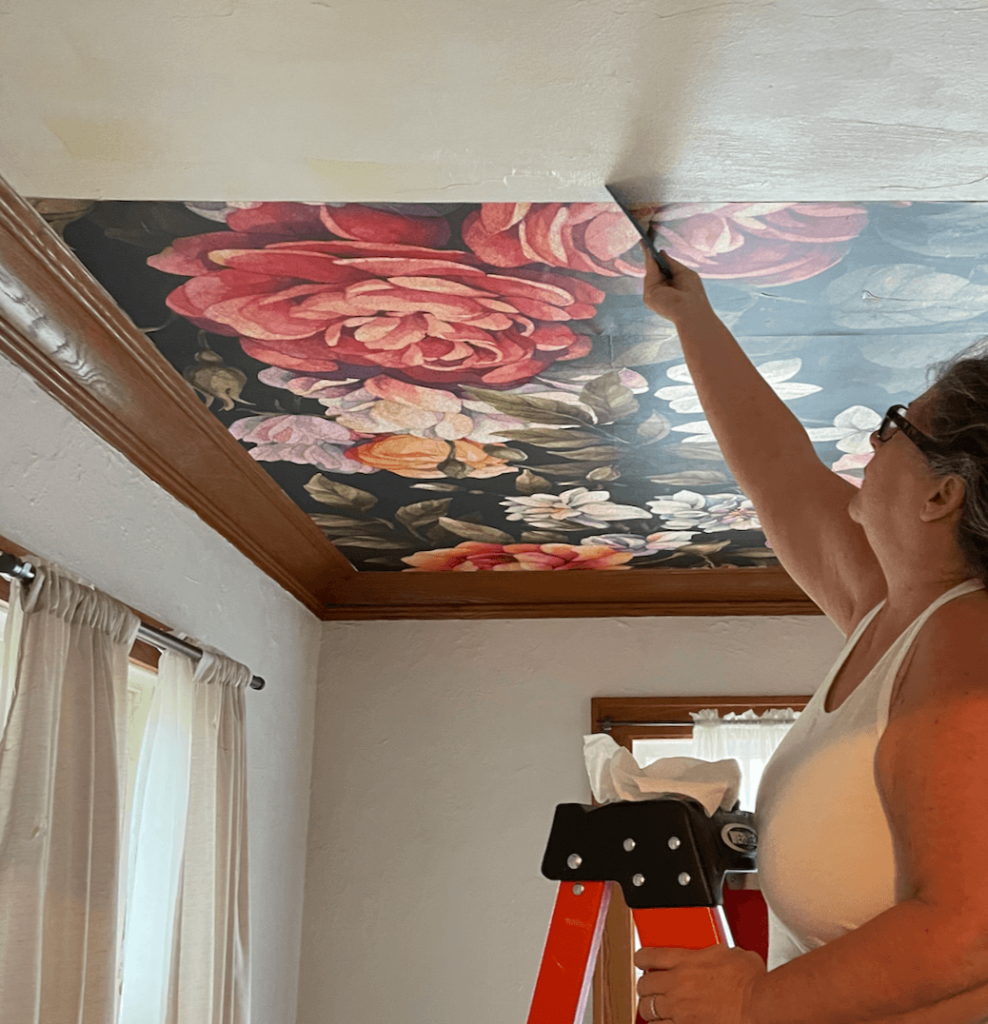
Once we got to the light fixture, we took the old one off and cut around it. I did make the hole waaaay bigger than it needed to be, but I knew the medallion would cover it.
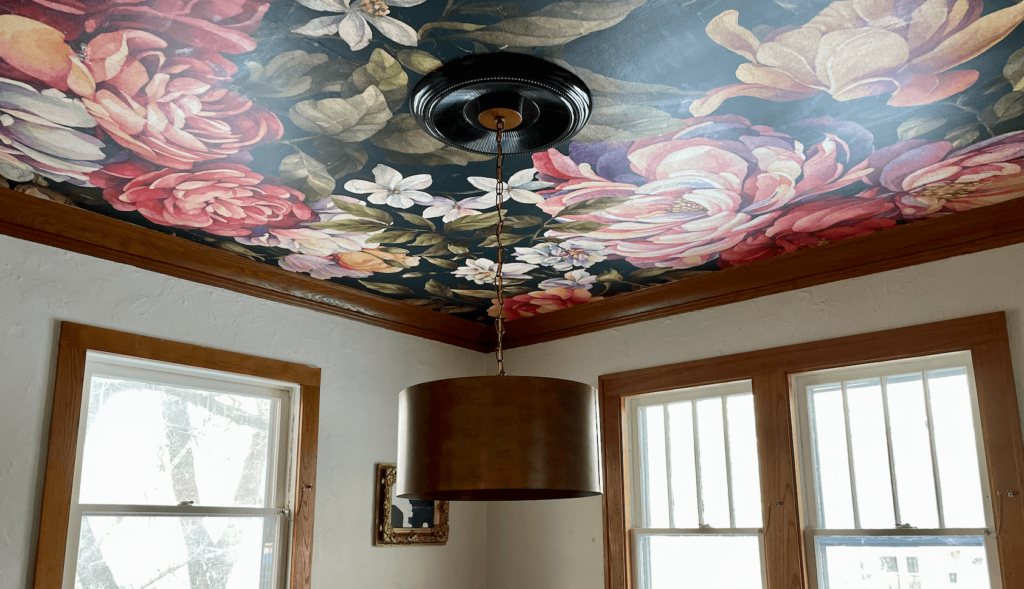
That’s all there was to it. It took a day and a half, and that’s because, as 50+ years old, I took lots of breaks from the ladder climbing. 🙂
We LOVE how it looks!
And how easy wallpapering a ceiling was!
What do you think? Let me know in the comments.
Shop this post:

Until next time,
-Libbie
You may also enjoy the following:
Installing traditional Wallpaper
My Favorite Bold, Colorful Wallpaper and Wall Murals
Hanging a Wall Mural in a bedroom
Ugh, How I Fixed My Wallpaper Mural Hanging Mistake.

Absolutely beautiful !!!!!
Such a beautiful look. Love the florals. It really transformed your room. Thanks for sharing at Love Your Creativity.
Thank you, Linda!
I absolutely love the wallpaper! I’ve always wanted to do this on my ceiling. I’m not sure I would want that in my dining room but I think that would be awesome in a large bathroom. Then again, if it were my forever home, I’d probably go for the dining room! I’m still going to do my living room ceiling but like you, being 60+ the ladder kills me!! Lol
I’m only doing white with a nice texture in the LR anything else would be too overpowering with the rest of my decor.
I love it!!!!!!!
🙂 Thank you!