

How to transform a flat closet door
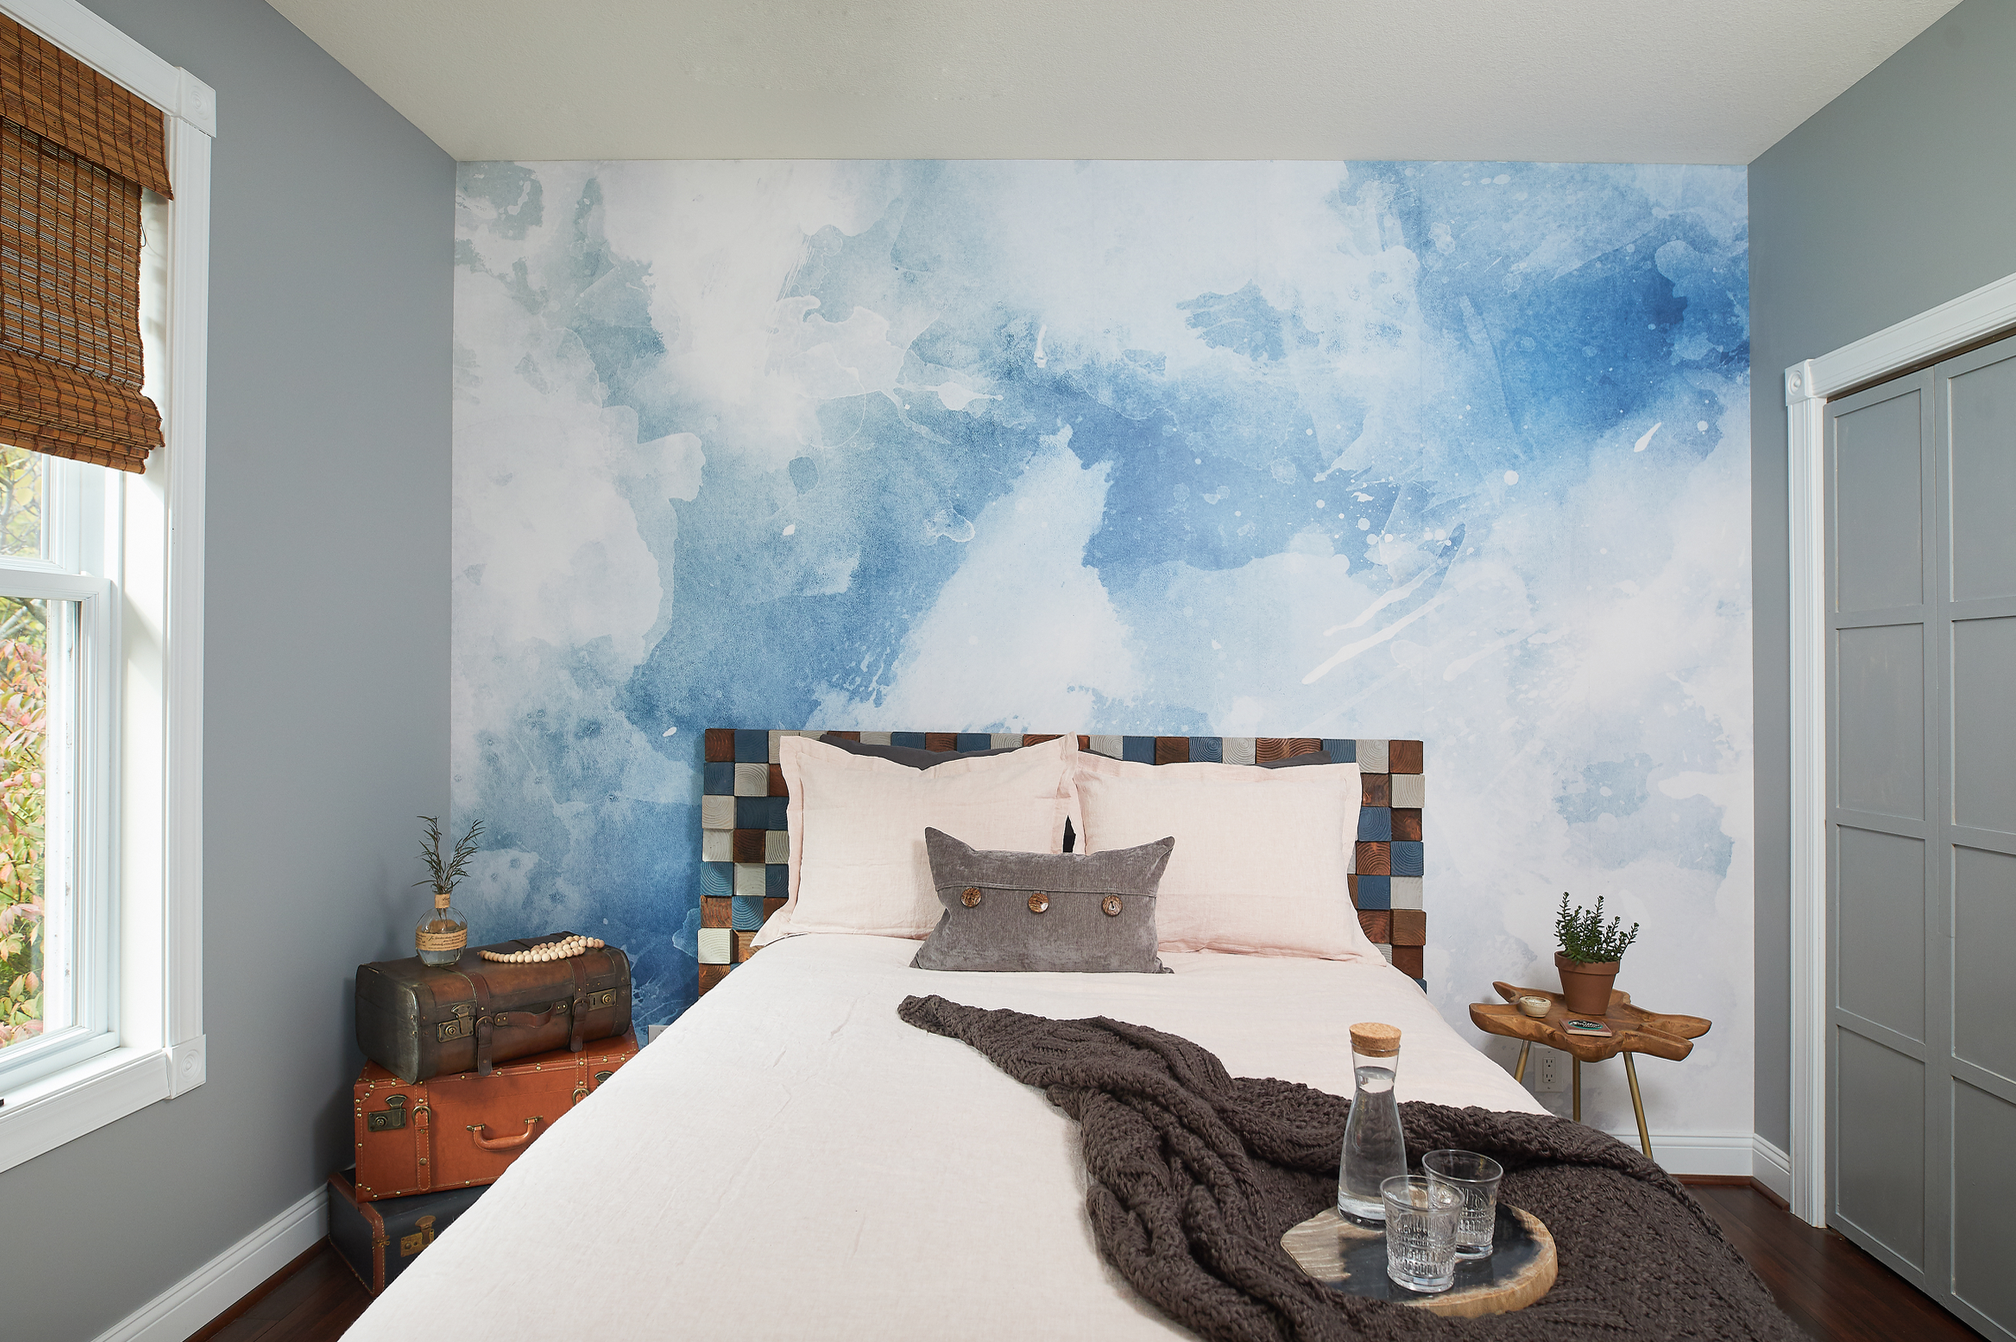
I love a quick DIY update, and these closet doors were the perfect candidate for one. Last Fall, I worked on the guest room update for the One Room Challenge; see it here. Towards the end of the six-week challenge, I was trying to choose between painting the doors blue or grey when I came across an IG image with a headboard trimmed out in molding, which I fell in love with and decided it was perfect for the doors! A little visual interest was exactly what the doors needed.
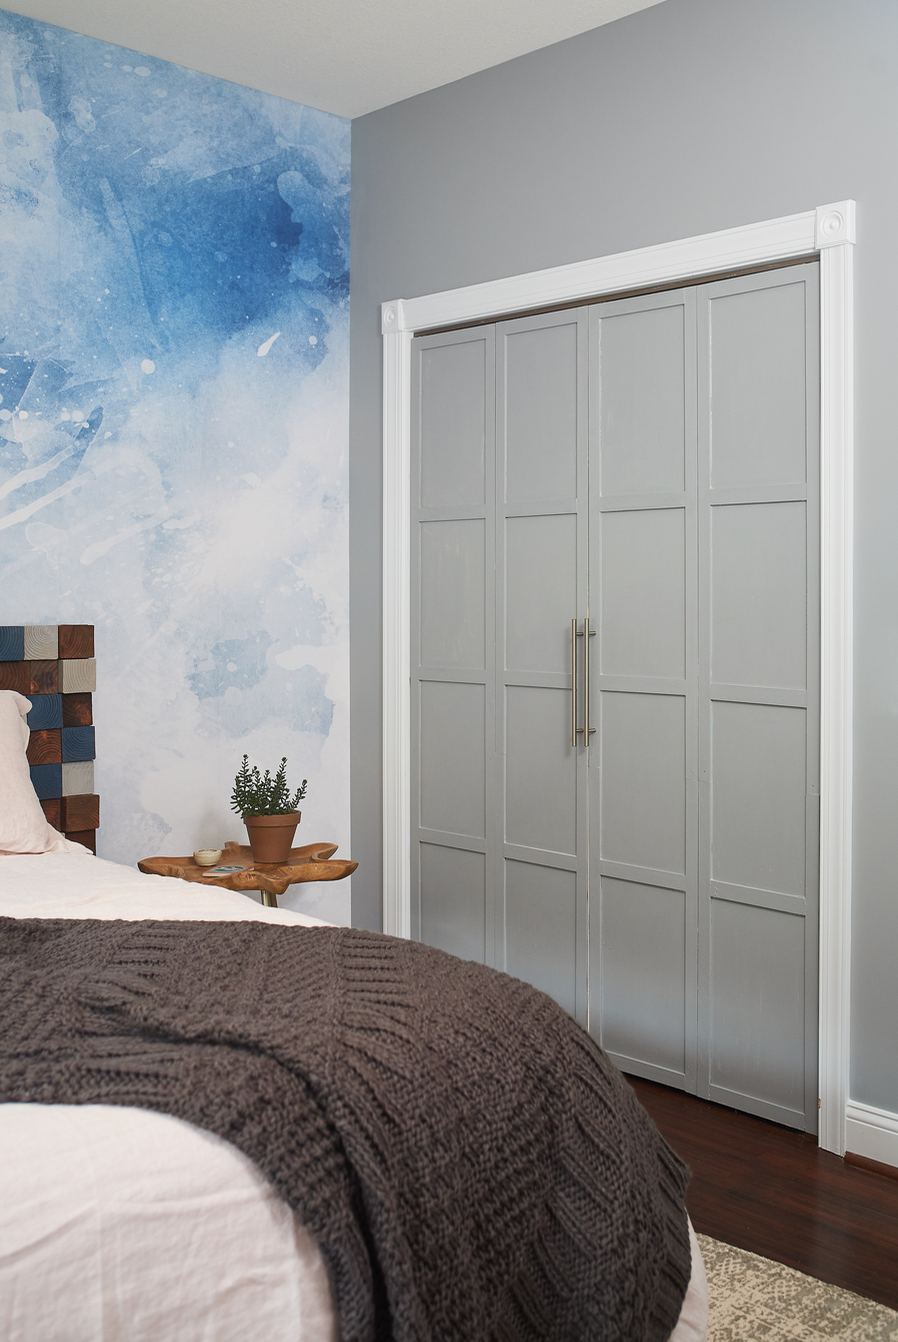
After
The other thing I was looking for was AFFORDABLE as I had budgeted carefully for the space, and the coffers were running low. The doors were in good shape, just a bit meh.
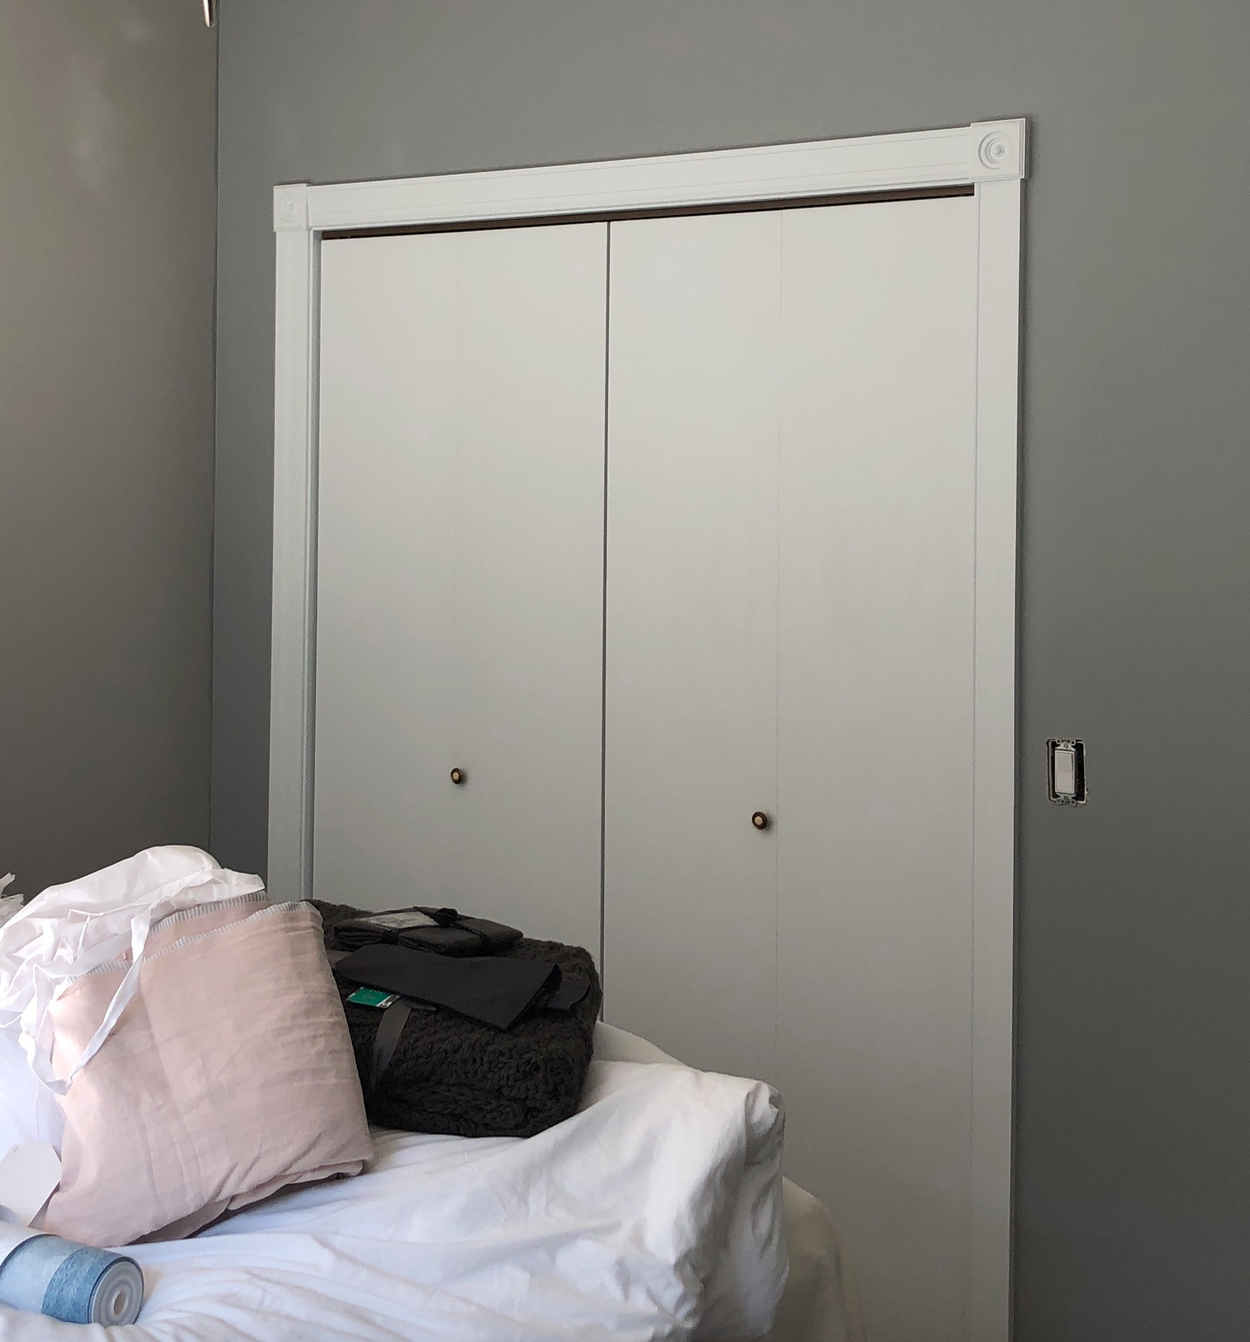
Before
Materials Used:
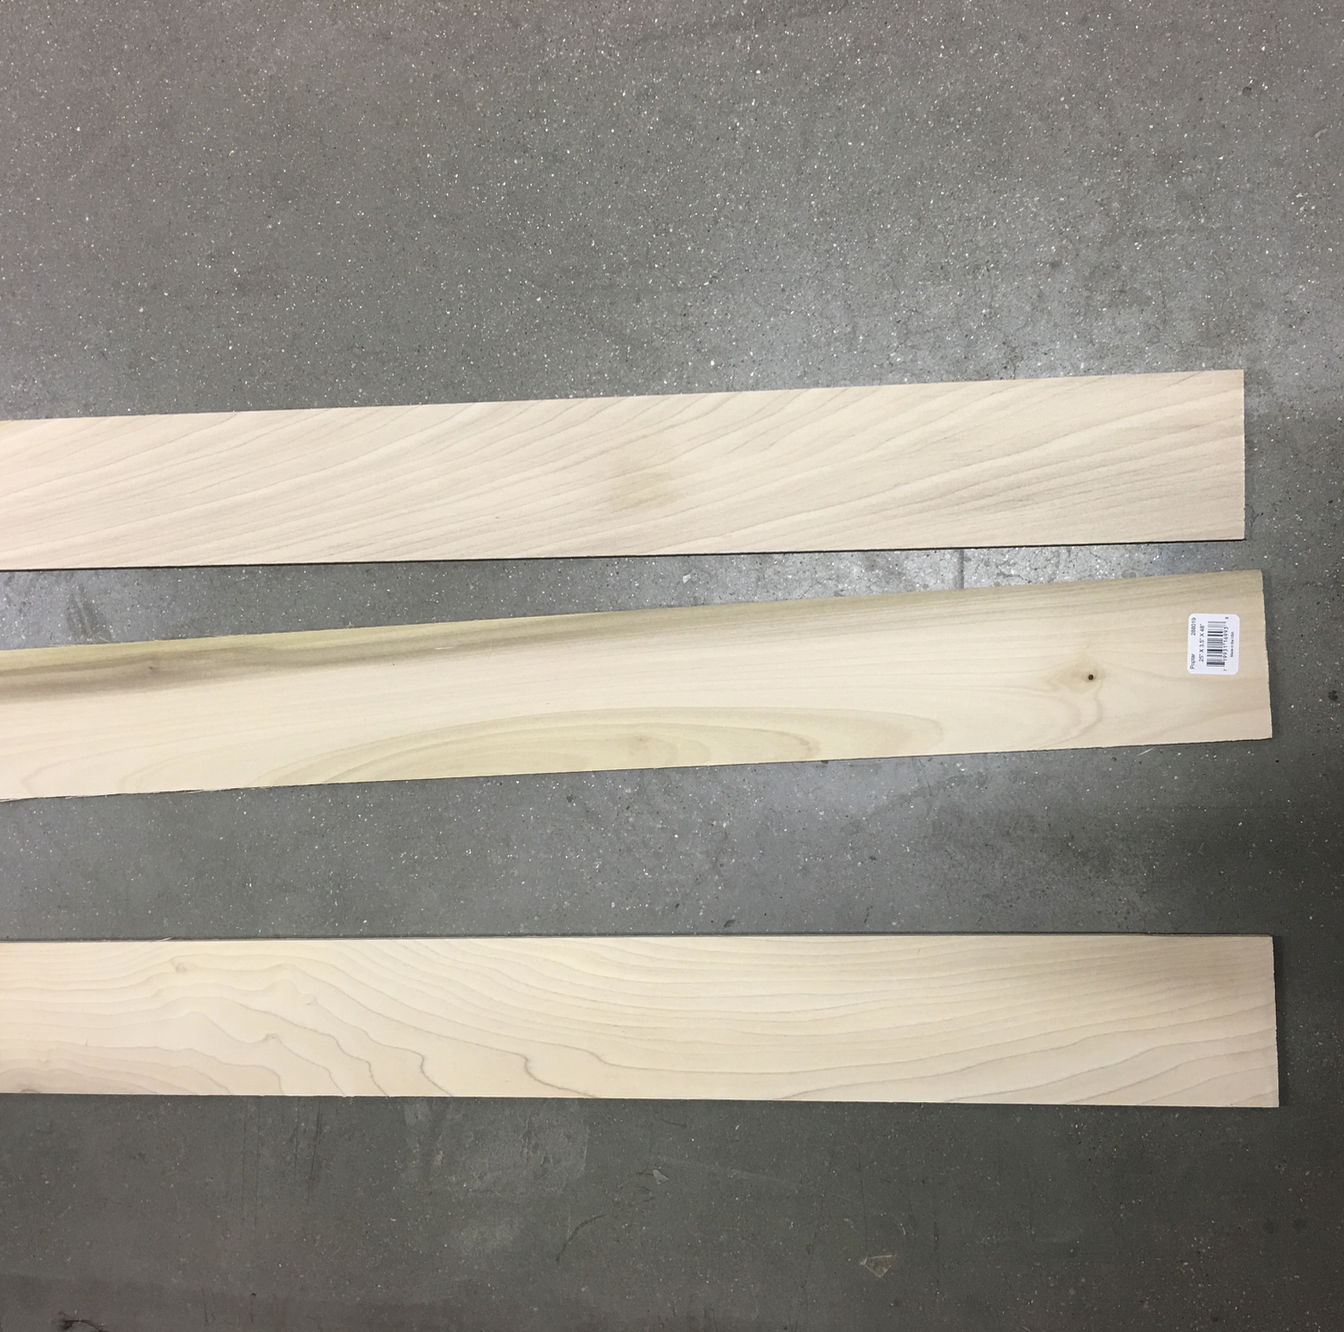
-Wood molding (we used 2-inch strips from Home Depot)
-Miter saw
-Wood glue
-Pneumatic nailer
-Spackle
-Paint
We found these inexpensive wood strips at Home Depot for around 1.00 per foot.
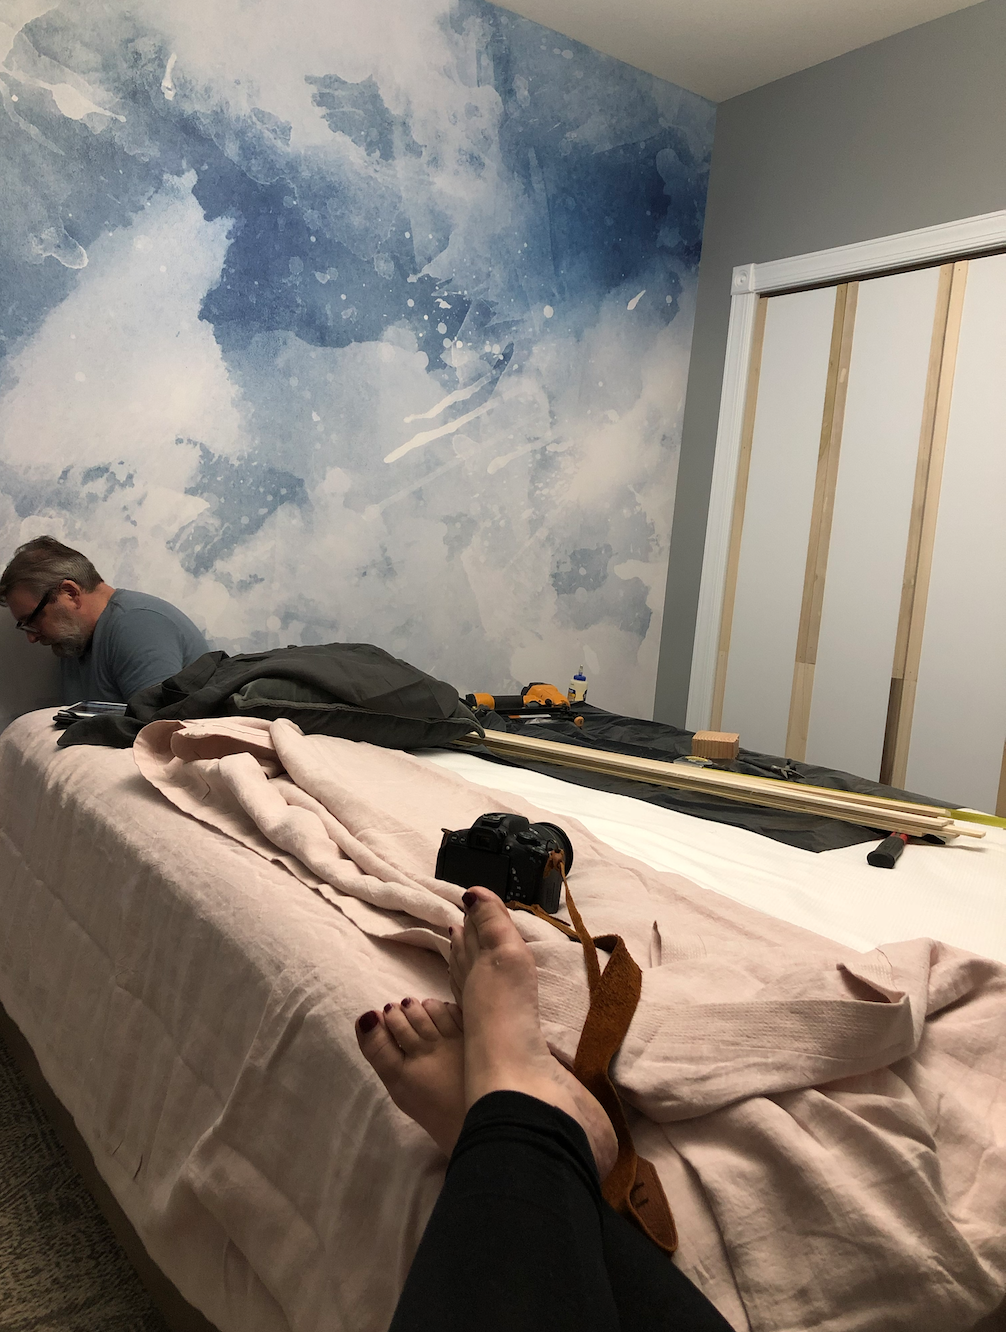
I had grandiose plans to lay out a very intricate design when my husband reminded me of my limited geometry skills. Point taken. Since I was short on both time and math skills, I decided on a simple design.
We started gluing the strips to the doors and added a few pneumatic nails to help hold them in place while the glue dried.

Here I am hard at work supervising.
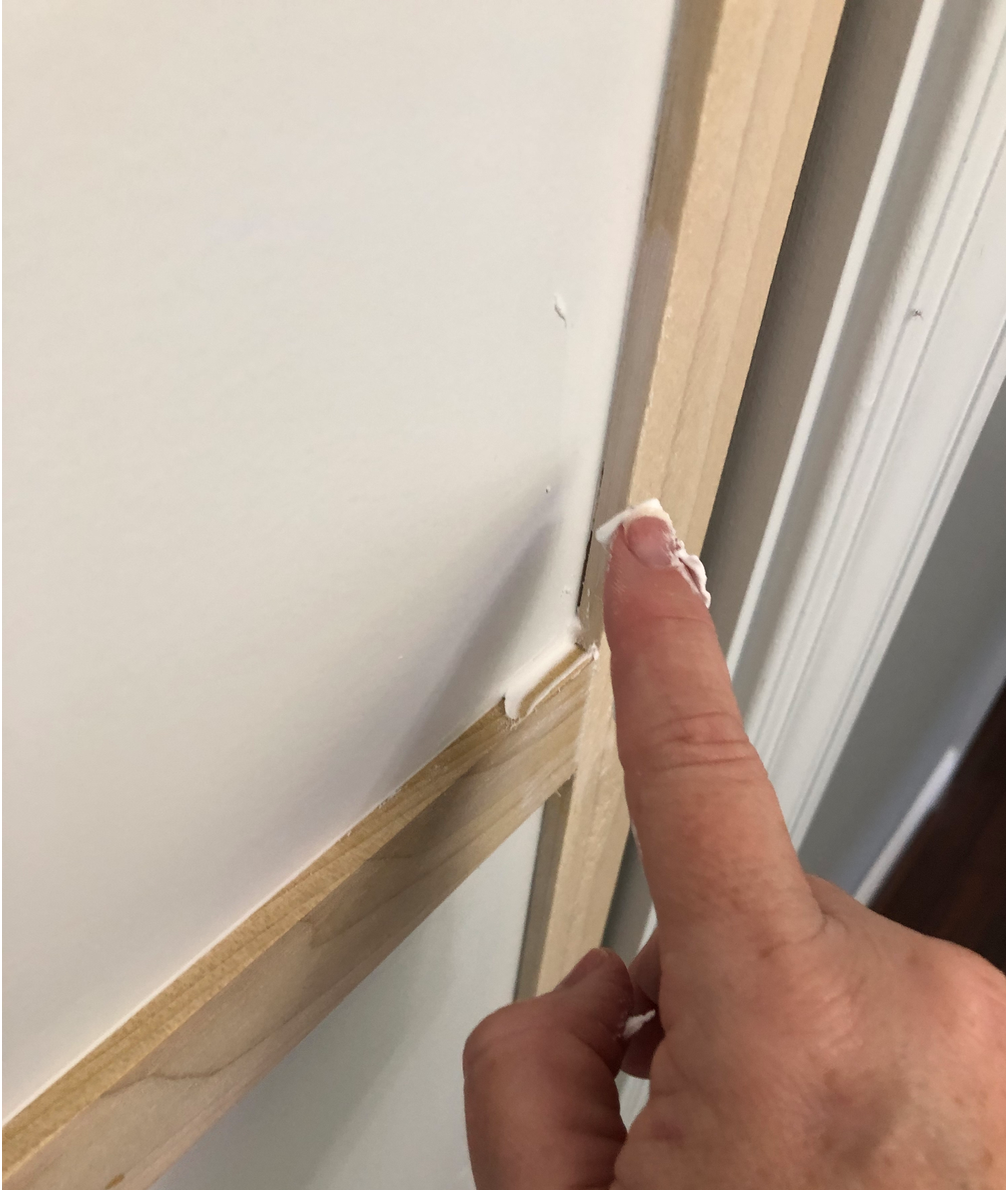
Once the molding was up, I filled in along the edges with a spackle to ensure a clean line when painted. It drives me crazy to see those little lines where the paint separates from the wood piece in molding.
The final step was using a high-quality paint. I am a fan of Sherwin Williams Emerald Interior paint and primer in one. I used Gray Matter SW 7066. 3 coats.

Added some pretty new Brass hardware.

I mentioned this was a quick and easy way to update closet doors! Don’t you agree?!?! The paint was leftover from another project, but even if I had included a quart of paint total cost would have been less than $50.00 and took a weekend. The details make all the difference!
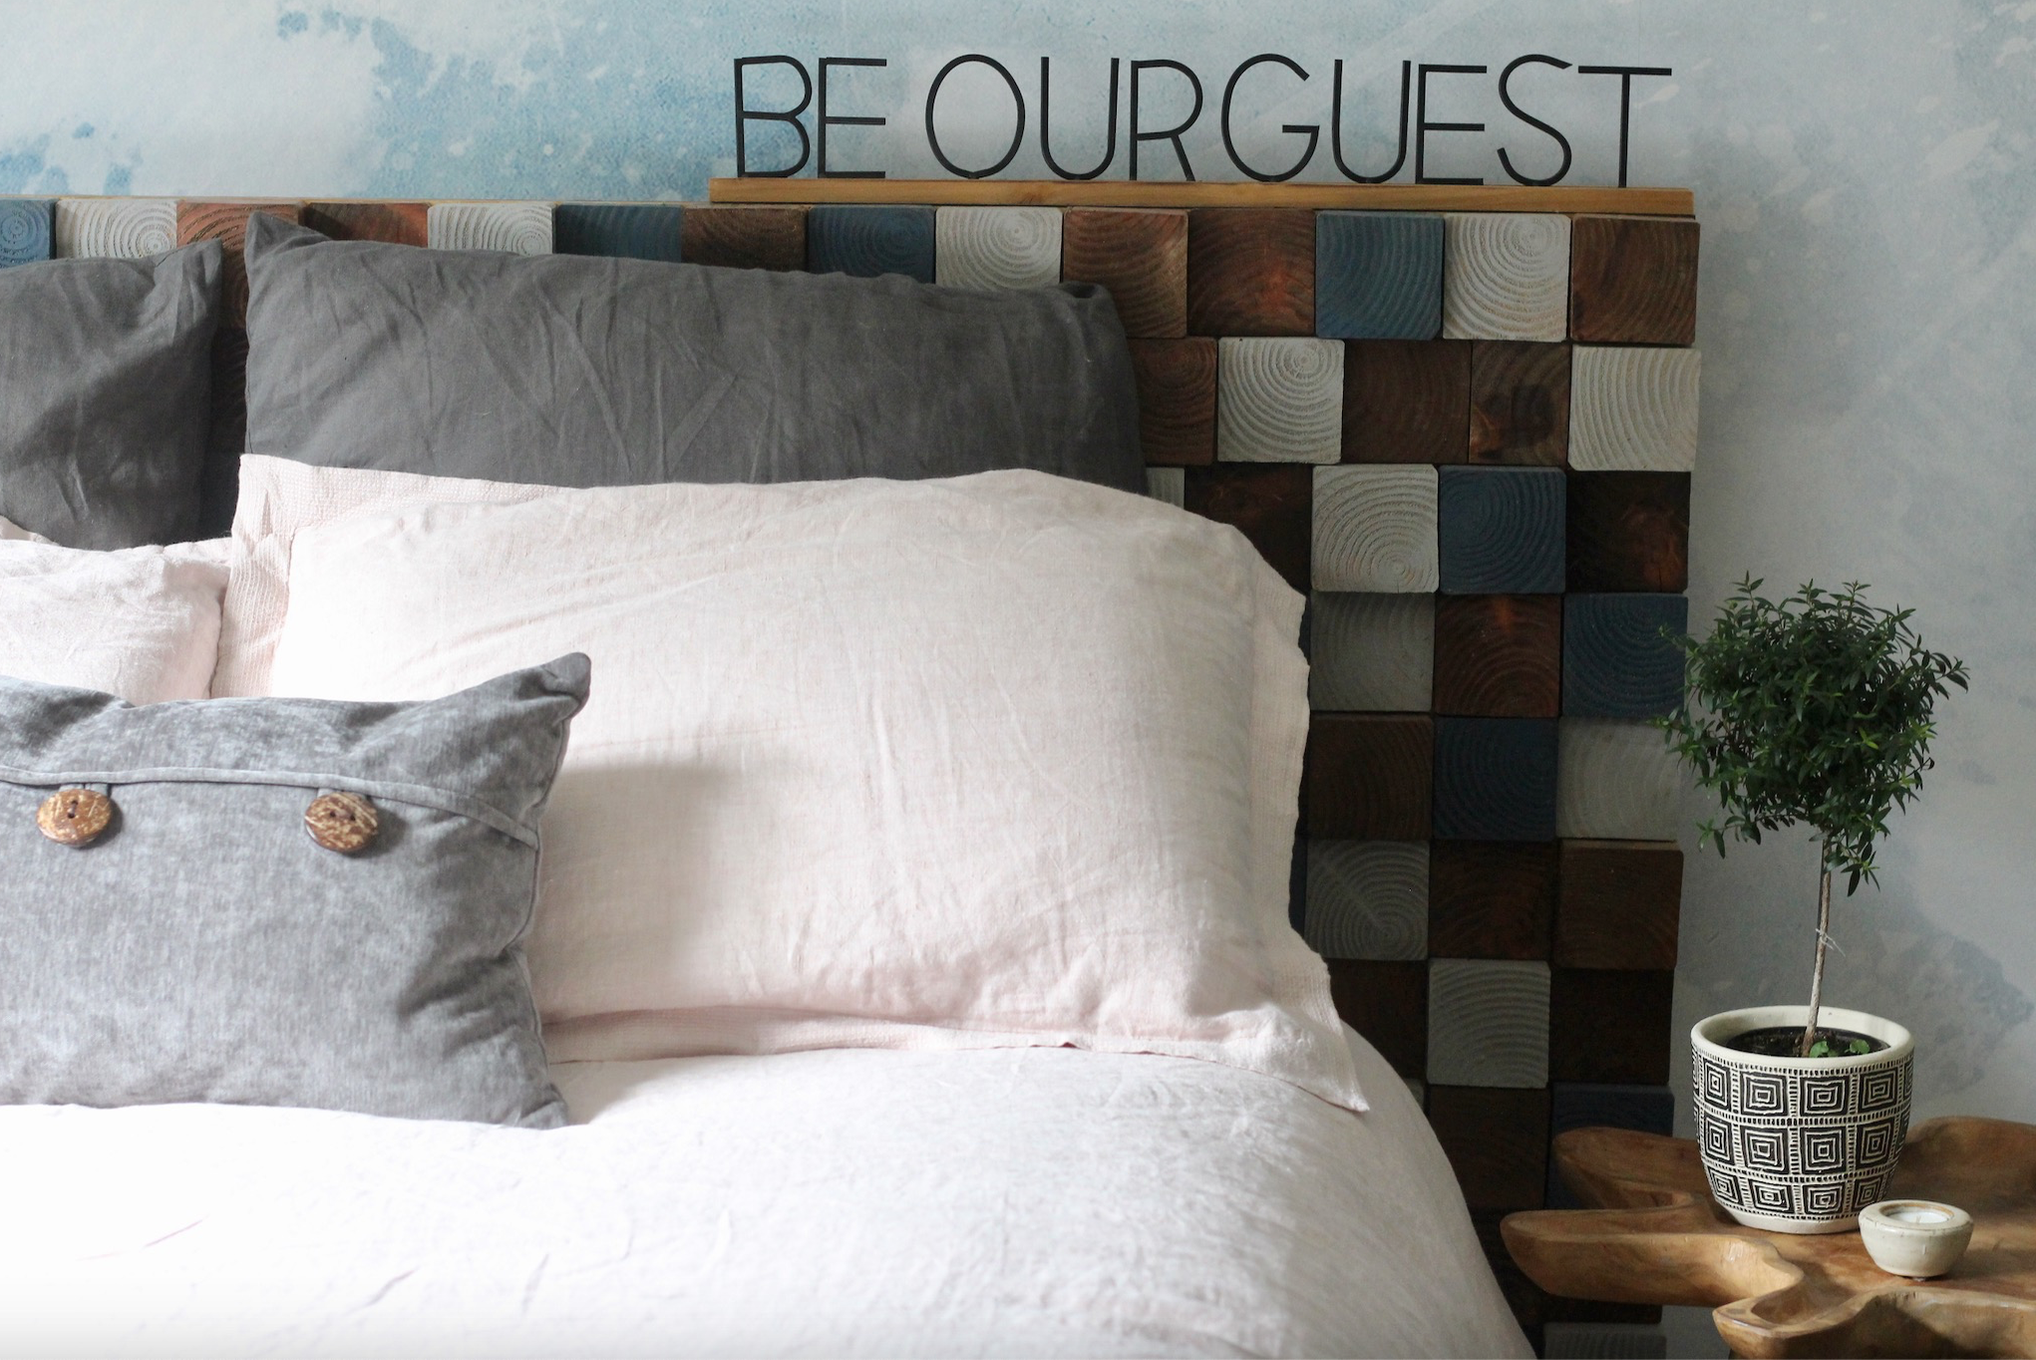
Be Our Guest Sign
Pin it for later!
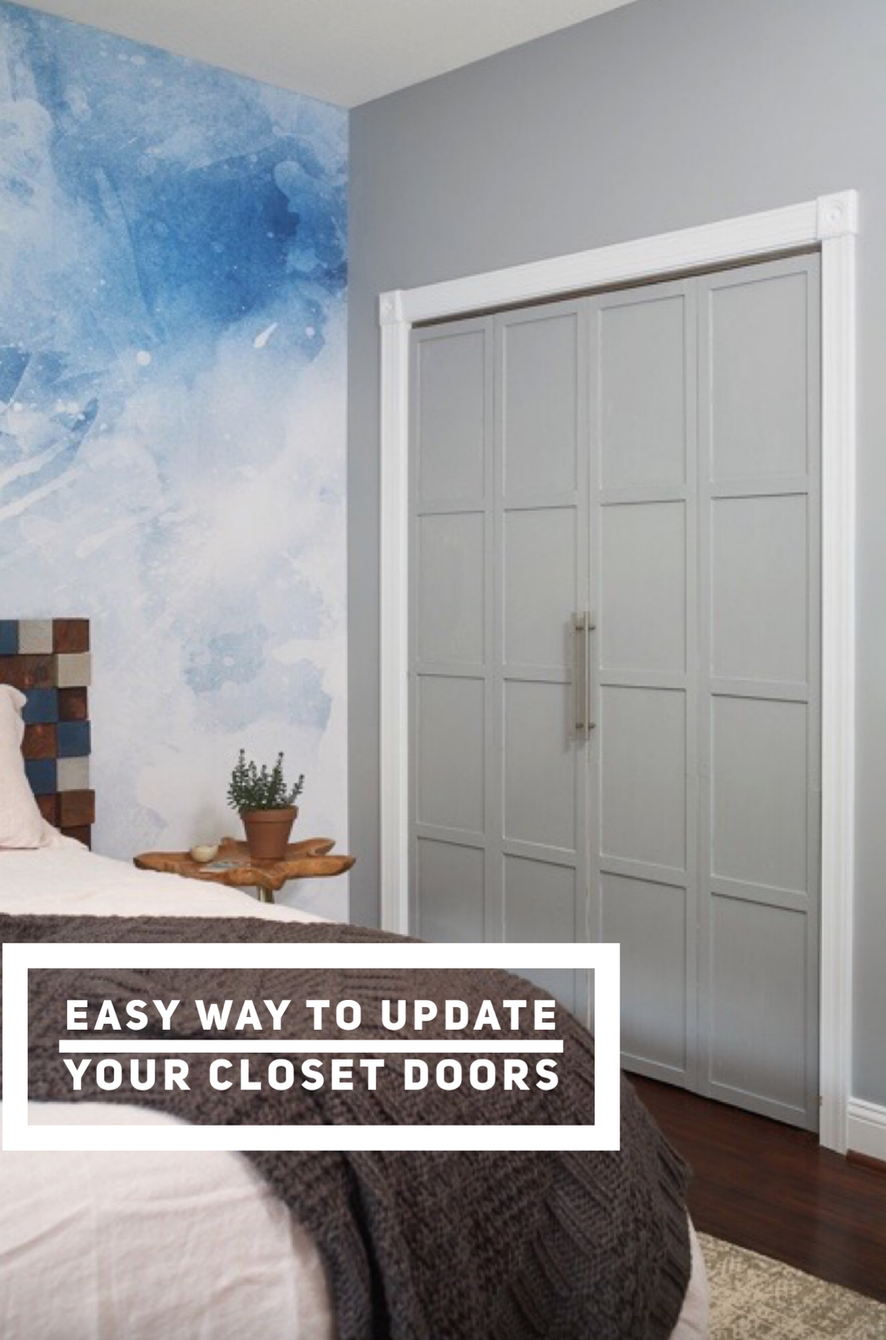

Closet Door Update Before and After
As always, I appreciate your taking the time to stop by!
Until next time,
-Libbie
You may also enjoy:

Wow! What a difference it makes! I’m going to find a closet door to transform!
I’m still searching for another! Next time I’m going for a slightly more complicated pattern. If you find one to transform make sure to come back and show it off!
I absolutely LOVE the closet doors! It’s such a huge transformation and they look custom. Fantastic job!
Thank you sweet friend! I still like to sit in the room and stare at them. 🙂
That is an amazing transformation. And really finishes that beautiful room. I also love the headboard. Have you a post on that?
Thank you, Hilda! I did make a post on the headboard. It was also pretty easy. Search for the Woodblock Headboard under DIY. 🙂
The doors look amazing! You never know where a little inspiration can lead.
Isn’t that the truth?! Love all the inspiration out there. Thank you for stopping by.
oh wow! Those closet doors look amazing! It adds such a crisp, modern, structured look to the room! I love it!
Thank you, Amy. I love that they somehow elevated the doors to balance that wallpaper. 🙂
Love the closets! I just added the same trim to my wall in my living area. 😉 However, though I wanted to caulk the trim, I didn’t because my home is a rental. Easier to take down when/if I need to. 😉 Pinned!
Julie,
I stopped over to see your wall and LOVED it! It’s a great way to update that doesn’t have to be permanent. Kudo’s.
Oh, and Libbie… Would love for you to share this on Homestyle Gathering tomorrow at My Wee Abode! 🙂 Feel free to share away!
Thanks for the invite Julie!
What a difference! I love the handles that your chose and the added trim looks so much nicer. I have some plain closet doors I really want to do this on them. Thanks,
Thanks for stopping by Cindy! Those handles were a bargain on Amazon.com 😉
Libbie what a difference the addition of the trim makes. It looks so much more modern and sleek now. And I cannot say enough about that wall!!!
Thank you for stopping by, Mary!
Wow! Amazing makeover, I’ll be sharing this one!!
Thank you, Roxanne! I love how it’s the little upgrades that can make such a difference.
Thanks for linking-up at Homestyle Gathering, Libbie! Be sure to come by tomorrow! 😉
Wow! What a great idea! I will start a remodel of my family home in NC soon. The original louvered doors are still in place in all the bedrooms. I will be updating or replacing using your idea. Thank you for sharing!
Thanks for stopping by Catherine! When you start updating come back and share your photos. I love to see everyone’s updates!
Such a huge difference made with a few items. I love how they turned out!
Love the look of the doors!! Really upclassed? them. Thank You. 💕💕
Thank you for the love! You made my day! 🙂
So nice!!! Also admiring your beautiful wall !!!
Thank you, Andrea!
I still walk in this room to star at the wall paper!
🙂
The whole room is beautiful and the closest doors are awesome! Thanks for the idea💜
Thank you, Anne.
I have updated 4 sets of closet doors since this one! (Might be a little out of control) 😉
Thank you for stopping by.
-Libbie
Love this project, now I really want to know how you created the accent wall. Please share.
I love your idea and it looks doable for me. Thank you very much for sharing.
Very cool idea & looks great ‼️ I LOVE your job “supervisor” 😂. Came out really nice
Thank you, Mary! I am very good at my job!!! LOL!
Hi there,
Is it possible to provide a link for the beautiful hardware on the closet door?
Hello Maureen,
Here is the link: https://urlgeni.us/amzn/rHe8
They have gone up in price since I bought them but still seem like a decent price for handles this size. 🙂